Panasonic KXFPG381 KXFPG381 User Guide - Page 77
Setting the flash time, Setting line mode, Changing the ring setting in TAM/FAX
 |
View all Panasonic KXFPG381 manuals
Add to My Manuals
Save this manual to your list of manuals |
Page 77 highlights
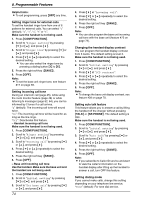
"Pulse": For rotary pulse dial service. Make sure the base unit and the handset are not being used. 1. Press {CONF/FUNCTION}. 2. Scroll to "Initial setting" by pressing {v} or {e}, and press {>}. 3. Scroll to "Set tel line" by pressing {v} or {e}, and press {>}. 4. Press {>} at "Set dial mode". 5. Press {v} or {e} repeatedly to select the desired setting. 6. Press the right soft key ({SAVE}). 7. Press {OFF}. Note: L You can also program this feature with the base unit (feature #13 on page 69). Setting the flash time The flash time depends on your telephone exchange or host PBX. You can select: "90ms" (milliseconds), "100ms", "110ms", "250ms", "300ms", "400ms", "600ms" or "700ms" (default). Make sure the base unit and the handset are not being used. 1. Press {CONF/FUNCTION}. 2. Scroll to "Initial setting" by pressing {v} or {e}, and press {>}. 3. Scroll to "Set tel line" by pressing {v} or {e}, and press {>}. 4. Scroll to "Set flash time" by pressing {v} or {e}, and press {>}. 5. Press {v} or {e} repeatedly to select the desired setting. 6. Press the right soft key ({SAVE}). 7. Press {OFF}. Note: L If the unit is connected via a PBX, PBX functions (transferring a call etc.) might not work correctly. Consult your PBX supplier for the correct setting. L You can also program this feature with the base unit (feature #72 on page 72). Setting line mode The default setting of the line mode is "B". Generally leave this setting to "B". If a change of the line mode setting is required by our customer call center or service personnel, change the line mode to "A". Make sure the base unit and the handset are not being used. 8. Programmable Features 1. Press {CONF/FUNCTION}. 2. Scroll to "Initial setting" by pressing {v} or {e}, and press {>}. 3. Scroll to "Set tel line" by pressing {v} or {e}, and press {>}. 4. Scroll to "Set line mode" by pressing {v} or {e}, and press {>}. 5. Press {v} or {e} repeatedly to select the desired setting. 6. Press the right soft key ({SAVE}). 7. Press {OFF}. Note: L You can also program this feature with the base unit (feature #62 on page 72). Changing the ring setting in TAM/FAX mode To change the number of rings before the unit answers a call in TAM/FAX mode. You can select "2" (default), "3", "4", "5", "6", "7" or "Toll saver". See page 55 for details. Make sure the base unit and the handset are not being used. 1. Press {CONF/FUNCTION}. 2. Scroll to "Initial setting" by pressing {v} or {e}, and press {>}. 3. Scroll to "Set answering" by pressing {v} or {e}, and press {>}. 4. Press {>} at "Number of rings". 5. Press {v} or {e} repeatedly to select the desired setting. L You can also select the number of rings by pressing a dialing button {0} ("Toll saver"), or {2} to {7}. 6. Press the right soft key ({SAVE}). 7. Press {OFF}. Note: L You can also program this feature with the base unit (feature #06 on page 69). Changing the maximum recording time for each incoming message "1min", "2min" or "3min" (default): 1 minute to 3 minutes. "Greeting only": Only plays your greeting message. Make sure the base unit and the handset are not being used. 1. Press {CONF/FUNCTION}. 2. Scroll to "Initial setting" by pressing {v} or {e}, and press {>}. 75
-
 1
1 -
2
-
3
-
4
-
5
-
6
-
7
-
8
-
9
-
10
-
11
-
12
-
13
-
14
-
15
-
16
-
17
-
18
-
19
-
20
-
21
-
22
-
23
-
24
-
25
-
26
-
27
-
28
-
29
-
30
-
31
-
32
-
33
-
34
-
35
-
36
-
37
-
38
-
39
-
40
-
41
-
42
-
43
-
44
-
45
-
46
-
47
-
48
-
49
-
50
-
51
-
52
-
53
-
54
-
55
-
56
-
57
-
58
-
59
-
60
-
61
-
62
-
63
-
64
-
65
-
66
-
67
-
68
-
69
-
70
-
71
-
 72
72 -
 73
73 -
 74
74 -
 75
75 -
 76
76 -
 77
77 -
 78
78 -
 79
79 -
 80
80 -
 81
81 -
 82
82 -
83
-
84
-
85
-
86
-
87
-
88
-
89
-
90
-
91
-
92
-
93
-
94
-
95
-
96
-
97
-
98
-
99
-
100
-
101
-
102
-
103
-
104
-
105
-
106
 |
 |
