Panasonic KXFPG381 KXFPG381 User Guide - Page 78
Setting remote operation code, Setting the mailbox 2 or 3 password, Setting the room monitor feature
 |
View all Panasonic KXFPG381 manuals
Add to My Manuals
Save this manual to your list of manuals |
Page 78 highlights
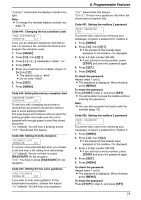
8. Programmable Features 3. Scroll to "Set answering" by pressing {v} or {e}, and press {>}. 4. Scroll to "Recording time" by pressing {v} or {e}, and press {>}. 5. Press {v} or {e} repeatedly to select the desired setting. L You can also select the recording time by pressing a dialing button {1} (1 minute), {2} (2 minutes), {3} (3 minutes) or {0} ("Greeting only"). 6. Press the right soft key ({SAVE}). 7. Press {OFF}. Note: L If you select "Greeting only", the unit will answer a call with the greeting message, and then hang up. The unit will not record any incoming messages. L You can also program this feature with the base unit (feature #10 on page 69). Setting remote operation code Make sure the base unit and the handset are not being used. 1. Press {CONF/FUNCTION}. 2. Scroll to "Initial setting" by pressing {v} or {e}, and press {>}. 3. Scroll to "Set answering" by pressing {v} or {e}, and press {>}. 4. Scroll to "Remote code" by pressing {v} or {e}, and press {>}. 5. Enter a remote code using a 2-digit number (00-99). L The default setting is "11". 6. Press the right soft key ({SAVE}). 7. Press {OFF}. Note: L You can also program this feature with the base unit (feature #11 on page 69). Setting the mailbox 2 or 3 password To prevent other users from retrieving your messages, program a password for mailbox 2 or 3. Make sure the base unit and the handset are not being used. 1. Press {CONF/FUNCTION}. 2. Scroll to "Initial setting" by pressing {v} or {e}, and press {>}. 3. Scroll to "Set answering" by pressing {v} or {e}, and press {>}. 4. Scroll to "Set mailbox2&3" by pressing {v} or {e}, and press {>}. 76 5. Select the mailbox by pressing {e} ("Mailbox2") or {v} ("Mailbox3"). L If the password has previously been assigned to the mailbox, it is displayed. 6. Enter a 2-digit number (00-99). L If you entered a wrong number, press {HOLD/CLEAR} and enter the password again. 7. Press the right soft key ({SAVE}). 8. Press {OFF}. To check the password Repeat steps 1 to 5. L The password is displayed. When finished, press {OFF}. To erase the password Press {HOLD/CLEAR} in step 6, and press the right soft key ({SAVE}), then press {OFF}. L You will be able to access the mailbox without entering the password. Note: L You can also program this feature with the base unit (feature #51 on page 71 and feature #52 on page 71). Setting the room monitor feature See page 48 for details. To turn ON the base unit room monitor feature using the handset, program as follows: Use the handset. Make sure the base unit and the handset are not being used. 1. Press {CONF/FUNCTION}. 2. Scroll to "Initial setting" by pressing {v} or {e}, and press {>}. 3. Scroll to "Set base unit" by pressing {v} or {e}, and press {>}. 4. Scroll to "Room monitor" by pressing {v} or {e}, and press {>}. 5. Press {v} or {e} repeatedly to select the desired setting. 6. Press the right soft key ({SAVE}). Note: L You can also set the base unit room monitor feature using the base unit (feature #74 on page 48).
-
 1
1 -
2
-
3
-
4
-
5
-
6
-
7
-
8
-
9
-
10
-
11
-
12
-
13
-
14
-
15
-
16
-
17
-
18
-
19
-
20
-
21
-
22
-
23
-
24
-
25
-
26
-
27
-
28
-
29
-
30
-
31
-
32
-
33
-
34
-
35
-
36
-
37
-
38
-
39
-
40
-
41
-
42
-
43
-
44
-
45
-
46
-
47
-
48
-
49
-
50
-
51
-
52
-
53
-
54
-
55
-
56
-
57
-
58
-
59
-
60
-
61
-
62
-
63
-
64
-
65
-
66
-
67
-
68
-
69
-
70
-
71
-
72
-
 73
73 -
 74
74 -
 75
75 -
 76
76 -
 77
77 -
 78
78 -
 79
79 -
 80
80 -
 81
81 -
 82
82 -
 83
83 -
84
-
85
-
86
-
87
-
88
-
89
-
90
-
91
-
92
-
93
-
94
-
95
-
96
-
97
-
98
-
99
-
100
-
101
-
102
-
103
-
104
-
105
-
106
 |
 |
