Panasonic KXFPG381 KXFPG381 User Guide - Page 80
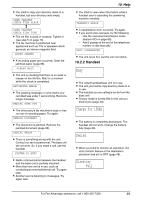
Option, Example: Extension number 2
 |
View all Panasonic KXFPG381 manuals
Add to My Manuals
Save this manual to your list of manuals |
Page 80 highlights
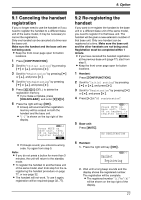
9. Option Example: Extension number 2 Note: L To stop registration, press {OFF} on the handset and press {MUTE} on the base unit. L If you have not canceled the handset registration at the previous base unit (page 77), the handset number still remains on that base unit memory. To erase the handset number from the previous base unit, see the base unit operating instructions. For this base unit: 1. Press {MENU}. 2. Press {MUTE}. 3. Press {SET}. 4. Enter {3}{3}{5}. 5. Press {SET}. 6. Enter that handset number ({1} to {8}). 7. Press {SET}. 78
-
 1
1 -
2
-
3
-
4
-
5
-
6
-
7
-
8
-
9
-
10
-
11
-
12
-
13
-
14
-
15
-
16
-
17
-
18
-
19
-
20
-
21
-
22
-
23
-
24
-
25
-
26
-
27
-
28
-
29
-
30
-
31
-
32
-
33
-
34
-
35
-
36
-
37
-
38
-
39
-
40
-
41
-
42
-
43
-
44
-
45
-
46
-
47
-
48
-
49
-
50
-
51
-
52
-
53
-
54
-
55
-
56
-
57
-
58
-
59
-
60
-
61
-
62
-
63
-
64
-
65
-
66
-
67
-
68
-
69
-
70
-
71
-
72
-
73
-
74
-
 75
75 -
 76
76 -
 77
77 -
 78
78 -
 79
79 -
 80
80 -
 81
81 -
 82
82 -
 83
83 -
 84
84 -
 85
85 -
86
-
87
-
88
-
89
-
90
-
91
-
92
-
93
-
94
-
95
-
96
-
97
-
98
-
99
-
100
-
101
-
102
-
103
-
104
-
105
-
106
 |
 |
9. Option
78
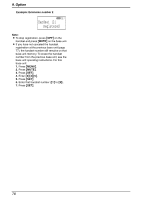
Example: Extension number 2
Note:
L
To stop registration, press
{
OFF
}
on the
handset and press
{
MUTE
}
on the base unit.
L
If you have not canceled the handset
registration at the previous base unit (page
77), the handset number still remains on that
base unit memory. To erase the handset
number from the previous base unit, see the
base unit operating instructions. For this
base unit:
1.
Press
{
MENU
}
.
2.
Press
{
MUTE
}
.
3.
Press
{
SET
}
.
4.
Enter
{
3
}{
3
}{
5
}
.
5.
Press
{
SET
}
.
6.
Enter that handset number (
{
1
}
to
{
8
}
).
7.
Press
{
SET
}
.