Ricoh Aficio MP 2500 Network Guide - Page 45
Installing SmartDeviceMonitor for Admin, Next >, License Agreement - scan to folder
 |
View all Ricoh Aficio MP 2500 manuals
Add to My Manuals
Save this manual to your list of manuals |
Page 45 highlights
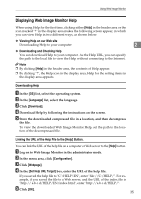
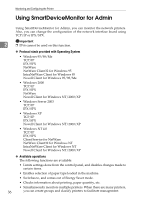
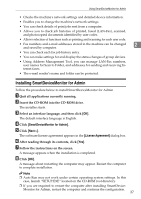
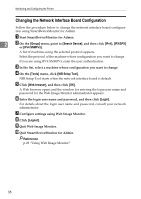
Using SmartDeviceMonitor for Admin • Checks the machine's network settings and detailed device information. • Enables you to change the machine's network settings. • You can check details of print jobs sent from a computer. • Allows you to check job histories of printed, faxed (LAN-Fax), scanned, and photocopied documents identified by user codes. • Allows selection of functions such as printing and scanning for each user code. • Fax numbers and e-mail addresses stored in the machine can be changed 2 and saved by computer. • You can check each fax job history entry. • You can make settings for and display the status changes of group devices. • Using Address Management Tool, you can manage LAN-Fax numbers, user names for Scan to Folder, and addresses for sending and receiving Internet faxes. • The e-mail sender's name and folder can be protected. Installing SmartDeviceMonitor for Admin Follow the procedure below to install SmartDeviceMonitor for Admin A Quit all applications currently running. B Insert the CD-ROM into the CD-ROM drive. The installer starts. C Select an interface language, and then click [OK]. The default interface language is English. D Click [SmartDeviceMonitor for Admin]. E Click [Next >]. The software license agreement appears in the [License Agreement] dialog box. F After reading through its contents, click [Yes]. G Follow the instructions on the screen. A message appears when the installation is completed. H Click [OK]. A message about restarting the computer may appear. Restart the computer to complete installation. Note ❒ Auto Run may not work under certain operating system settings. In this case, launch "SETUP.EXE" located on the CD-ROM root directory. ❒ If you are required to restart the computer after installing SmartDevice- Monitor for Admin, restart the computer and continue the configuration. 37
-
 1
1 -
2
-
3
-
4
-
5
-
6
-
7
-
8
-
9
-
10
-
11
-
12
-
13
-
14
-
15
-
16
-
17
-
18
-
19
-
20
-
21
-
22
-
23
-
24
-
25
-
26
-
27
-
28
-
29
-
30
-
31
-
32
-
33
-
34
-
35
-
36
-
37
-
38
-
39
-
 40
40 -
 41
41 -
 42
42 -
 43
43 -
 44
44 -
 45
45 -
 46
46 -
 47
47 -
 48
48 -
 49
49 -
 50
50 -
51
-
52
-
53
-
54
-
55
-
56
-
57
-
58
-
59
-
60
-
61
-
62
-
63
-
64
-
65
-
66
-
67
-
68
-
69
-
70
-
71
-
72
-
73
-
74
-
75
-
76
-
77
-
78
-
79
-
80
-
81
-
82
-
83
-
84
-
85
-
86
-
87
-
88
-
89
-
90
-
91
-
92
-
93
-
94
-
95
-
96
-
97
-
98
-
99
-
100
-
101
-
102
-
103
-
104
-
105
-
106
-
107
-
108
-
109
-
110
-
111
-
112
-
113
-
114
-
115
-
116
-
117
-
118
-
119
-
120
-
121
-
122
-
123
-
124
-
125
-
126
-
127
-
128
-
129
-
130
-
131
-
132
-
133
-
134
-
135
-
136
-
137
-
138
-
139
-
140
-
141
-
142
-
143
-
144
 |
 |