Ricoh Aficio MP C305 Manuals - Page 28

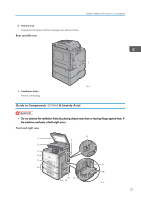
Front and left view, Lower right cover

Page 28 highlights

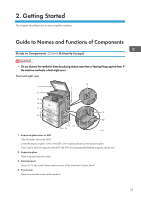
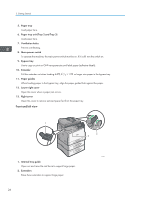
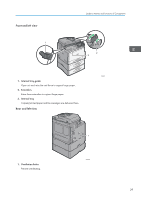
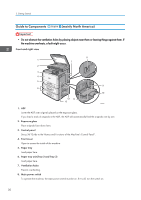
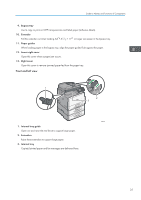
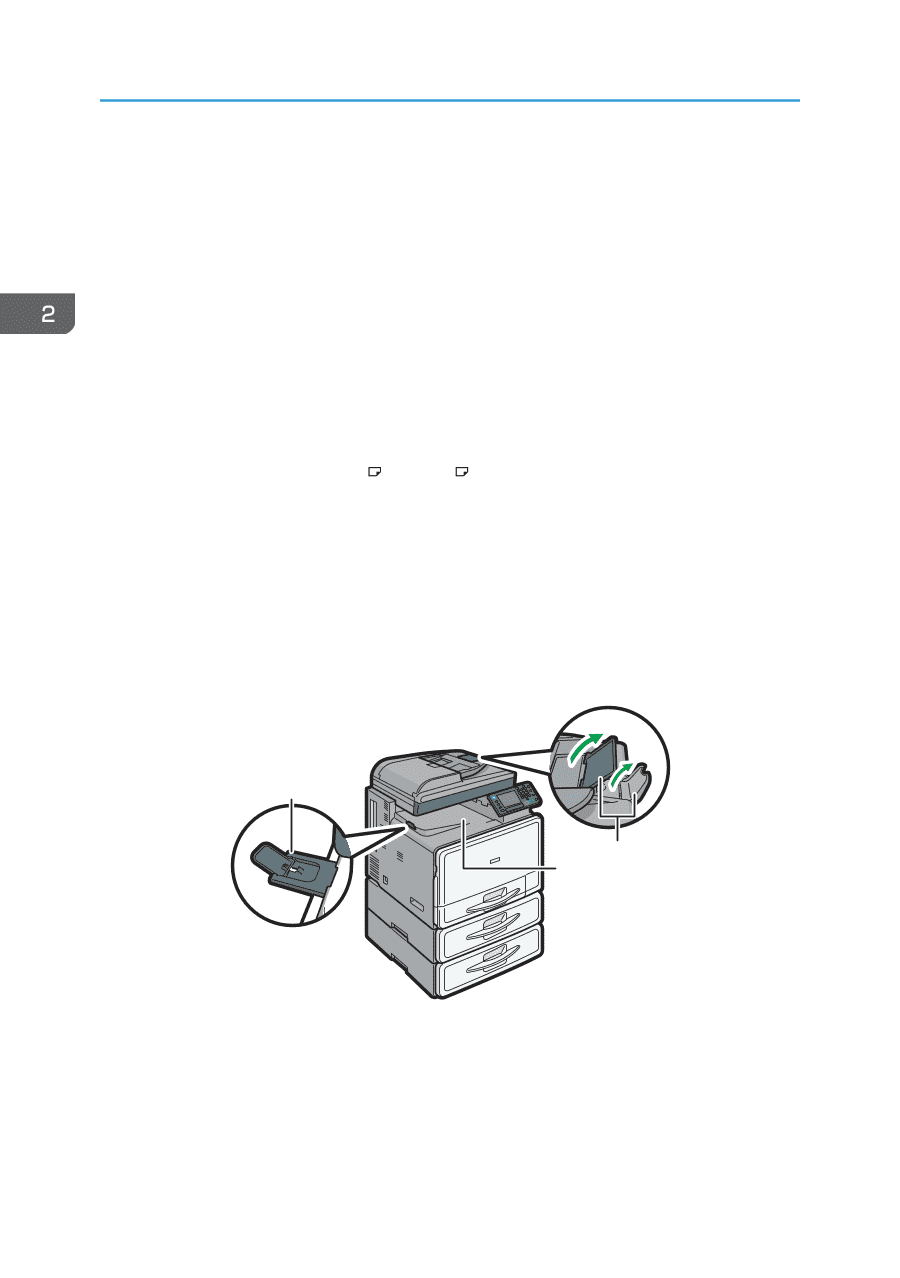
2. Getting Started 5. Paper tray Load paper here. 6. Paper tray unit (Tray 2 and Tray 3) Load paper here. 7. Ventilation holes Prevent overheating. 8. Main power switch To operate the machine, the main power switch must be on. If it is off, turn the switch on. 9. Bypass tray Use to copy or print on OHP transparencies and label paper (adhesive labels). 10. Extender Pull this extender out when loading A4 11. Paper guides , 81/2 × 11 or larger size paper in the bypass tray. When loading paper in the bypass tray, align the paper guides flush against the paper. 12. Lower right cover Open this cover when a paper jam occurs. 13. Right cover Open this cover to remove jammed paper fed from the paper tray. Front and left view 1 2 3 CMR602 1. Internal tray guide Open out and raise the end fence to support large paper. 2. Extenders Raise these extenders to support large paper. 26
  • 1
  • 2
  • 3
  • 4
  • 5
  • 6
  • 7
  • 8
  • 9
  • 10
  • 11
  • 12
  • 13
  • 14
  • 15
  • 16
  • 17
  • 18
  • 19
  • 20
  • 21
  • 22
  • 23
  • 24
  • 25
  • 26
  • 27
  • 28
  • 29
  • 30
  • 31
  • 32
  • 33
  • 34
  • 35
  • 36
  • 37
  • 38
  • 39
  • 40
  • 41
  • 42
  • 43
  • 44
  • 45
  • 46
  • 47
  • 48
  • 49
  • 50
  • 51
  • 52
  • 53
  • 54
  • 55
  • 56
  • 57
  • 58
  • 59
  • 60
  • 61
  • 62
  • 63
  • 64
  • 65
  • 66
  • 67
  • 68
  • 69
  • 70
  • 71
  • 72
  • 73
  • 74
  • 75
  • 76
  • 77
  • 78
  • 79
  • 80
  • 81
  • 82
  • 83
  • 84
  • 85
  • 86
  • 87
  • 88
  • 89
  • 90
  • 91
  • 92
  • 93
  • 94
  • 95
  • 96
  • 97
  • 98
  • 99
  • 100
  • 101
  • 102
  • 103
  • 104
  • 105
  • 106
  • 107
  • 108
  • 109
  • 110
  • 111
  • 112
  • 113
  • 114
  • 115
  • 116
  • 117
  • 118
  • 119
  • 120
  • 121
  • 122
  • 123
  • 124
  • 125
  • 126
  • 127
  • 128
  • 129
  • 130
  • 131
  • 132
  • 133
  • 134
  • 135
  • 136
  • 137
  • 138
  • 139
  • 140
  • 141
  • 142
  • 143
  • 144
  • 145
  • 146
  • 147
  • 148
  • 149
  • 150
  • 151
  • 152
  • 153
  • 154
  • 155
  • 156
  • 157
  • 158
  • 159
  • 160
  • 161
  • 162
  • 163
  • 164
  • 165
  • 166
  • 167
  • 168
  • 169
  • 170
  • 171
  • 172
  • 173
  • 174
  • 175
  • 176
  • 177
  • 178
  • 179
  • 180
  • 181
  • 182
  • 183
  • 184
  • 185
  • 186
  • 187
  • 188
  • 189
  • 190
  • 191
  • 192
  • 193
  • 194
  • 195
  • 196
  • 197
  • 198
  • 199
  • 200
  • 201
  • 202
  • 203
  • 204
  • 205
  • 206
  • 207
  • 208
  • 209
  • 210
  • 211
  • 212
  • 213
  • 214
  • 215
  • 216

5.
Paper tray
Load paper here.
6.
Paper tray unit (Tray 2 and Tray 3)
Load paper here.
7.
Ventilation holes
Prevent overheating.
8.
Main power switch
To operate the machine, the main power switch must be on. If it is off, turn the switch on.
9.
Bypass tray
Use to copy or print on OHP transparencies and label paper (adhesive labels).
10. Extender
Pull this extender out when loading A4
, 8
1
/
2
× 11
or larger size paper in the bypass tray.
11.
Paper guides
When loading paper in the bypass tray, align the paper guides flush against the paper.
12.
Lower right cover
Open this cover when a paper jam occurs.
13.
Right cover
Open this cover to remove jammed paper fed from the paper tray.
Front and left view
CMR602
1
2
3
1.
Internal tray guide
Open out and raise the end fence to support large paper.
2. Extenders
Raise these extenders to support large paper.
2. Getting Started
26