Samsung GT-P5113 User Manual - Page 189
Settings, Accounts and sync, Add account, Important, Remove account, Remove, account, Sync all
 |
View all Samsung GT-P5113 manuals
Add to My Manuals
Save this manual to your list of manuals |
Page 189 highlights
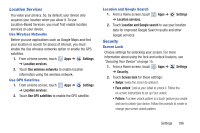
Adding an Account 1. From a Home screen, touch ➔ Accounts and sync. Apps ➔ Settings 2. Touch Add account. 3. Touch one of the account types. 4. Use the keyboard and follow the prompts to enter your credentials and set up the account. Tip: For more information about the types of accounts that you can add, see "Accounts" on page 51. Removing an Account Important! Removing an account also deletes all of its messages, contacts, and other data from the device. 1. From a Home screen, touch ➔ Accounts and sync. Apps ➔ 2. Touch an account to display its settings. Settings 3. Touch Remove account, then touch Remove account at the prompt to remove the account and delete all its messages, contacts, and other data. Synchronizing Account Select the items you want to synchronize on your account such as Books, Calendar, Contacts, and more. 1. From a Home screen, touch Apps ➔ Settings ➔ Accounts and sync. 2. Touch Sync all to synchronize all your accounts. Touch Cancel sync to stop the synchronization. 3. On the Auto-sync field, touch the OFF / ON icon to turn Auto-sync on or off, which controls whether changes you make to information on your device or on the web are automatically synced with each other. Data and Synchronization To sync account information manually: 1. From a Home screen, touch Apps ➔ ➔ Accounts and sync. Settings 2. Touch an account to display its settings. Settings 184
-
 1
1 -
2
-
3
-
4
-
5
-
6
-
7
-
8
-
9
-
10
-
11
-
12
-
13
-
14
-
15
-
16
-
17
-
18
-
19
-
20
-
21
-
22
-
23
-
24
-
25
-
26
-
27
-
28
-
29
-
30
-
31
-
32
-
33
-
34
-
35
-
36
-
37
-
38
-
39
-
40
-
41
-
42
-
43
-
44
-
45
-
46
-
47
-
48
-
49
-
50
-
51
-
52
-
53
-
54
-
55
-
56
-
57
-
58
-
59
-
60
-
61
-
62
-
63
-
64
-
65
-
66
-
67
-
68
-
69
-
70
-
71
-
72
-
73
-
74
-
75
-
76
-
77
-
78
-
79
-
80
-
81
-
82
-
83
-
84
-
85
-
86
-
87
-
88
-
89
-
90
-
91
-
92
-
93
-
94
-
95
-
96
-
97
-
98
-
99
-
100
-
101
-
102
-
103
-
104
-
105
-
106
-
107
-
108
-
109
-
110
-
111
-
112
-
113
-
114
-
115
-
116
-
117
-
118
-
119
-
120
-
121
-
122
-
123
-
124
-
125
-
126
-
127
-
128
-
129
-
130
-
131
-
132
-
133
-
134
-
135
-
136
-
137
-
138
-
139
-
140
-
141
-
142
-
143
-
144
-
145
-
146
-
147
-
148
-
149
-
150
-
151
-
152
-
153
-
154
-
155
-
156
-
157
-
158
-
159
-
160
-
161
-
162
-
163
-
164
-
165
-
166
-
167
-
168
-
169
-
170
-
171
-
172
-
173
-
174
-
175
-
176
-
177
-
178
-
179
-
180
-
181
-
182
-
183
-
 184
184 -
 185
185 -
 186
186 -
 187
187 -
 188
188 -
 189
189 -
 190
190 -
 191
191 -
 192
192 -
 193
193 -
 194
194 -
195
-
196
-
197
-
198
-
199
-
200
-
201
-
202
-
203
-
204
-
205
-
206
-
207
-
208
-
209
-
210
-
211
-
212
-
213
-
214
-
215
-
216
-
217
-
218
-
219
-
220
-
221
-
222
-
223
-
224
-
225
-
226
-
227
-
228
-
229
-
230
-
231
-
232
-
233
-
234
-
235
-
236
-
237
-
238
-
239
-
240
-
241
-
242
 |
 |
