Samsung SCX 4828FN SyncThru 5.0 Guide (ENGLISH) - Page 26
Enabling First Option, Disabling First Option, Widgets Refresh Time Interval, Enable Group
 |
UPC - 635753612172
View all Samsung SCX 4828FN manuals
Add to My Manuals
Save this manual to your list of manuals |
Page 26 highlights
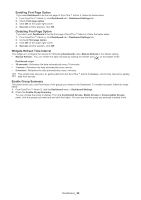
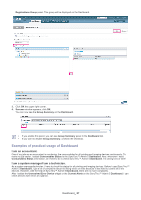
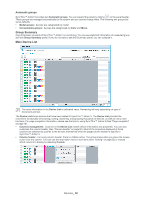
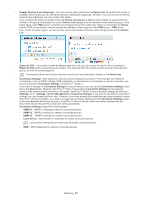
Enabling First Page Option If you want Dashboard to be the first page of SyncThru™ Admin 5, follow the below steps: 1. From SyncThru™ Admin 5, click Dashboard tab > Dashboard Settings tab. 2. Check First page option. 3. Click OK on the upper right corner. 4. Success window appears, click OK. Disabling First Page Option If you don't want Dashboard to be the first page of SyncThru™ Admin 5, follow the below steps: 1. From SyncThru™ Admin 5, click Dashboard tab > Dashboard Settings tab. 2. Uncheck First page option. 3. Click OK on the upper right corner. 4. Success window appears, click OK. Widgets Refresh Time Interval This widget is to configure the interval for refreshing Dashboard's data. Manual Refresh is the default setting. • Manual Refresh: You can refresh the data manually by clicking the refresh icon on the header of the Dashboard widget. • 30 seconds: Refreshes the data automatically every 30 seconds. • 1 minute: Refreshes the data automatically every minute. • 5 minutes: Refreshes the data automatically every 5 minutes. This refresh time interval is for getting data from the SyncThru™ Admin 5 database, not the time interval for getting data from devices. Enable Group Summary This panel shows you a brief summary of the groups you made on the Dashboard. To enable this panel, follow the steps below: 1. From SyncThru™ Admin 5, click the Dashboard menu > Dashboard Settings. 2. Check the Enable Group Summary. You can choose the group to display. From the Customized Groups, Model Groups or Consumables Groups panel, click the groups you want and and click the button. You can see that the group you selected is added to the Dashboard_ 26
-
 1
1 -
2
-
3
-
4
-
5
-
6
-
7
-
8
-
9
-
10
-
11
-
12
-
13
-
14
-
15
-
16
-
17
-
18
-
19
-
20
-
 21
21 -
 22
22 -
 23
23 -
 24
24 -
 25
25 -
 26
26 -
 27
27 -
 28
28 -
 29
29 -
 30
30 -
 31
31 -
32
-
33
-
34
-
35
-
36
-
37
-
38
-
39
-
40
-
41
-
42
-
43
-
44
-
45
-
46
-
47
-
48
-
49
-
50
-
51
-
52
-
53
-
54
-
55
-
56
-
57
-
58
-
59
-
60
-
61
-
62
-
63
-
64
-
65
-
66
-
67
-
68
-
69
-
70
-
71
-
72
-
73
-
74
-
75
-
76
-
77
-
78
-
79
-
80
-
81
-
82
-
83
-
84
-
85
-
86
-
87
-
88
-
89
-
90
-
91
-
92
-
93
-
94
-
95
-
96
-
97
-
98
-
99
-
100
-
101
-
102
-
103
-
104
-
105
-
106
-
107
-
108
-
109
-
110
-
111
 |
 |