Samsung SCX 4828FN SyncThru 5.0 Guide (ENGLISH) - Page 75
Viewing SyncThru™ Admin 5 Servers
 |
UPC - 635753612172
View all Samsung SCX 4828FN manuals
Add to My Manuals
Save this manual to your list of manuals |
Page 75 highlights
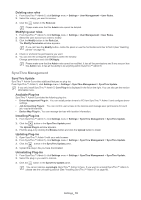
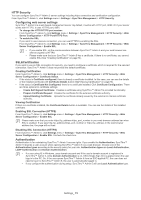
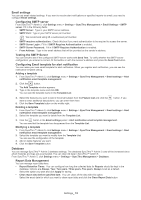
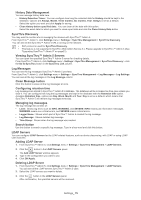
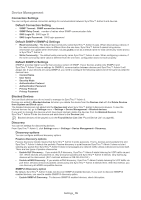
History Data Management You can manage history data here. • History Retention Times: You can configure how long the collected data for History should be kept in the database. Options are Always, Month, Three months, Six months, Year. Always is set as a default. Select the option you want and click Apply for saving. • Clean history before specified date: You can clean all the data with this option. Select the exact date for which you want to clean report data and click the Clean History Data button SyncThru Discovery You may want to monitor who is managing the devices with SyncThru™ Admin 5. From SyncThru™ Admin 5, click Settings menu > Settings > SyncThru Management > SyncThru Discovery. You can see all the SyncThru™ Admin 5 URLs running on the network. • SLP protocol is used for SyncThru Discovery. • This feature is not supported in SyncThru Web Admin Service 4.x. Please upgrade to SyncThru™ Admin 5 (See "Upgrading SyncThru™ Admin 5" on page 21). Viewing SyncThru™ Admin 5 Servers You can open the specified SyncThru™ Admin 5 server for checking details. From SyncThru™ Admin 5, click Settings menu > Settings > SyncThru Management > SyncThru Discovery > click the Go to SyncThru button in the SyncThru Link column. Log Messages You can see the log messages SyncThru™ Admin 5 provides. From SyncThru™ Admin 5, click Settings menu > Settings > SyncThru Management > Log Messages > Log Settings. You can see all the log messages in the Log Message column. Clean Message button Click this button to erase all the log messages at once. Configuring retention time Log messages are stored in SyncThru™ Admin 5's database. The database will be increased as time goes unless you clear it. You can configure how long the log messages are kept in the database with the Retention time option. Available Retention time options are Day, Week, Month and Year. Day is set as a default, which means that SyncThru™ Admin 5 will remove log messages everyday. Managing log messages The log message list consists of: • Level: Shows log level, such as INFO, WARNING, and SEVERE. INFO means just information messages, WARNING means non-critical errors, and SEVERE means critical errors. • Logger Name: Shows which part of SyncThru™ Admin 5 created the log message. • Log Message: Shows detailed log message. • Time Stamp: Shows when the log message was created. Search button Use this button to search a specific log message. Type in a key word and click this button. LDAP Servers You can configure LDAP Servers for the LDAP-related features, such as device discovering, with LDAP or using LDAP user accounts. Adding LDAP Server 1. From SyncThru™ Admin 5, click Settings menu > Settings > SyncThru Management > LDAP Servers. 2. Click the button in the LDAP Servers panel. The Add LDAP Server window appears. 3. Type in the configuration you want to use. 4. Click OK/Apply. Deleting LDAP Server 1. From SyncThru™ Admin 5, click Settings menu > Settings > SyncThru Management > LDAP Servers. You can see all the LDAP servers SyncThru™ Admin 5 uses. 2. Select the LDAP servers you want to delete. 3. Click the button in the LDAP Servers panel. After confirmation, the specified servers will be removed. Settings_ 75
-
 1
1 -
2
-
3
-
4
-
5
-
6
-
7
-
8
-
9
-
10
-
11
-
12
-
13
-
14
-
15
-
16
-
17
-
18
-
19
-
20
-
21
-
22
-
23
-
24
-
25
-
26
-
27
-
28
-
29
-
30
-
31
-
32
-
33
-
34
-
35
-
36
-
37
-
38
-
39
-
40
-
41
-
42
-
43
-
44
-
45
-
46
-
47
-
48
-
49
-
50
-
51
-
52
-
53
-
54
-
55
-
56
-
57
-
58
-
59
-
60
-
61
-
62
-
63
-
64
-
65
-
66
-
67
-
68
-
69
-
 70
70 -
 71
71 -
 72
72 -
 73
73 -
 74
74 -
 75
75 -
 76
76 -
 77
77 -
 78
78 -
 79
79 -
 80
80 -
81
-
82
-
83
-
84
-
85
-
86
-
87
-
88
-
89
-
90
-
91
-
92
-
93
-
94
-
95
-
96
-
97
-
98
-
99
-
100
-
101
-
102
-
103
-
104
-
105
-
106
-
107
-
108
-
109
-
110
-
111
 |
 |