Samsung SCX 4828FN SyncThru 5.0 Guide (ENGLISH) - Page 64
Report settings, Generating reports, Scheduling report generation, Sending reports via email
 |
UPC - 635753612172
View all Samsung SCX 4828FN manuals
Add to My Manuals
Save this manual to your list of manuals |
Page 64 highlights
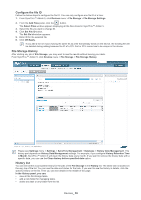
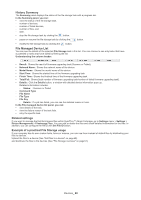
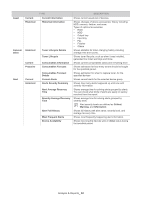
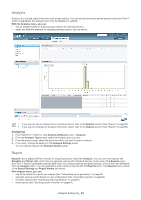
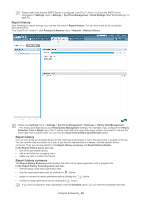
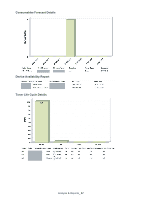
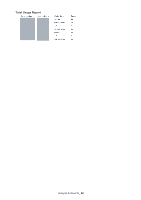
Report settings Generating reports 1. From SyncThru™ Admin 5, click Analysis & Reports menu > Reports > Report Settings. You can see the Device List and Report Settings panels for advanced reporting. 2. Select the report type you want to generate from the Report Types. 3. Select the group and the devices for which you want to get the report. 4. Type in the Report Name and configure other settings: • Report Name: Type in the name for the report you are generating. • Period: Select the time period for which data to use when generating the report. The data for report generation depends on this period. For example, if you select Last week and start to generate report, SyncThru™ Admin 5 uses data collected last week. Available options are, This week, This month, This year, Last week, Last month, Last year and Custom (you can set the period). • Columns: Select the columns you want to see with the report. • Sort by: Select the column used for sorting when generating the report. • Sort Order: Select Ascending or Descending for sorting 5. Click OK/Apply. You can see the generated reports in Report History. If you click the OK button (not Apply button) after the final step, the page will be automatically moved to Report History (See "Report history" on page 65). Scheduling report generation You can schedule report generation. 1. From SyncThru™ Admin 5, click Analysis & Reports menu > Reports > Report Settings. 2. Configure settings. 3. Check the Schedule checkbox and set the specific date/time you want. If you want to generate the report periodically, set the Time Interval. If you configure scheduling option, you can see reports with the special icon like in the Report History. 4. Click OK/Apply. Sending reports via email You can receive reports via email without accessing SyncThru™ Admin 5. 1. From SyncThru™ Admin 5, click Analysis & Reports menu > Reports > Report Settings. 2. Configure settings. 3. Check the Send by Email and type in the email address in Recipients field. 4. Click OK/Apply. Analysis & Reports_ 64
-
 1
1 -
2
-
3
-
4
-
5
-
6
-
7
-
8
-
9
-
10
-
11
-
12
-
13
-
14
-
15
-
16
-
17
-
18
-
19
-
20
-
21
-
22
-
23
-
24
-
25
-
26
-
27
-
28
-
29
-
30
-
31
-
32
-
33
-
34
-
35
-
36
-
37
-
38
-
39
-
40
-
41
-
42
-
43
-
44
-
45
-
46
-
47
-
48
-
49
-
50
-
51
-
52
-
53
-
54
-
55
-
56
-
57
-
58
-
 59
59 -
 60
60 -
 61
61 -
 62
62 -
 63
63 -
 64
64 -
 65
65 -
 66
66 -
 67
67 -
 68
68 -
 69
69 -
70
-
71
-
72
-
73
-
74
-
75
-
76
-
77
-
78
-
79
-
80
-
81
-
82
-
83
-
84
-
85
-
86
-
87
-
88
-
89
-
90
-
91
-
92
-
93
-
94
-
95
-
96
-
97
-
98
-
99
-
100
-
101
-
102
-
103
-
104
-
105
-
106
-
107
-
108
-
109
-
110
-
111
 |
 |
