Seagate GoFlex Home User Guide - Page 16
The Add Users window opens., Allow this user to create, modify, and delete user accounts, Add User
 |
View all Seagate GoFlex Home manuals
Add to My Manuals
Save this manual to your list of manuals |
Page 16 highlights
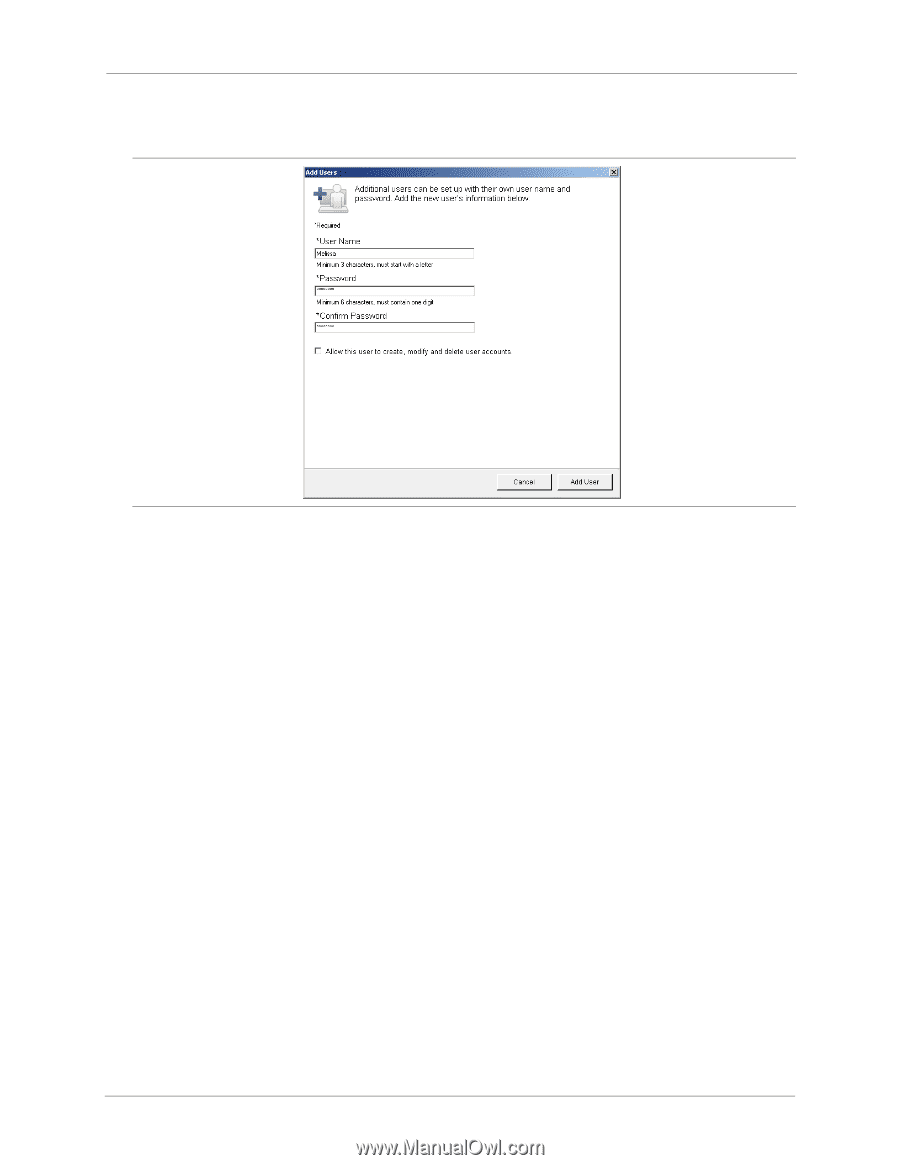
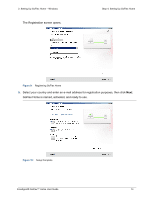
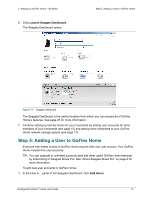
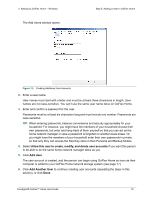
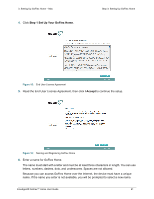
2. Setting Up GoFlex Home - Windows The Add Users window opens. Step 5: Adding a User to GoFlex Home Figure 12: Creating Additional User Accounts 2. Enter a user name. User names must start with a letter and must be at least three characters in length. User names are not case-sensitive. You can't use the same user name twice on GoFlex Home. 3. Enter and confirm a password for the user. Passwords must be at least six characters long and must include one number. Passwords are case-sensitive. TIP: When entering passwords, balance convenience and security appropriately for your household. For instance, you might have the members of your household choose their own passwords, but enter and keep track of them yourself so that you can act as the home network manager in case a password is forgotten or another issue arises. Or, you might have the members of your household enter their own passwords in private, so that only they can access the files they store in their Personal and Backup folders. 4. Select Allow this user to create, modify, and delete user accounts if you want this person to be able to do the same home network manager tasks as you. 5. Click Add User. The user account is created, and the person can begin using GoFlex Home as soon as their computer is added to your GoFlex Home network storage system (see page 17). 6. Click Add Another User to continue creating user accounts (repeating the steps in this section), or click Done. FreeAgent® GoFlex™ Home User Guide 16
-
 1
1 -
2
-
3
-
4
-
5
-
6
-
7
-
8
-
9
-
10
-
 11
11 -
 12
12 -
 13
13 -
 14
14 -
 15
15 -
 16
16 -
 17
17 -
 18
18 -
 19
19 -
 20
20 -
 21
21 -
22
-
23
-
24
-
25
-
26
-
27
-
28
-
29
-
30
-
31
-
32
-
33
-
34
-
35
-
36
-
37
-
38
-
39
-
40
-
41
-
42
-
43
-
44
-
45
-
46
-
47
-
48
-
49
-
50
-
51
-
52
-
53
-
54
-
55
-
56
-
57
-
58
-
59
-
60
-
61
-
62
-
63
-
64
-
65
-
66
-
67
-
68
-
69
-
70
-
71
-
72
-
73
-
74
-
75
-
76
-
77
-
78
-
79
-
80
-
81
-
82
 |
 |