Sharp MX-M700 MX-M550 MX-M620 MX-M700 Operation Manual - Page 144
Printing a stamp reverse text on copies
 |
View all Sharp MX-M700 manuals
Add to My Manuals
Save this manual to your list of manuals |
Page 144 highlights
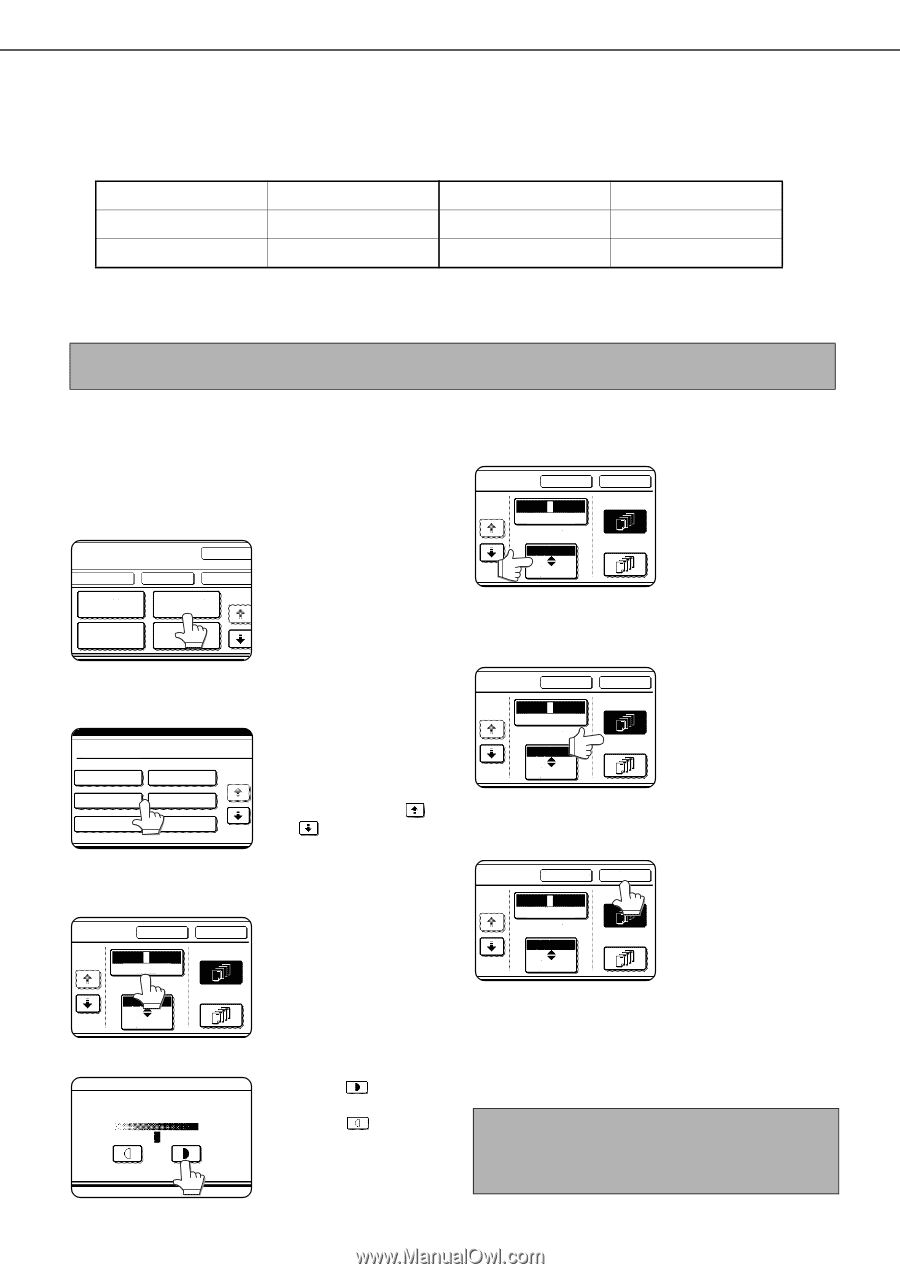
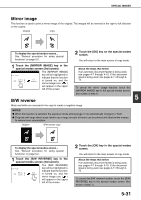
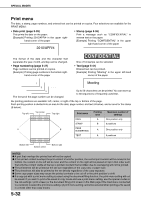
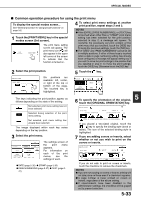
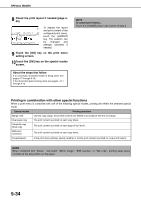
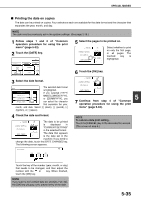
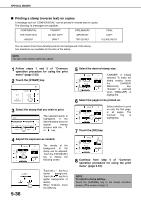
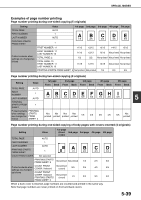
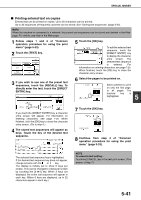
SPECIAL MODES ■ Printing a stamp (reverse text) on copies A message such as "CONFIDENTIAL" can be printed in reverse text on copies. The following 12 messages are available. CONFIDENTIAL PRIORITY PRELIMINARY FOR YOUR INFO. DO NOT COPY IMPORTANT URGENT DRAFT TOP SECRET FINAL COPY PLEASE REPLY You can select from three density levels for the background of the stamp. Two selections are available for the size of the stamp. NOTE The text of the stamp cannot be edited. 1 Follow steps 1 and 2 of "Common operation procedure for using the print menu" (page 5-33). 2 Touch the [STAMP] key. LAYOUT CANCEL DATE STAMP PAGE NUMBERING TEXT OK OK 1/2 3 Select the stamp that you wish to print. STAMP CONFIDENTIAL PRIORITY 1/2 FOR YOUR INFO. DO NOT COPY URGENT DRAFT The selected stamp is highlighted. If the desired stamp does not appear, change screens with the or key. 4 Adjust the exposure as needed. CANCEL OK 1/2 12 3 FIRST PAGE EXPOSURE SIZE LARGER ALL PAGES SMALLER The density of the background of the stamp can be adjusted. Touch the [EXPOSURE] key to display the following screen. EXPOSURE 1 2 3 5-36 Touch the key for a darker background. Touch the key for a lighter background (3 levels). When finished, touch the [OK] key. 5 Select the desired stamp size. CANCEL OK 1/2 12 3 FIRST PAGE EXPOSURE SIZE LARGER ALL PAGES SMALLER "LARGER" is initially selected. To make the stamp smaller, touch the [LARGER/ SMALLER] key. "Smaller" is selected when [SMALLER] is highlighted. 6 Select the pages to be printed on. CANCEL OK 1/2 12 3 FIRST PAGE EXPOSURE SIZE LARGER ALL PAGES SMALLER Select whether to print on only the first page, or all pages. The touched key is highlighted. 7 Touch the [OK] key. CANCEL OK 1/2 12 3 FIRST PAGE EXPOSURE SIZE LARGER ALL PAGES SMALLER 8 Continue from step 4 of "Common operation procedure for using the print menu" (page 5-33). NOTE To cancel a stamp setting... Touch the [CANCEL] key in the stamp selection screen. (The screen of step 7.)
-
 1
1 -
2
-
3
-
4
-
5
-
6
-
7
-
8
-
9
-
10
-
11
-
12
-
13
-
14
-
15
-
16
-
17
-
18
-
19
-
20
-
21
-
22
-
23
-
24
-
25
-
26
-
27
-
28
-
29
-
30
-
31
-
32
-
33
-
34
-
35
-
36
-
37
-
38
-
39
-
40
-
41
-
42
-
43
-
44
-
45
-
46
-
47
-
48
-
49
-
50
-
51
-
52
-
53
-
54
-
55
-
56
-
57
-
58
-
59
-
60
-
61
-
62
-
63
-
64
-
65
-
66
-
67
-
68
-
69
-
70
-
71
-
72
-
73
-
74
-
75
-
76
-
77
-
78
-
79
-
80
-
81
-
82
-
83
-
84
-
85
-
86
-
87
-
88
-
89
-
90
-
91
-
92
-
93
-
94
-
95
-
96
-
97
-
98
-
99
-
100
-
101
-
102
-
103
-
104
-
105
-
106
-
107
-
108
-
109
-
110
-
111
-
112
-
113
-
114
-
115
-
116
-
117
-
118
-
119
-
120
-
121
-
122
-
123
-
124
-
125
-
126
-
127
-
128
-
129
-
130
-
131
-
132
-
133
-
134
-
135
-
136
-
137
-
138
-
 139
139 -
 140
140 -
 141
141 -
 142
142 -
 143
143 -
 144
144 -
 145
145 -
 146
146 -
 147
147 -
 148
148 -
 149
149 -
150
-
151
-
152
-
153
-
154
-
155
-
156
-
157
-
158
-
159
-
160
-
161
-
162
-
163
-
164
-
165
-
166
-
167
-
168
-
169
-
170
-
171
-
172
-
173
-
174
-
175
-
176
-
177
-
178
-
179
-
180
-
181
-
182
-
183
-
184
-
185
-
186
-
187
-
188
-
189
-
190
-
191
-
192
-
193
-
194
-
195
-
196
-
197
-
198
-
199
-
200
 |
 |