Sharp MX-M700 MX-M550 MX-M620 MX-M700 Operation Manual - Page 92
Standard original placement orientations, Automatic copy image rotation - rotation copying
 |
View all Sharp MX-M700 manuals
Add to My Manuals
Save this manual to your list of manuals |
Page 92 highlights
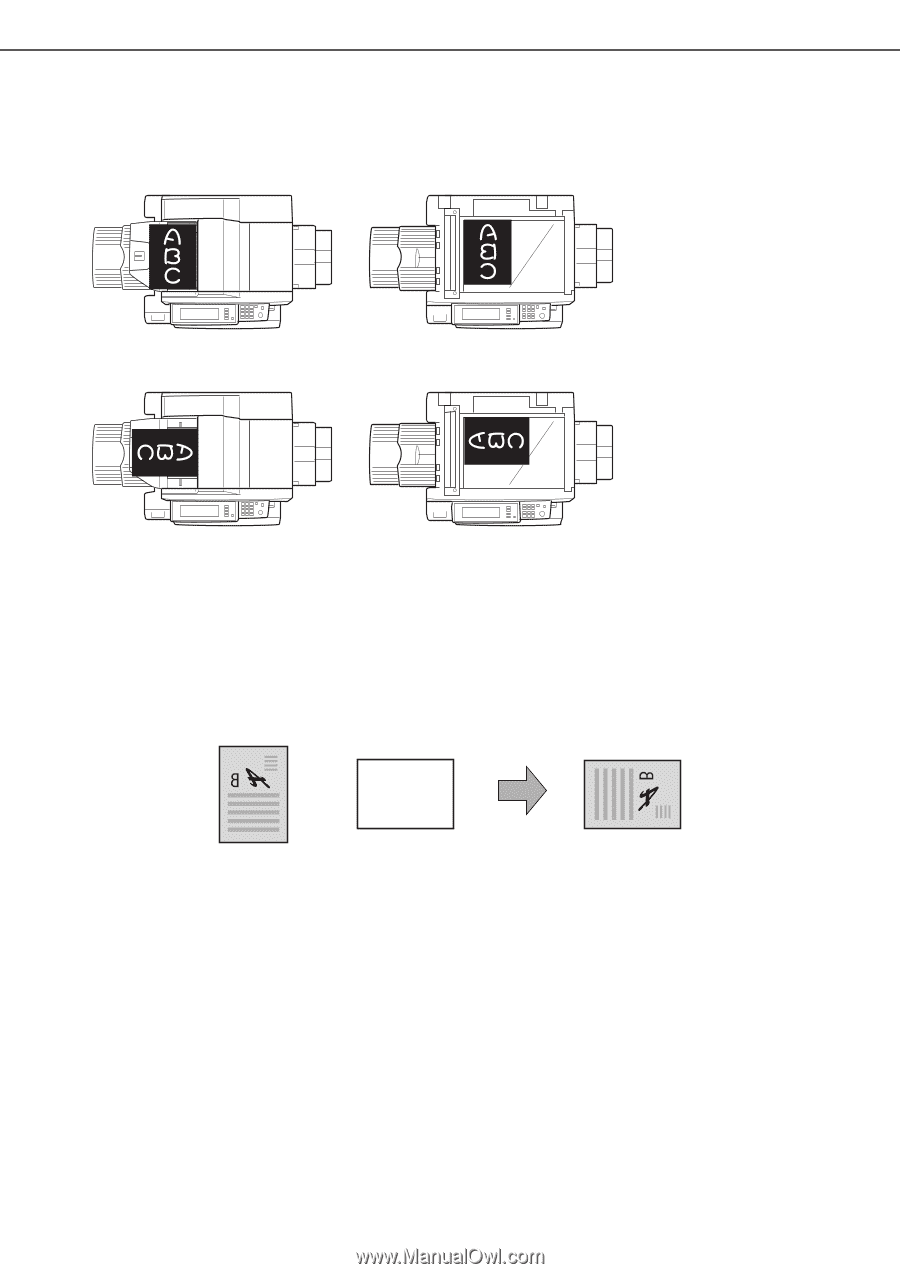
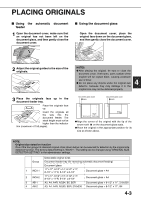
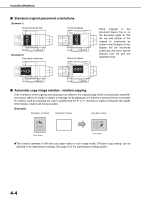
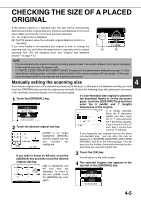
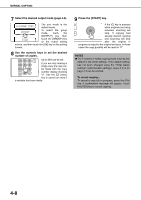
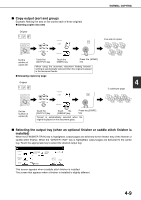
PLACING ORIGINALS ■ Standard original placement orientations [Example 1] Document feeder tray Document glass [Example 2] Document feeder tray Document glass Place originals in the document feeder tray or on the document glass so that the top and bottom of the original is positioned as shown in the illustration. If not, staples will be incorrectly positioned and some special features may not give the expected result. ■ Automatic copy image rotation - rotation copying If the orientation of the originals and copy paper are different, the original image will be automatically rotated 90° and copied. (When an image is rotated, a message will be displayed.) If a function is selected that is not suitable for rotation, such as enlarging the copy to greater than 8-1/2" x 11" (A4) size or staple sorting with the saddle stitch finisher, rotation will not be possible. [Example] Orientation of original Orientation of paper Copy after rotation Face down Face down ●This function operates in both the auto paper select or auto image mode. ("Rotation copy setting" can be disabled in the administrator settings. See page 16 of the administrator settings guide.) 4-4
-
 1
1 -
2
-
3
-
4
-
5
-
6
-
7
-
8
-
9
-
10
-
11
-
12
-
13
-
14
-
15
-
16
-
17
-
18
-
19
-
20
-
21
-
22
-
23
-
24
-
25
-
26
-
27
-
28
-
29
-
30
-
31
-
32
-
33
-
34
-
35
-
36
-
37
-
38
-
39
-
40
-
41
-
42
-
43
-
44
-
45
-
46
-
47
-
48
-
49
-
50
-
51
-
52
-
53
-
54
-
55
-
56
-
57
-
58
-
59
-
60
-
61
-
62
-
63
-
64
-
65
-
66
-
67
-
68
-
69
-
70
-
71
-
72
-
73
-
74
-
75
-
76
-
77
-
78
-
79
-
80
-
81
-
82
-
83
-
84
-
85
-
86
-
 87
87 -
 88
88 -
 89
89 -
 90
90 -
 91
91 -
 92
92 -
 93
93 -
 94
94 -
 95
95 -
 96
96 -
 97
97 -
98
-
99
-
100
-
101
-
102
-
103
-
104
-
105
-
106
-
107
-
108
-
109
-
110
-
111
-
112
-
113
-
114
-
115
-
116
-
117
-
118
-
119
-
120
-
121
-
122
-
123
-
124
-
125
-
126
-
127
-
128
-
129
-
130
-
131
-
132
-
133
-
134
-
135
-
136
-
137
-
138
-
139
-
140
-
141
-
142
-
143
-
144
-
145
-
146
-
147
-
148
-
149
-
150
-
151
-
152
-
153
-
154
-
155
-
156
-
157
-
158
-
159
-
160
-
161
-
162
-
163
-
164
-
165
-
166
-
167
-
168
-
169
-
170
-
171
-
172
-
173
-
174
-
175
-
176
-
177
-
178
-
179
-
180
-
181
-
182
-
183
-
184
-
185
-
186
-
187
-
188
-
189
-
190
-
191
-
192
-
193
-
194
-
195
-
196
-
197
-
198
-
199
-
200
 |
 |