Sharp MX-M700 MX-M550 MX-M620 MX-M700 Operation Manual - Page 169
Select [AUTO] or [MANUAL].
 |
View all Sharp MX-M700 manuals
Add to My Manuals
Save this manual to your list of manuals |
Page 169 highlights
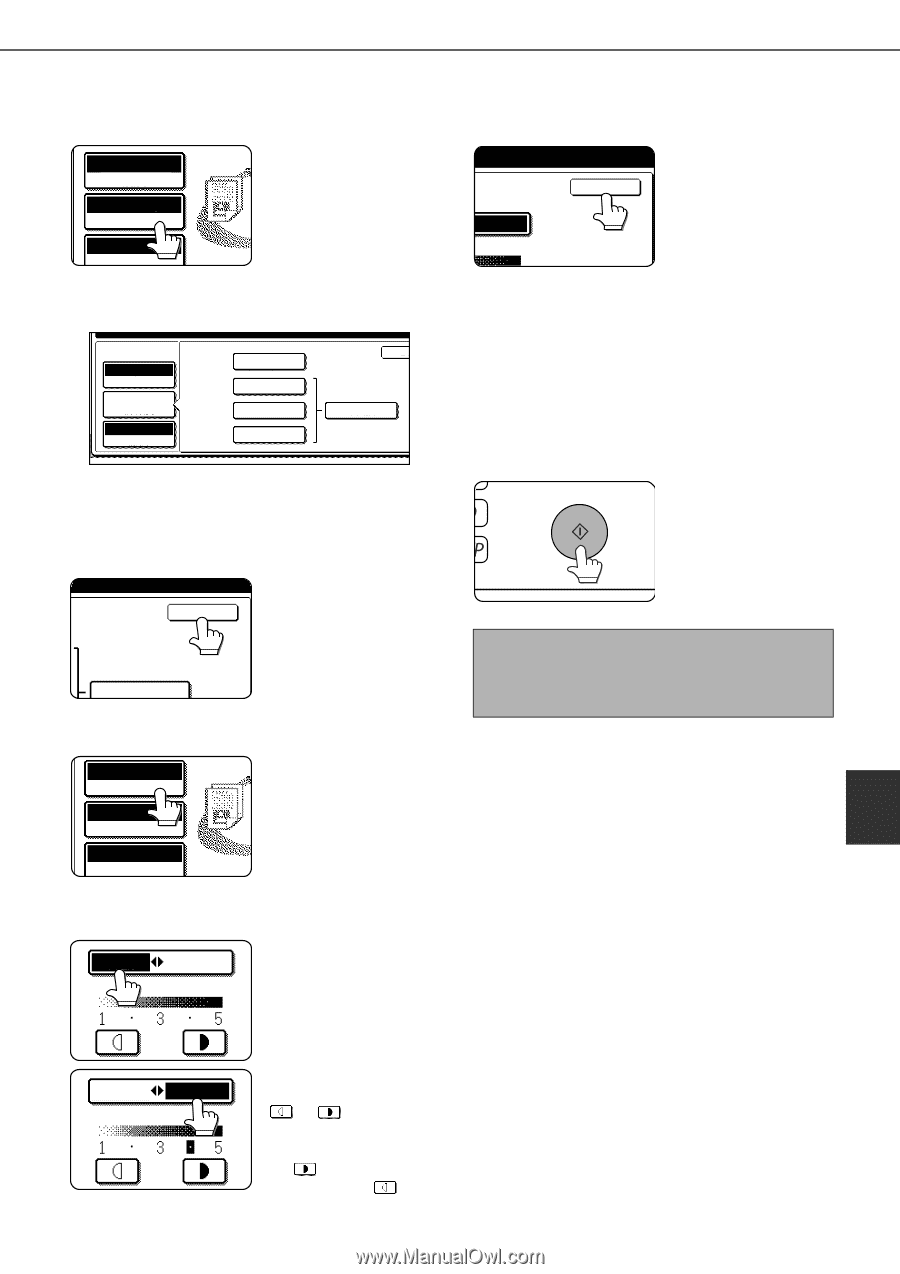
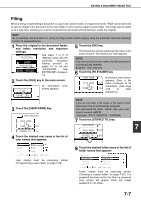
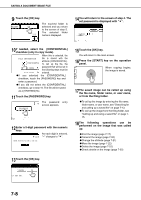
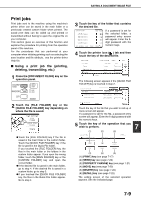
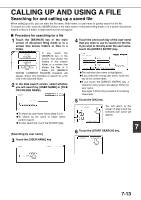
SAVING A DOCUMENT IMAGE FILE 11Touch the [RESOLUTION] key. AUTO EXPOSURE 300x300dpi RESOLUTION AUTO ORIGINAL 12Touch the key of the desired resolution. PRESS [START] TO SCAN ORIGINAL. SCAN TO HDD OK 200x200dpi AUTO EXPOSURE 300x300dpi RESOLUTION AUTO ORIGINAL 400x400dpi 600x600dpi HALF TONE Select one of four resolution levels as appropriate for the original. The selected resolution key is highlighted. 13Touch the [OK] key. You will return to the screen of step 11. OK HALF TONE 14Touch the [EXPOSURE] key. AUTO EXPOSURE 300x300dpi RESOLUTION AUTO ORIGINAL 15Select [AUTO] or [MANUAL]. AUTO MANUAL To have the exposure adjusted automatically, select [AUTO]. AUTO MANUAL If you selected [MANUAL], touch the or key to adjust the exposure. (For a darker image, touch the key. For a lighter image, touch the key.) 16Touch the [OK] key. You will return to the screen of step 14. OK MANUAL 17Place the original and touch the [START] key. [Placing the original] ●For information on placing the original, see "NORMAL COPYING" in chapter 4. ●If you selected the "Card Shot" special function, the document glass must be used. ●If you selected job build mode, the automatic document feeding function must be used. Scanning begins. If you are using the document glass, touch the [READ-END] key after all pages have been scanned. NOTE This completes the scan save procedure. Follow the steps below when you wish to call up the image and print or transmit it. 18The saved image can be called up using the file name, folder name, or user name, or from the filing folder. ●To call up the image by entering the file name, 7 folder name, or user name, see "Searching for and calling up a saved file" on page 7-13. ●To call up the image from the filing folder, see "Calling up and using a saved file" on page 7- 15. 19The following operations can be performed on the image that was called up in step 18: ●Print the image (page 7-17) ●Transmit the image (page 7-20) ●Change the attribute ((page 7-21) ●Move the image (page 7-22) ●Delete the image (page 7-22) ●Check details on the image (page 7-22) 7-11
-
 1
1 -
2
-
3
-
4
-
5
-
6
-
7
-
8
-
9
-
10
-
11
-
12
-
13
-
14
-
15
-
16
-
17
-
18
-
19
-
20
-
21
-
22
-
23
-
24
-
25
-
26
-
27
-
28
-
29
-
30
-
31
-
32
-
33
-
34
-
35
-
36
-
37
-
38
-
39
-
40
-
41
-
42
-
43
-
44
-
45
-
46
-
47
-
48
-
49
-
50
-
51
-
52
-
53
-
54
-
55
-
56
-
57
-
58
-
59
-
60
-
61
-
62
-
63
-
64
-
65
-
66
-
67
-
68
-
69
-
70
-
71
-
72
-
73
-
74
-
75
-
76
-
77
-
78
-
79
-
80
-
81
-
82
-
83
-
84
-
85
-
86
-
87
-
88
-
89
-
90
-
91
-
92
-
93
-
94
-
95
-
96
-
97
-
98
-
99
-
100
-
101
-
102
-
103
-
104
-
105
-
106
-
107
-
108
-
109
-
110
-
111
-
112
-
113
-
114
-
115
-
116
-
117
-
118
-
119
-
120
-
121
-
122
-
123
-
124
-
125
-
126
-
127
-
128
-
129
-
130
-
131
-
132
-
133
-
134
-
135
-
136
-
137
-
138
-
139
-
140
-
141
-
142
-
143
-
144
-
145
-
146
-
147
-
148
-
149
-
150
-
151
-
152
-
153
-
154
-
155
-
156
-
157
-
158
-
159
-
160
-
161
-
162
-
163
-
 164
164 -
 165
165 -
 166
166 -
 167
167 -
 168
168 -
 169
169 -
 170
170 -
 171
171 -
 172
172 -
 173
173 -
 174
174 -
175
-
176
-
177
-
178
-
179
-
180
-
181
-
182
-
183
-
184
-
185
-
186
-
187
-
188
-
189
-
190
-
191
-
192
-
193
-
194
-
195
-
196
-
197
-
198
-
199
-
200
 |
 |