Sharp MX-M700 MX-M550 MX-M620 MX-M700 Operation Manual - Page 40
Loading paper in the bypass tray
 |
View all Sharp MX-M700 manuals
Add to My Manuals
Save this manual to your list of manuals |
Page 40 highlights
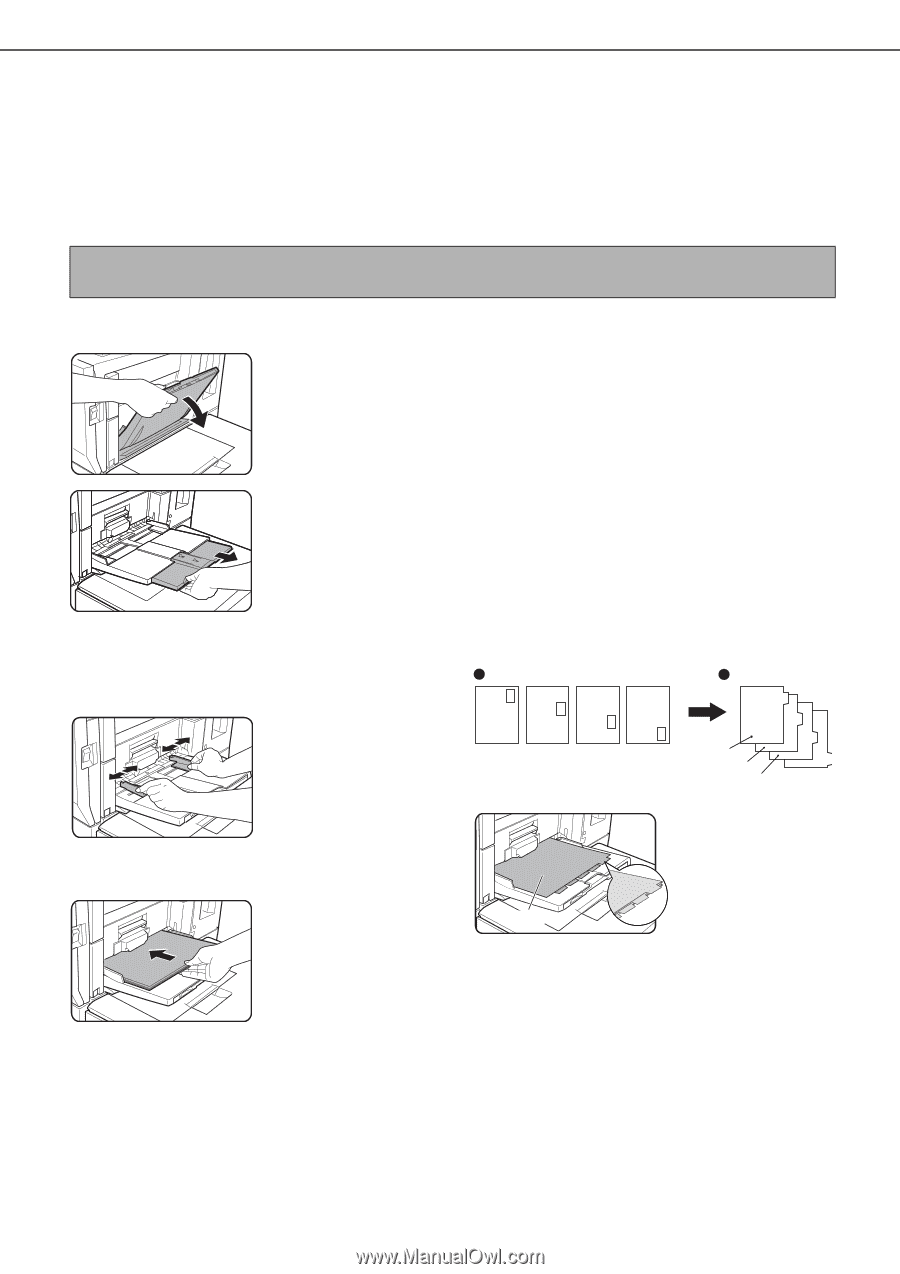
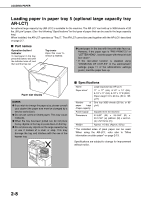
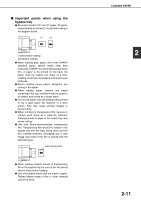
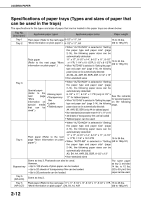
LOADING PAPER Loading paper in the bypass tray The bypass tray can be used to print on plain paper, postcards, label sheets, tabbed paper, and other special papers. When using SHARP standard paper, up to 100 sheets can be loaded (up to 20 postcards) for continuous printing similar to the other trays. For the paper types that can be used in the bypass tray, see "Specifications of paper trays (Types and sizes of paper that can be used in the trays)" on page 2-12. NOTE After loading the paper in the bypass tray, be sure to set the paper type and size (step 4) if these were changed. 1 Open the bypass tray. When loading 11" x 17", 8-1/2" x 14", 8-1/2" x 13", or 8-1/2" x 11"R, A3, B4, A4R size paper, be sure to pull the auxiliary tray all the way out. If the auxiliary tray is not pulled all the way out, the size of the loaded paper will not be correctly displayed. 2 Set the bypass tray guides to the width of the copy paper. 4 Set the type and size of the paper loaded in the bypass tray. If the paper size was changed from an inch size to an AB size, or from an AB size to an inch size, or if the paper type was changed, be sure to change the appropriate settings as explained in "Setting the paper type and paper size" (see page 2-14). 5 This completes the procedure for loading paper in the bypass tray. ■ Loading tabbed paper in the bypass tray [Example] Make sure that the positions of the tabs correspond with the originals as shown below. Original Tabbed paper Front side JKL GHI DEF ABC 1st page 2nd page 3rd page 4th page Place the tabbed paper face up. 1st page 2nd page 3rd page 4th page 3 Insert the copy paper all the way into the bypass tray. (Do not force the paper in.) Place the copy paper face up. If the bypass tray guides are set wider than the copy paper, the inside of the machine may become soiled, resulting in smudges on succeeding copies. A gap may cause skewing or wrinkling. Front 2-10
-
 1
1 -
2
-
3
-
4
-
5
-
6
-
7
-
8
-
9
-
10
-
11
-
12
-
13
-
14
-
15
-
16
-
17
-
18
-
19
-
20
-
21
-
22
-
23
-
24
-
25
-
26
-
27
-
28
-
29
-
30
-
31
-
32
-
33
-
34
-
 35
35 -
 36
36 -
 37
37 -
 38
38 -
 39
39 -
 40
40 -
 41
41 -
 42
42 -
 43
43 -
 44
44 -
 45
45 -
46
-
47
-
48
-
49
-
50
-
51
-
52
-
53
-
54
-
55
-
56
-
57
-
58
-
59
-
60
-
61
-
62
-
63
-
64
-
65
-
66
-
67
-
68
-
69
-
70
-
71
-
72
-
73
-
74
-
75
-
76
-
77
-
78
-
79
-
80
-
81
-
82
-
83
-
84
-
85
-
86
-
87
-
88
-
89
-
90
-
91
-
92
-
93
-
94
-
95
-
96
-
97
-
98
-
99
-
100
-
101
-
102
-
103
-
104
-
105
-
106
-
107
-
108
-
109
-
110
-
111
-
112
-
113
-
114
-
115
-
116
-
117
-
118
-
119
-
120
-
121
-
122
-
123
-
124
-
125
-
126
-
127
-
128
-
129
-
130
-
131
-
132
-
133
-
134
-
135
-
136
-
137
-
138
-
139
-
140
-
141
-
142
-
143
-
144
-
145
-
146
-
147
-
148
-
149
-
150
-
151
-
152
-
153
-
154
-
155
-
156
-
157
-
158
-
159
-
160
-
161
-
162
-
163
-
164
-
165
-
166
-
167
-
168
-
169
-
170
-
171
-
172
-
173
-
174
-
175
-
176
-
177
-
178
-
179
-
180
-
181
-
182
-
183
-
184
-
185
-
186
-
187
-
188
-
189
-
190
-
191
-
192
-
193
-
194
-
195
-
196
-
197
-
198
-
199
-
200
 |
 |