Sharp MX-M700 MX-M550 MX-M620 MX-M700 Operation Manual - Page 165
Filing
 |
View all Sharp MX-M700 manuals
Add to My Manuals
Save this manual to your list of manuals |
Page 165 highlights
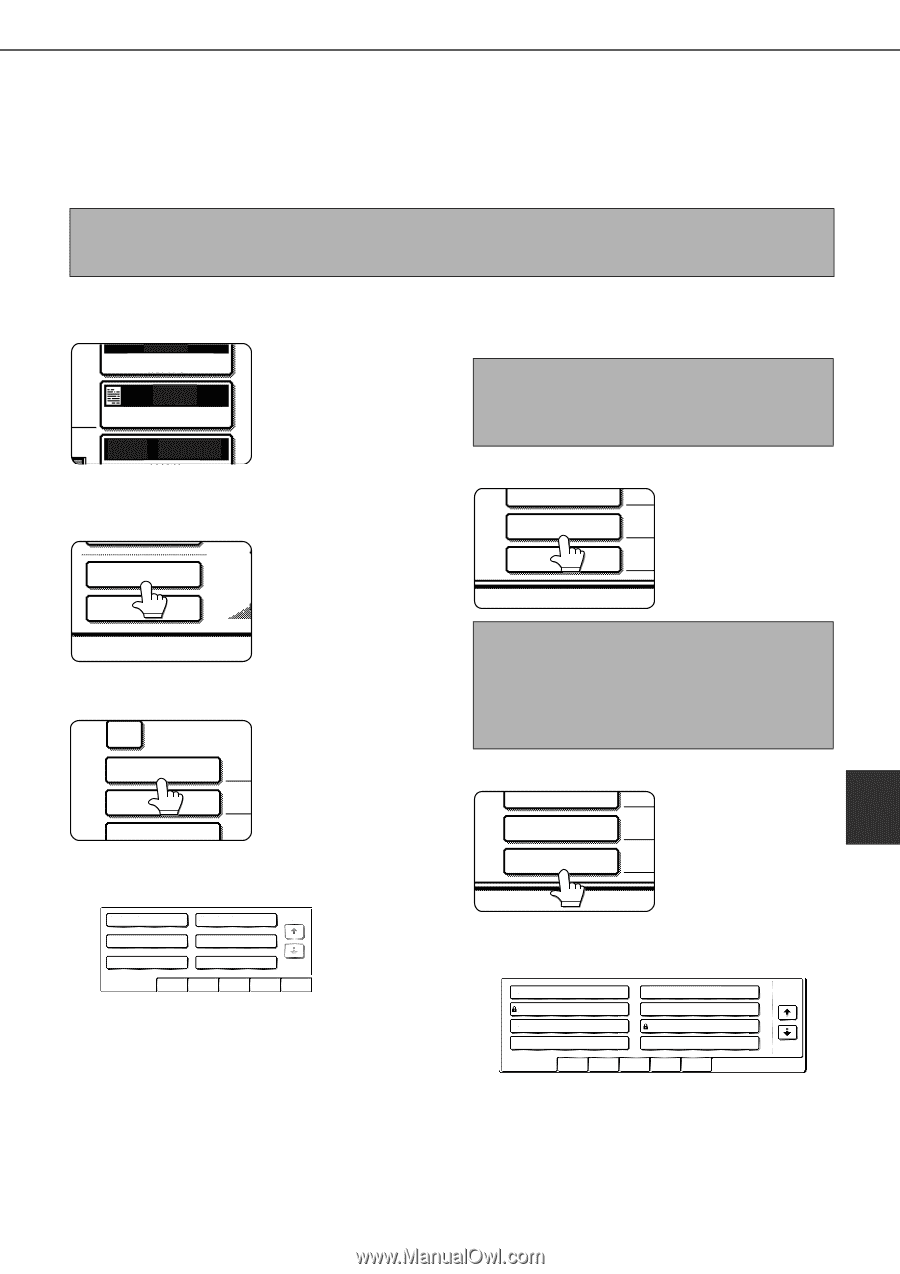
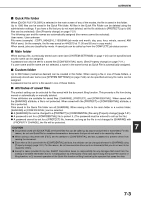
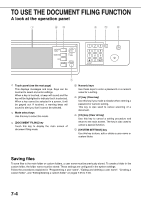
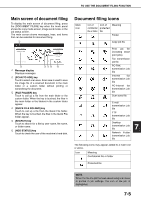
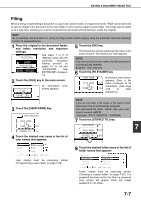
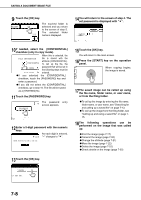
SAVING A DOCUMENT IMAGE FILE Filing When printing or transmitting a document in copy mode, printer mode, or image send mode, "FILE" can be selected to save an image of the document to the main folder or a previously created custom folder. The image can be called up at a later time, allowing you to print or transmit the document without having to locate the original. NOTE As an example, the procedure for using the filing function while copying using the automatic document feeding function is explained below. 1 Place the original in the document feeder and select resolution and exposure settings. AUTO ORIGINAL See steps 1 to 8 of "Making copies with the AUTO EXPOSURE automatic document feeding function" on pages 4-7 to 4-8 and AUTO 81/2x11 "ADJUSTING THE EXPOSURE" on page 4- 14. 2 Touch the [FILE] key in the main screen. FILE An information entry screen appears. 5 Touch the [OK] key. The touched user name is selected and you return to the screen of step 3. The selected user name appears. NOTE If you do not select a user name, the following name is automatically selected: Example : User unknown 6 Touch the [FILE NAME] key. USER NAME FILE NAME STORED TO: A character entry screen appears. Enter a file COPY name (maximum of 30 characters). (See page MAI 7-29 to enter characters.) QUICK FILE 3 Touch the [USER NAME] key. CONFIDENTIAL USER NAME NOTE If you do not enter a file name, a file name in the following format is automatically assigned: Auto generated file name : Month, day, year, hour, minute, second, AM/PM (Example : COPY_04042010_113050AM) 7 Touch the [STORED TO:] key. FILE NAME COPY STORED TO: MAI USER NAME 7 FILE NAME COPY 4 Touch the desired user name in the list of user names that appears. STORED TO: MAIN Suzuki Sasaki 1/1 Hasegawa Nakata Ono Yamada ALL USERS ABCD EFGHI JKLMN OPQRST UVWXYZ User names must be previously stored ("Programming a user name" on page 7-25). 8 Touch the desired folder name in the list of folder names that appears CUSTOM FOLDER 1 CUSTOM FOLDER 2 1/2 CUSTOM FOLDER 3 CUSTOM FOLDER 4 CUSTOM FOLDER 5 CUSTOM FOLDER 6 CUSTOM FOLDER 7 CUSTOM FOLDER 8 ALL FOLDERS ABCD EFGHI JKLMN OPQRS UVWXY Folder names must be previously stored. ("Creating a custom folder" on page 7-27). If a password has been set for the folder, a password entry screen will appear. Enter the 5-digit password for the folder. 7-7
-
 1
1 -
2
-
3
-
4
-
5
-
6
-
7
-
8
-
9
-
10
-
11
-
12
-
13
-
14
-
15
-
16
-
17
-
18
-
19
-
20
-
21
-
22
-
23
-
24
-
25
-
26
-
27
-
28
-
29
-
30
-
31
-
32
-
33
-
34
-
35
-
36
-
37
-
38
-
39
-
40
-
41
-
42
-
43
-
44
-
45
-
46
-
47
-
48
-
49
-
50
-
51
-
52
-
53
-
54
-
55
-
56
-
57
-
58
-
59
-
60
-
61
-
62
-
63
-
64
-
65
-
66
-
67
-
68
-
69
-
70
-
71
-
72
-
73
-
74
-
75
-
76
-
77
-
78
-
79
-
80
-
81
-
82
-
83
-
84
-
85
-
86
-
87
-
88
-
89
-
90
-
91
-
92
-
93
-
94
-
95
-
96
-
97
-
98
-
99
-
100
-
101
-
102
-
103
-
104
-
105
-
106
-
107
-
108
-
109
-
110
-
111
-
112
-
113
-
114
-
115
-
116
-
117
-
118
-
119
-
120
-
121
-
122
-
123
-
124
-
125
-
126
-
127
-
128
-
129
-
130
-
131
-
132
-
133
-
134
-
135
-
136
-
137
-
138
-
139
-
140
-
141
-
142
-
143
-
144
-
145
-
146
-
147
-
148
-
149
-
150
-
151
-
152
-
153
-
154
-
155
-
156
-
157
-
158
-
159
-
 160
160 -
 161
161 -
 162
162 -
 163
163 -
 164
164 -
 165
165 -
 166
166 -
 167
167 -
 168
168 -
 169
169 -
 170
170 -
171
-
172
-
173
-
174
-
175
-
176
-
177
-
178
-
179
-
180
-
181
-
182
-
183
-
184
-
185
-
186
-
187
-
188
-
189
-
190
-
191
-
192
-
193
-
194
-
195
-
196
-
197
-
198
-
199
-
200
 |
 |