Sharp MX-M700 MX-M550 MX-M620 MX-M700 Operation Manual - Page 36
Changing the paper size in paper tray 4
 |
View all Sharp MX-M700 manuals
Add to My Manuals
Save this manual to your list of manuals |
Page 36 highlights
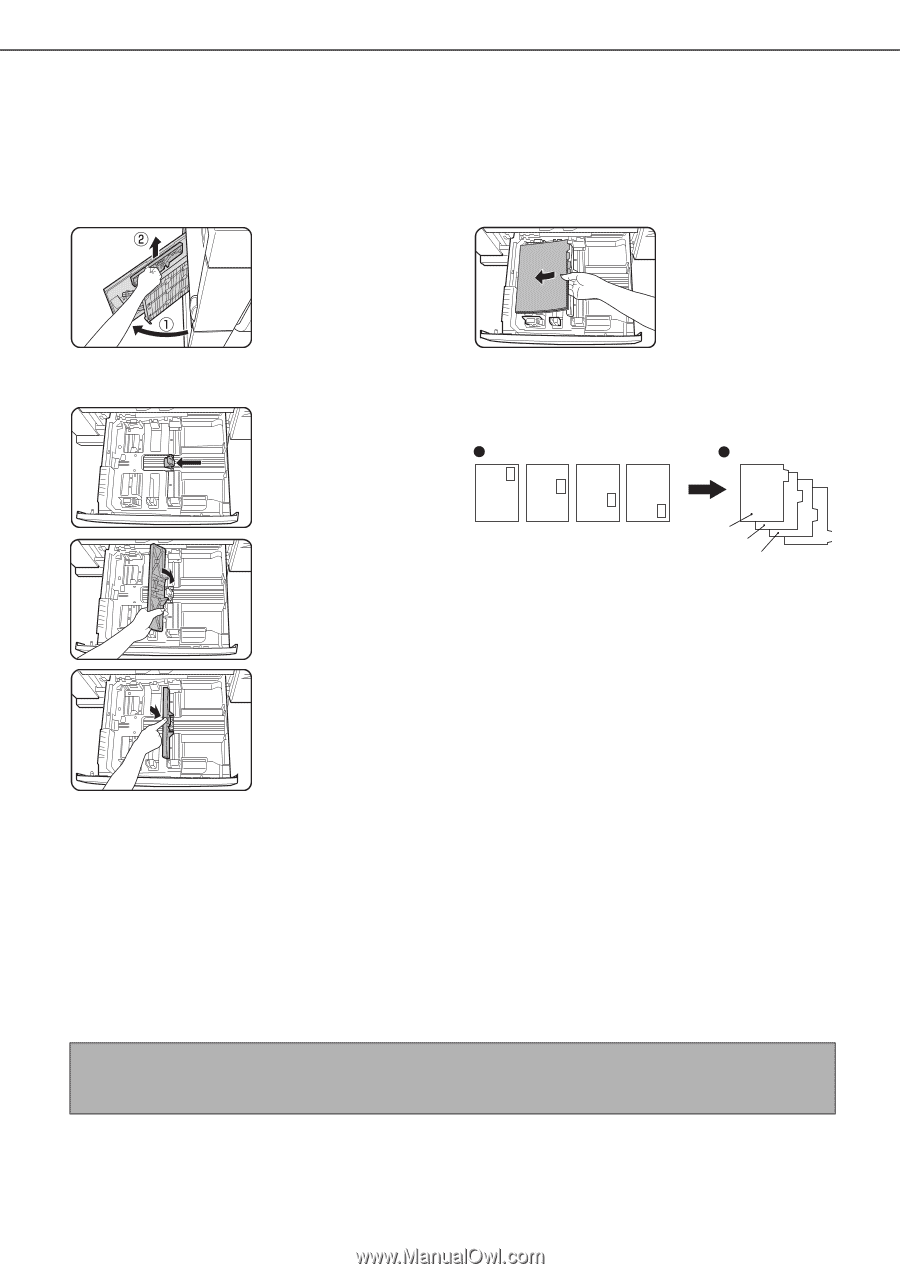
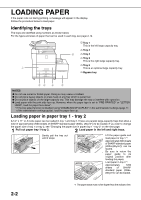
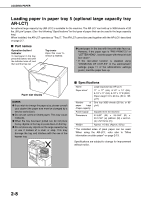
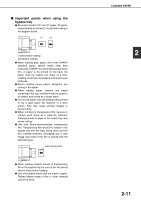
LOADING PAPER ■ Loading tabbed paper When using tabbed paper, follow the steps below to attach the special guide to the divider plate at the bottom edge of the tabbed paper. (Tabbed paper cannot be used in tray 4.) 1 Take out the tabbed paper guide. The guide is stored inside the left side of the machine as shown. Be sure to replace the guide when you have finished using it. 3 Place the tabbed paper in the tray. Place the tabbed paper with the print side face up. 2 Pull out the tray and attach the guide. Slide the divider plate to the position of the bottom edge of the tabbed paper and attach the guide so that it covers the divider plate. [Example] Make sure that the positions of the tabs correspond with the originals as shown below. Original Tabbed paper JKL GHI DEF ABC Front side 1st page 2nd page 3rd page 4th page 1st page 2nd page 3rd page 4th page 4 Gently push the tray in and set the paper type to tabbed paper. (See "Setting the paper type and paper size" on page 2-14) ■ Loading transparency film Be sure to load transparency film with the label facing down and the film oriented vertically. Smudging and a dirty image may result if the film is loaded with the label facing up. (Transparency film cannot be used in tray 4.) Changing the paper size in paper tray 4 Plain paper from 11" x 17" to 7-1/4" x 10-1/2"R size (A3 to B5) can be loaded in tray 4. For paper that can be used, see "Specifications of paper trays (Types and sizes of paper that can be used in the trays)" on page 2-12. The procedures for loading paper in tray 4 and changing the paper size are the same as for tray 3 (see page 2-5). NOTE When referring to the explanations of tray 3, keep in mind that special papers such as tabbed paper and transparency film cannot be used in tray 4. Use tray 3 for special paper. 2-6
-
 1
1 -
2
-
3
-
4
-
5
-
6
-
7
-
8
-
9
-
10
-
11
-
12
-
13
-
14
-
15
-
16
-
17
-
18
-
19
-
20
-
21
-
22
-
23
-
24
-
25
-
26
-
27
-
28
-
29
-
30
-
 31
31 -
 32
32 -
 33
33 -
 34
34 -
 35
35 -
 36
36 -
 37
37 -
 38
38 -
 39
39 -
 40
40 -
 41
41 -
42
-
43
-
44
-
45
-
46
-
47
-
48
-
49
-
50
-
51
-
52
-
53
-
54
-
55
-
56
-
57
-
58
-
59
-
60
-
61
-
62
-
63
-
64
-
65
-
66
-
67
-
68
-
69
-
70
-
71
-
72
-
73
-
74
-
75
-
76
-
77
-
78
-
79
-
80
-
81
-
82
-
83
-
84
-
85
-
86
-
87
-
88
-
89
-
90
-
91
-
92
-
93
-
94
-
95
-
96
-
97
-
98
-
99
-
100
-
101
-
102
-
103
-
104
-
105
-
106
-
107
-
108
-
109
-
110
-
111
-
112
-
113
-
114
-
115
-
116
-
117
-
118
-
119
-
120
-
121
-
122
-
123
-
124
-
125
-
126
-
127
-
128
-
129
-
130
-
131
-
132
-
133
-
134
-
135
-
136
-
137
-
138
-
139
-
140
-
141
-
142
-
143
-
144
-
145
-
146
-
147
-
148
-
149
-
150
-
151
-
152
-
153
-
154
-
155
-
156
-
157
-
158
-
159
-
160
-
161
-
162
-
163
-
164
-
165
-
166
-
167
-
168
-
169
-
170
-
171
-
172
-
173
-
174
-
175
-
176
-
177
-
178
-
179
-
180
-
181
-
182
-
183
-
184
-
185
-
186
-
187
-
188
-
189
-
190
-
191
-
192
-
193
-
194
-
195
-
196
-
197
-
198
-
199
-
200
 |
 |