Sharp MX-M700 MX-M550 MX-M620 MX-M700 Operation Manual - Page 75
Removing a misfeed
 |
View all Sharp MX-M700 manuals
Add to My Manuals
Save this manual to your list of manuals |
Page 75 highlights
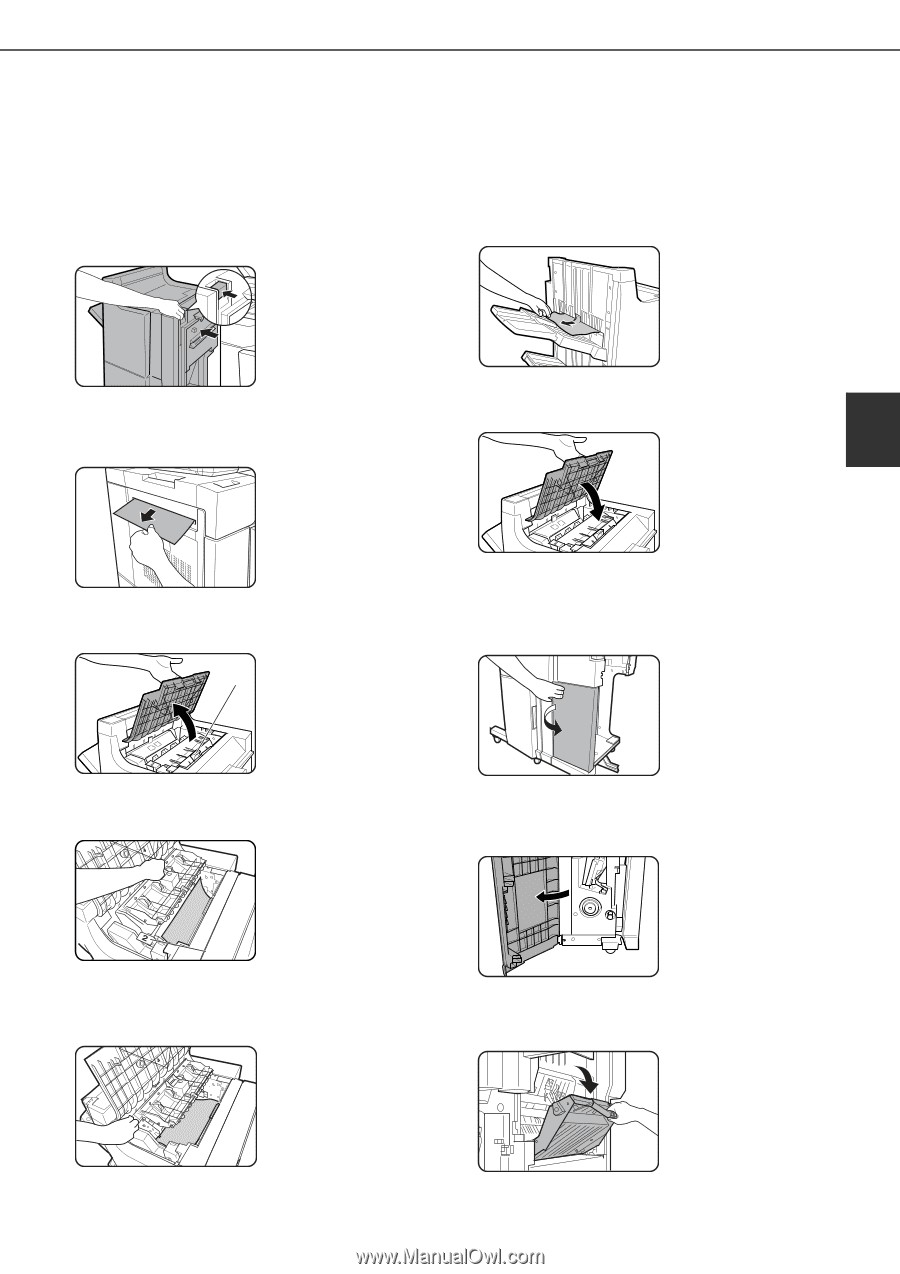
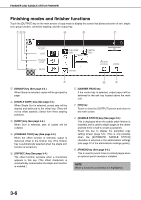
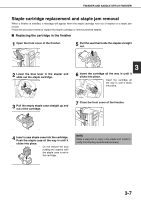
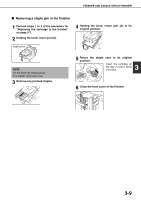
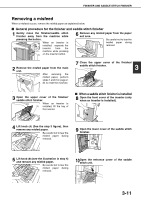
FINISHER AND SADDLE STITCH FINISHER Removing a misfeed When a misfeed occurs, remove the misfed paper as explained below. ■ General procedure for the finisher and saddle stitch finisher 1 Gently move the finisher/saddle stitch finisher away from the machine while pressing the button. When an inserter is installed, separate the inserter from the machine while pressing on the inserter button. 6 Remove any misfed paper from the paper exit area. Be careful not to tear the misfed paper during removal. 2 Remove the misfed paper from the main unit. After removing the misfed paper, perform steps 1 and 3 on page 224 to reset the machine. Close the upper cover of the finisher/ 7 3 saddle stitch finisher. 3 Open the upper cover of the finisher/ saddle stitch finisher. When an inserter is (A) installed, lift the tray of the inserter. ■ When a saddle stitch finisher is installed 8 Open the front cover of the inserter (only when an inserter is installed). 4 Lift knob (A) (See the step 3 figure), then remove any misfed paper. Be careful not to tear the misfed paper during removal. 9 Open the lower cover of the saddle stitch finisher. (B) 5 Lift knob (B) (see the illustration in step 4) and remove any misfed paper. Be careful not to tear the misfed paper during removal. 10Open the entrance cover of the saddle stitch unit. 3-11
-
 1
1 -
2
-
3
-
4
-
5
-
6
-
7
-
8
-
9
-
10
-
11
-
12
-
13
-
14
-
15
-
16
-
17
-
18
-
19
-
20
-
21
-
22
-
23
-
24
-
25
-
26
-
27
-
28
-
29
-
30
-
31
-
32
-
33
-
34
-
35
-
36
-
37
-
38
-
39
-
40
-
41
-
42
-
43
-
44
-
45
-
46
-
47
-
48
-
49
-
50
-
51
-
52
-
53
-
54
-
55
-
56
-
57
-
58
-
59
-
60
-
61
-
62
-
63
-
64
-
65
-
66
-
67
-
68
-
69
-
 70
70 -
 71
71 -
 72
72 -
 73
73 -
 74
74 -
 75
75 -
 76
76 -
 77
77 -
 78
78 -
 79
79 -
 80
80 -
81
-
82
-
83
-
84
-
85
-
86
-
87
-
88
-
89
-
90
-
91
-
92
-
93
-
94
-
95
-
96
-
97
-
98
-
99
-
100
-
101
-
102
-
103
-
104
-
105
-
106
-
107
-
108
-
109
-
110
-
111
-
112
-
113
-
114
-
115
-
116
-
117
-
118
-
119
-
120
-
121
-
122
-
123
-
124
-
125
-
126
-
127
-
128
-
129
-
130
-
131
-
132
-
133
-
134
-
135
-
136
-
137
-
138
-
139
-
140
-
141
-
142
-
143
-
144
-
145
-
146
-
147
-
148
-
149
-
150
-
151
-
152
-
153
-
154
-
155
-
156
-
157
-
158
-
159
-
160
-
161
-
162
-
163
-
164
-
165
-
166
-
167
-
168
-
169
-
170
-
171
-
172
-
173
-
174
-
175
-
176
-
177
-
178
-
179
-
180
-
181
-
182
-
183
-
184
-
185
-
186
-
187
-
188
-
189
-
190
-
191
-
192
-
193
-
194
-
195
-
196
-
197
-
198
-
199
-
200
 |
 |