Adobe 25510629 User Guide - Page 107
Setting a pause point for a VirtualTrak effect, Adjusting the volume of a video clip
 |
UPC - 883919067353
View all Adobe 25510629 manuals
Add to My Manuals
Save this manual to your list of manuals |
Page 107 highlights
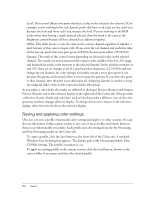
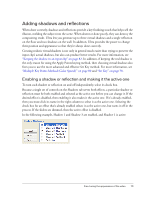
Setting a pause point for a VirtualTrak effect Some VirtualTrak sets let you pause the effect so that the virtual camera move allows time for a video clip to play, subject to talk, or credits to roll. For example, in the "Library Book to Talent with Pause" set in the Master Sets Library 1 (MSL1), the camera starts with a tight shot on a book containing an inset Source B. If you insert a video in the Source B, you must program a pause time so that the camera waits the appropriate length of time before beginning the virtual pan to the location of the input clip. You may want to enter a pause time for a still image as well if you want the audience to have time to study it. Ultra defines the Pause Begins At time; you specify the Pause Ends At time. Typically, it takes the following steps to accomplish this: 1. Select the correct Input Source. 2. In the Input Preview Monitor, drag the preview slider to the point where you want the virtual camera move to start or resume. 3. Click the Set button in the Pause Point Setting control area on the Scene tab. This applies the time from the Output Preview Monitor. Adjusting the volume of a video clip For any video clip that has an audio track, you can control the volume by selecting the correct layer and adjusting the Volume slider on the Input tab. This is particularly useful for eliminating ambient audio from a clip that you use as the source for any layer other than the input clip. To mute the audio, move the slider all of the way to the left. This setting affects the volume in the final output file and what you hear in Ultra. Fine-tuning the appearance of the video This section covers a variety of refinements that you can make in Ultra to put the finishing touches on a composited shot. These changes can make the difference between a scene that is merely effective and one that is truly convincing. The following are changes you can make outside of Ultra to modify your video: Fine-tuning the appearance of the video 107
-
 1
1 -
2
-
3
-
4
-
5
-
6
-
7
-
8
-
9
-
10
-
11
-
12
-
13
-
14
-
15
-
16
-
17
-
18
-
19
-
20
-
21
-
22
-
23
-
24
-
25
-
26
-
27
-
28
-
29
-
30
-
31
-
32
-
33
-
34
-
35
-
36
-
37
-
38
-
39
-
40
-
41
-
42
-
43
-
44
-
45
-
46
-
47
-
48
-
49
-
50
-
51
-
52
-
53
-
54
-
55
-
56
-
57
-
58
-
59
-
60
-
61
-
62
-
63
-
64
-
65
-
66
-
67
-
68
-
69
-
70
-
71
-
72
-
73
-
74
-
75
-
76
-
77
-
78
-
79
-
80
-
81
-
82
-
83
-
84
-
85
-
86
-
87
-
88
-
89
-
90
-
91
-
92
-
93
-
94
-
95
-
96
-
97
-
98
-
99
-
100
-
101
-
 102
102 -
 103
103 -
 104
104 -
 105
105 -
 106
106 -
 107
107 -
 108
108 -
 109
109 -
 110
110 -
 111
111 -
 112
112 -
113
-
114
-
115
-
116
-
117
-
118
-
119
-
120
-
121
-
122
-
123
-
124
-
125
-
126
-
127
-
128
-
129
-
130
 |
 |
