Adobe 25510629 User Guide - Page 108
Correcting colors
 |
UPC - 883919067353
View all Adobe 25510629 manuals
Add to My Manuals
Save this manual to your list of manuals |
Page 108 highlights
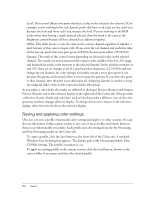
Matching mixed media: If the input clips are DV that were compressed, but the background was shot on film, the two sources may not match perfectly. Typically, the film footage looks too clean compared to the subject. Since there's no way to make the DV clip as clean as the film, you can compress the film clip in an NLE, such as Premiere Pro, using the same codec, or you can add noise using Adobe Premiere Pro. Matching the audio to the virtual environment: In some situations, you may want to process the audio for a composited scene to make it sound like it was recorded in an environment similar to the virtual set in which the scene takes place. For example, if a scene is set in a large virtual cathedral, you may want to add some reverb to the actor's voice. You can also change the reverb and equalizer settings to simulate relative microphone distance between tight shots and wide shots. You may also want to mix in subtle appropriate ambient sound effects, such as street noise or wind in the trees. You cannot change the audio in Ultra. You can use an application such as Adobe Audition or Soundbooth. Correcting colors Ultra lets you adjust the colors of any source in a session. For the input clip, you can make separate adjustments for pre-processing and post-processing. Changes made in the PreProcessing mode are applied to the source before being keyed and, therefore, affect what the keyer sees and has to work with. Post-Processing adjustments are applied after keying. If the color of the background is not well-saturated and, therefore, is not keying well, then you may want to change them in the Pre-Processing mode. If the keyed subject does not fit in well with the selected virtual set or requires corrections to counter pre-processing color adjustments, then you may want to adjust its colors in the Post-Processing mode. To select the appropriate mode, select its option at the top of the control area. The controls in these modes are identical with the exception of the Gamma slider, which is available only in the Post-Processing mode. 108 How to
-
 1
1 -
2
-
3
-
4
-
5
-
6
-
7
-
8
-
9
-
10
-
11
-
12
-
13
-
14
-
15
-
16
-
17
-
18
-
19
-
20
-
21
-
22
-
23
-
24
-
25
-
26
-
27
-
28
-
29
-
30
-
31
-
32
-
33
-
34
-
35
-
36
-
37
-
38
-
39
-
40
-
41
-
42
-
43
-
44
-
45
-
46
-
47
-
48
-
49
-
50
-
51
-
52
-
53
-
54
-
55
-
56
-
57
-
58
-
59
-
60
-
61
-
62
-
63
-
64
-
65
-
66
-
67
-
68
-
69
-
70
-
71
-
72
-
73
-
74
-
75
-
76
-
77
-
78
-
79
-
80
-
81
-
82
-
83
-
84
-
85
-
86
-
87
-
88
-
89
-
90
-
91
-
92
-
93
-
94
-
95
-
96
-
97
-
98
-
99
-
100
-
101
-
102
-
 103
103 -
 104
104 -
 105
105 -
 106
106 -
 107
107 -
 108
108 -
 109
109 -
 110
110 -
 111
111 -
 112
112 -
 113
113 -
114
-
115
-
116
-
117
-
118
-
119
-
120
-
121
-
122
-
123
-
124
-
125
-
126
-
127
-
128
-
129
-
130
 |
 |
