Adobe 25510629 User Guide - Page 85
Viewing the key, Basic keying workflows, right-click the Background thumbnail
 |
UPC - 883919067353
View all Adobe 25510629 manuals
Add to My Manuals
Save this manual to your list of manuals |
Page 85 highlights
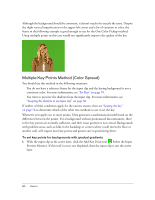
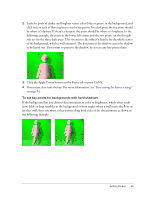
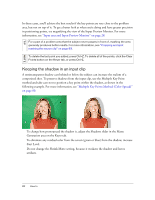
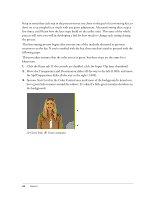
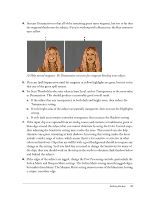
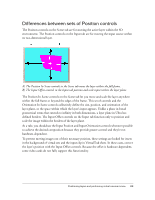
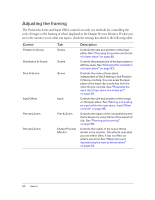
NOTE Viewing the key The first step in fine-tuning the keyer settings is to see what the key looks like. Two measures that will help you see the key better are zooming in on a trouble spots and switching to a neutral background. For information on panning and zooming the view in the monitor, see "Magnifying and repositioning the view in the monitors" on page 33. Switching backgrounds Switching temporarily to a pure white, pure black, or checkerboard background can help you detect and eliminate imperfections in the key. For your convenience, these useful backgrounds are built into the Background layer thumbnail. Right-click the Background layer thumbnail, and try the different options to see which one best reveals various problems. In general, black and white work help you check the key along the edges and isolate imperfections in the input clip's background, and the checkerboard backdrop helps you detect an unwanted transparency. To change back to the desired background when you're finished changing the keyer settings, right-click the Background thumbnail, and choose Reassign Last Source to retrieve the original image. For most keyed scenes, a pure white or black test background represents the most challenging possible keying situation. You can use these backgrounds to tune the key more precisely than you can with an actual background. However, trying to eliminate all of the shading or noise in the video can be a frustrating and impossible challenge and can actually yield less appealing results than leaving the key a bit less than perfect. This is because achieving a perfect key can require extreme settings that reduce the quality of the overall appearance. For example, removing the last hint of green in the subject's hair can result in a loss of definition along the edges. When viewed against a real-world background, minor flaws in the key are usually not visible. Therefore, Adobe recommends that you use the white and black test backgrounds only for broad changes, and then use the actual background over which the clip will be composited to fine-tune the settings. If you later change the background, you may need to readjust the key. Basic keying workflows This section suggests a sequence of steps to fine-tune a key. The order of the steps is important because various settings on the Keyer tab interact with one another. Proceeding in a different order may result in taking one step forward in one regard, only to find that you've moved back two steps in another regard. Setting the key 85
-
 1
1 -
2
-
3
-
4
-
5
-
6
-
7
-
8
-
9
-
10
-
11
-
12
-
13
-
14
-
15
-
16
-
17
-
18
-
19
-
20
-
21
-
22
-
23
-
24
-
25
-
26
-
27
-
28
-
29
-
30
-
31
-
32
-
33
-
34
-
35
-
36
-
37
-
38
-
39
-
40
-
41
-
42
-
43
-
44
-
45
-
46
-
47
-
48
-
49
-
50
-
51
-
52
-
53
-
54
-
55
-
56
-
57
-
58
-
59
-
60
-
61
-
62
-
63
-
64
-
65
-
66
-
67
-
68
-
69
-
70
-
71
-
72
-
73
-
74
-
75
-
76
-
77
-
78
-
79
-
 80
80 -
 81
81 -
 82
82 -
 83
83 -
 84
84 -
 85
85 -
 86
86 -
 87
87 -
 88
88 -
 89
89 -
 90
90 -
91
-
92
-
93
-
94
-
95
-
96
-
97
-
98
-
99
-
100
-
101
-
102
-
103
-
104
-
105
-
106
-
107
-
108
-
109
-
110
-
111
-
112
-
113
-
114
-
115
-
116
-
117
-
118
-
119
-
120
-
121
-
122
-
123
-
124
-
125
-
126
-
127
-
128
-
129
-
130
 |
 |