Adobe 25510629 User Guide - Page 87
Soften Matte and Sharpen Matte settings. The Soften Matte setting smooths jagged edges
 |
UPC - 883919067353
View all Adobe 25510629 manuals
Add to My Manuals
Save this manual to your list of manuals |
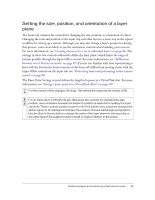
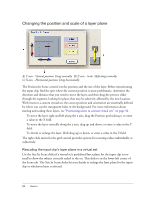
Page 87 highlights
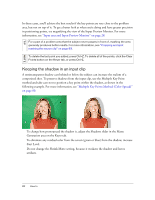
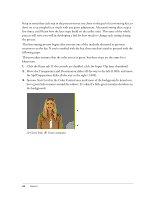
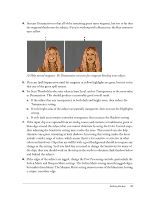
4. Increase Desaturation so that all of the remaining green turns magenta, but not so far that the magenta bleeds onto the subject. If you're working with a bluescreen, the blue remnants turn yellow. A) Halo turned magenta. B) Desaturation went too far; magenta bleeding onto subject. 5. Decrease Spill Suppression until the magenta or yellow highlights are gone, but not so far that any of the green spill returns. 6. Set Start Threshold to the same value as Start Level, and set Transparency to the same value as Desaturation. This should produce a reasonably good overall result. a. If the subject has any transparency in both dark and bright areas, then reduce the Transparency setting. b. If only bright areas of the subject are partially transparent, then increase the Highlights setting. c. If only dark areas remain somewhat transparent, then increase the Shadows setting. 7. If the input clip was captured from an analog source and contains a troublesome green or blue edge around the subject that you cannot eliminate by using the Color Control steps, then adjusting the Sensitivity setting may resolve the issue. This control can also help eliminate any green remaining in dark shadows. Increasing this setting makes the keyer include a wider range of colors, which means that it's less sensitive or selective in what colors are keyed out. Clips that are well lit with a good background should not require any change to this setting. So if you find that you need to change the Sensitivity for many of the clips, then you should work on the setup in the studio to eliminate dark shadows below and behind the subject. 8. If the edges of the subject are jagged, change the Post-Processing controls, particularly the Soften Matte and Sharpen Matte settings. The Soften Matte setting smooths jagged edges, but makes them blurry. The Sharpen Matte setting removes some of the blurriness, leaving a crisper, smoother edge. Setting the key 87
-
 1
1 -
2
-
3
-
4
-
5
-
6
-
7
-
8
-
9
-
10
-
11
-
12
-
13
-
14
-
15
-
16
-
17
-
18
-
19
-
20
-
21
-
22
-
23
-
24
-
25
-
26
-
27
-
28
-
29
-
30
-
31
-
32
-
33
-
34
-
35
-
36
-
37
-
38
-
39
-
40
-
41
-
42
-
43
-
44
-
45
-
46
-
47
-
48
-
49
-
50
-
51
-
52
-
53
-
54
-
55
-
56
-
57
-
58
-
59
-
60
-
61
-
62
-
63
-
64
-
65
-
66
-
67
-
68
-
69
-
70
-
71
-
72
-
73
-
74
-
75
-
76
-
77
-
78
-
79
-
80
-
81
-
 82
82 -
 83
83 -
 84
84 -
 85
85 -
 86
86 -
 87
87 -
 88
88 -
 89
89 -
 90
90 -
 91
91 -
 92
92 -
93
-
94
-
95
-
96
-
97
-
98
-
99
-
100
-
101
-
102
-
103
-
104
-
105
-
106
-
107
-
108
-
109
-
110
-
111
-
112
-
113
-
114
-
115
-
116
-
117
-
118
-
119
-
120
-
121
-
122
-
123
-
124
-
125
-
126
-
127
-
128
-
129
-
130
 |
 |
