Adobe 25510629 User Guide - Page 82
Keeping the shadow in an input clip, Input area and Input Preview Monitor
 |
UPC - 883919067353
View all Adobe 25510629 manuals
Add to My Manuals
Save this manual to your list of manuals |
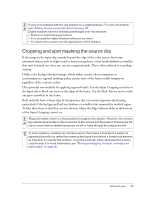
Page 82 highlights
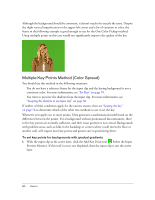
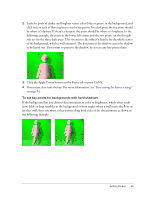
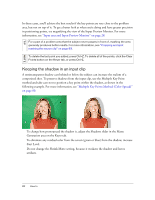
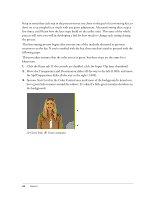
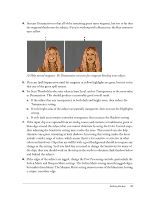
TIP NOTE In these cases, you'll achieve the best results if the key points are very close to the problem area, but not on top of it. To get a better look at what you're doing and have greater precision in positioning points, try magnifying the view of the Input Preview Monitor. For more information, see "Input area and Input Preview Monitor" on page 28. For a part of a problem area that the subject never passes in front of, masking the area generally produces better results. For more information, see "Cropping and spot masking the source clip" on page 83. To delete the last point you added, press Ctrl+Z. To delete all of the points, click the Clear Points button on the Keyer tab, or press Ctrl+E. Keeping the shadow in an input clip A semitransparent shadow cast behind or below the subject can increase the realism of a composited shot. To preserve shadows from the input clip, use the Multiple Key Point method and take care not to position a key point within the shadow, as shown in the following example. For more information, see "Multiple Key Points Method (Color Spread)" on page 80. To change how pronounced the shadow is, adjust the Shadows slider in the Matte Generation area on the Keyer tab. To eliminate any residual color from the screen (green or blue) from the shadow, increase Start Level. Do not change the Shrink Matte setting, because it weakens the shadow and leaves artifacts. 82 How to
-
 1
1 -
2
-
3
-
4
-
5
-
6
-
7
-
8
-
9
-
10
-
11
-
12
-
13
-
14
-
15
-
16
-
17
-
18
-
19
-
20
-
21
-
22
-
23
-
24
-
25
-
26
-
27
-
28
-
29
-
30
-
31
-
32
-
33
-
34
-
35
-
36
-
37
-
38
-
39
-
40
-
41
-
42
-
43
-
44
-
45
-
46
-
47
-
48
-
49
-
50
-
51
-
52
-
53
-
54
-
55
-
56
-
57
-
58
-
59
-
60
-
61
-
62
-
63
-
64
-
65
-
66
-
67
-
68
-
69
-
70
-
71
-
72
-
73
-
74
-
75
-
76
-
 77
77 -
 78
78 -
 79
79 -
 80
80 -
 81
81 -
 82
82 -
 83
83 -
 84
84 -
 85
85 -
 86
86 -
 87
87 -
88
-
89
-
90
-
91
-
92
-
93
-
94
-
95
-
96
-
97
-
98
-
99
-
100
-
101
-
102
-
103
-
104
-
105
-
106
-
107
-
108
-
109
-
110
-
111
-
112
-
113
-
114
-
115
-
116
-
117
-
118
-
119
-
120
-
121
-
122
-
123
-
124
-
125
-
126
-
127
-
128
-
129
-
130
 |
 |
