Adobe 25510629 User Guide - Page 79
Setting Key Points (Apply Points Method), Single Key Point Method (One Color Pickup)
 |
UPC - 883919067353
View all Adobe 25510629 manuals
Add to My Manuals
Save this manual to your list of manuals |
Page 79 highlights
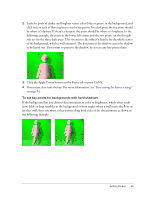
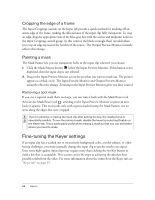
Setting Key Points (Apply Points Method) Ultra provides two methods for setting the key using key points that you select. In general, you should only need to use one of these methods if you do not have a reference frame that shows only the color screen background with nothing in the foreground. If the background is a consistent, saturated shade of green or blue, then you should use the Single Key Point method. For more information, see "Single Key Point Method (One Color Pickup)" on page 79. If the color, brightness, and saturation of the background are not consistent throughout the frame, then you should use the Multiple Key Points method. For more information, see "Multiple Key Points Method (Color Spread)" on page 80. Single Key Point Method (One Color Pickup) You should use this method if you do not have a reference frame for the input clip and the keying background is well lit and consistent in color with no pronounced shadows or uneven shading. For more information, see "Set Key" on page 78. If this is not the case for the current session, see "Setting the key" on page 76 to determine which of the other two methods to use to set the key. Unlike the other methods of setting the key, this method does not use a mathematical model. Instead, this method samples a single color and subtracts that from the entire image, hence the name One Color Pickup for the keying method. To set the key 1. With the input clip as the active layer, click the Add Key Point tool below the Input Preview Monitor. If this tool's icon is not displayed, then the input clip is not the active layer. 2. Click a single spot in the background to set the key point. Because the background should be a consistent color if you're using this method, it doesn't matter where you set the key point. If there are minor irregularities in the background, don't set the key point near them. 3. Click the Apply Points button or press Ctrl+K. 4. If necessary, fine-tune the key. For more information, see "Fine-tuning the Keyer settings" on page 84. Setting the key 79
-
 1
1 -
2
-
3
-
4
-
5
-
6
-
7
-
8
-
9
-
10
-
11
-
12
-
13
-
14
-
15
-
16
-
17
-
18
-
19
-
20
-
21
-
22
-
23
-
24
-
25
-
26
-
27
-
28
-
29
-
30
-
31
-
32
-
33
-
34
-
35
-
36
-
37
-
38
-
39
-
40
-
41
-
42
-
43
-
44
-
45
-
46
-
47
-
48
-
49
-
50
-
51
-
52
-
53
-
54
-
55
-
56
-
57
-
58
-
59
-
60
-
61
-
62
-
63
-
64
-
65
-
66
-
67
-
68
-
69
-
70
-
71
-
72
-
73
-
 74
74 -
 75
75 -
 76
76 -
 77
77 -
 78
78 -
 79
79 -
 80
80 -
 81
81 -
 82
82 -
 83
83 -
 84
84 -
85
-
86
-
87
-
88
-
89
-
90
-
91
-
92
-
93
-
94
-
95
-
96
-
97
-
98
-
99
-
100
-
101
-
102
-
103
-
104
-
105
-
106
-
107
-
108
-
109
-
110
-
111
-
112
-
113
-
114
-
115
-
116
-
117
-
118
-
119
-
120
-
121
-
122
-
123
-
124
-
125
-
126
-
127
-
128
-
129
-
130
 |
 |
