Adobe 25510629 User Guide - Page 88
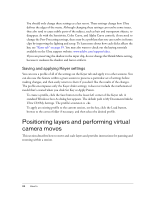
Saving and applying Keyer settings, Positioning layers and performing virtual camera moves
 |
UPC - 883919067353
View all Adobe 25510629 manuals
Add to My Manuals
Save this manual to your list of manuals |
Page 88 highlights
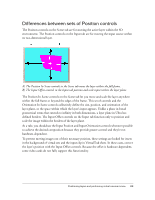
You should only change these settings as a last resort. These settings change how Ultra defines the edges of the matte. Although changing these settings can resolve some issues, they also tend to cause subtle parts of the subject, such as hair and transparent objects, to disappear. As with the Sensitivity, Color Curve, and Alpha Curve controls, if you need to change the Post-Processing settings, there may be a problem that you can resolve in future clips by improving the lighting and setup. To learn more about how each slider affects the key, see "Keyer tab" on page 35. You may also want to check out the keying tutorials available on the Ultra support website: www.adobe.com/support/ultra. If you are preserving the shadow in the input clip, do not change the Shrink Matte setting, because it weakens the shadow and leaves artifacts. Saving and applying Keyer settings You can save a profile of all of the settings on the Keyer tab and apply it to other sessions. You can also use this feature within a given session to preserve a particular set of settings before making changes, and then easily return to them if you don't like the results of the changes. The profile encompasses only the Keyer slider settings; it does not include the mathematical model that's created when you click Set Key or Apply Points. To create a profile, click the Save button in the lower-left corner of the Keyer tab. A standard Windows Save As dialog box appears. The default path is My Documents\Adobe Ultra CS3\My Settings. The profile's extension is .cks. To apply an existing profile to the current session, set the key, click the Load button, browse to the correct folder if necessary, and then select the desired profile. Positioning layers and performing virtual camera moves This section describes how to move and scale layers and provides instructions for panning and zooming within a session. 88 How to
-
 1
1 -
2
-
3
-
4
-
5
-
6
-
7
-
8
-
9
-
10
-
11
-
12
-
13
-
14
-
15
-
16
-
17
-
18
-
19
-
20
-
21
-
22
-
23
-
24
-
25
-
26
-
27
-
28
-
29
-
30
-
31
-
32
-
33
-
34
-
35
-
36
-
37
-
38
-
39
-
40
-
41
-
42
-
43
-
44
-
45
-
46
-
47
-
48
-
49
-
50
-
51
-
52
-
53
-
54
-
55
-
56
-
57
-
58
-
59
-
60
-
61
-
62
-
63
-
64
-
65
-
66
-
67
-
68
-
69
-
70
-
71
-
72
-
73
-
74
-
75
-
76
-
77
-
78
-
79
-
80
-
81
-
82
-
 83
83 -
 84
84 -
 85
85 -
 86
86 -
 87
87 -
 88
88 -
 89
89 -
 90
90 -
 91
91 -
 92
92 -
 93
93 -
94
-
95
-
96
-
97
-
98
-
99
-
100
-
101
-
102
-
103
-
104
-
105
-
106
-
107
-
108
-
109
-
110
-
111
-
112
-
113
-
114
-
115
-
116
-
117
-
118
-
119
-
120
-
121
-
122
-
123
-
124
-
125
-
126
-
127
-
128
-
129
-
130
 |
 |
