Brother International MacBroidery„ Embroidery Lettering Software for Mac - Page 26
Creating your own Background from a, Scanned Image
 |
View all Brother International MacBroidery„ Embroidery Lettering Software for Mac manuals
Add to My Manuals
Save this manual to your list of manuals |
Page 26 highlights
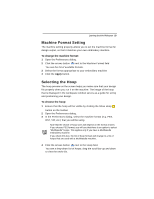
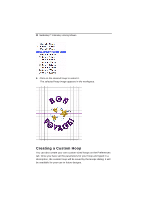
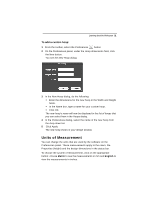
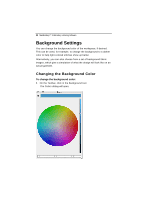
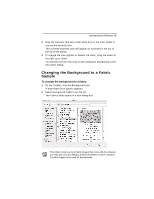
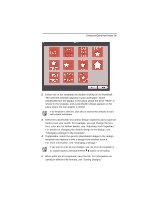
24 MacBroidery™ Embroidery Lettering Software 3 Select one of the fabric images on the list. The images can be previewed in the Open dialog by clicking the small gray triangle to the left of the word "Preview" in the dialog. 4 In the dialog, click Open. The fabric image appears in the workspace; the image will be tiled to cover the entire background. To remove the fabric background, use the Background tool - Color dialog to choose a plain color. Creating your own Background from a Scanned Image You can also use a scanner or other device (e.g. a camera, or the Photo Booth application) to make your own images of fabric samples for backgrounds. This allows you to get a more exact simulation of what your design will look like when sewn out on your fabric. When you save the image in the Fabrics folder of MacBroidery™ Embroidery Lettering Software, they will be available for you to use in the usual way from the Preferences dialog. The following procedure explains how to open up the Fabrics folder and save images into it. To create and save your own background image: 1 Create and save the image of your fabric. 2 In the Applications folder, select MacBroidery™ Embroidery Lettering Software to highlight it. 3 On your keyboard, press Control and click simultaneously. You see a context menu. 4 From the menu, select Show Package contents. A new finder window opens, showing the contents of the folder. 5 Navigate to Contents-Resources-Config-Fabrics. You can simplify the process of navigating to this folder the next time by creating an alias for it. To do this, press Ctrl and click, and choose Make Alias from the context list.
-
 1
1 -
2
-
3
-
4
-
5
-
6
-
7
-
8
-
9
-
10
-
11
-
12
-
13
-
14
-
15
-
16
-
17
-
18
-
19
-
20
-
 21
21 -
 22
22 -
 23
23 -
 24
24 -
 25
25 -
 26
26 -
 27
27 -
 28
28 -
 29
29 -
 30
30 -
 31
31 -
32
-
33
-
34
-
35
-
36
-
37
-
38
-
39
-
40
-
41
-
42
-
43
-
44
-
45
-
46
-
47
-
48
-
49
-
50
-
51
-
52
-
53
-
54
-
55
 |
 |
