Brother International MacBroidery„ Embroidery Lettering Software for Mac - Page 34
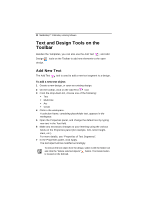
Text and Design Tools on the, Toolbar
 |
View all Brother International MacBroidery„ Embroidery Lettering Software for Mac manuals
Add to My Manuals
Save this manual to your list of manuals |
Page 34 highlights
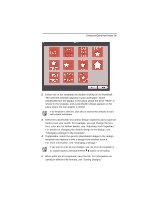
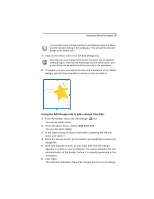
32 MacBroidery™ Embroidery Lettering Software Text and Design Tools on the Toolbar Besides the Templates, you can also use the Add Text and Add Design tools on the Toolbar to add new elements to the open design. Add New Text The Add Text tool is used to add a new text segment to a design. To add a new text object: 1 Create a new design, or open an existing design. 2 On the toolbar, click on the Add Text tool. 3 From the drop-down list, choose one of the following: Text Multi-line Arc Circle 4 Click in the workspace. A selection frame, containing placeholder text, appears in the workspace. 5 Open the Properties panel, and change the default text by typing new text in the Text field. 6 Make any necessary changes to your lettering using the various fields on the Properties panel (for example, font, letter height, slant, etc.) For more details, see "Properties of Text Segments". 7 In the Properties panel, click Apply. The text object will be modified accordingly. To remove the text object from the design, select it with the Select tool and click the "Delete selected objects" button. The Delete button is located on the Edit tab.
-
 1
1 -
2
-
3
-
4
-
5
-
6
-
7
-
8
-
9
-
10
-
11
-
12
-
13
-
14
-
15
-
16
-
17
-
18
-
19
-
20
-
21
-
22
-
23
-
24
-
25
-
26
-
27
-
28
-
 29
29 -
 30
30 -
 31
31 -
 32
32 -
 33
33 -
 34
34 -
 35
35 -
 36
36 -
 37
37 -
 38
38 -
 39
39 -
40
-
41
-
42
-
43
-
44
-
45
-
46
-
47
-
48
-
49
-
50
-
51
-
52
-
53
-
54
-
55
 |
 |
