Brother International MacBroidery„ Embroidery Lettering Software for Mac - Page 42
Density Setting, Adding Slant to Text
 |
View all Brother International MacBroidery„ Embroidery Lettering Software for Mac manuals
Add to My Manuals
Save this manual to your list of manuals |
Page 42 highlights
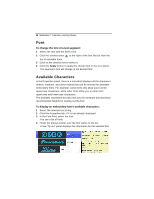
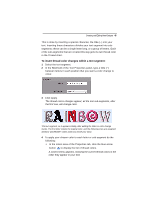
40 MacBroidery™ Embroidery Lettering Software 2 Click on the arrows button on the right of the Pattern field. You see a list of patterns. 3 From the Pattern list, select a pattern. 4 Click Apply. The fill of your text segment will be accordingly. Density Setting Satin stitch density is measured in embroidery points (pts). This is measured as the distance between stitches (each point = 0.1 mm). You adjust density according to the design's size and the fabric you are using. To make a density change to a segment: 1 With the Select tool, select the segment. 2 In the density field, enter a new density value; higher numbers correspond to lower density, lower numbers correspond to higher density. 3 Click the Apply button. The density will be applied to the selected segment. Adding Slant to Text Use the Slant setting to create a slanted effect for your lettering. Slant changes the degree value of the slant on your lettering. A negative value slants your lettering to the left; a positive value slants it to the right. To add slanted effect: 1 Select the text segment. 2 Select the Properties panel to display the Text properties. 3 In the Slant field, enter the amount slant you want for your lettering. The slant is given in degrees, with straight up-and-down being considered as zero degrees. 4 Click Apply. You see the lettering altered accordingly.
-
 1
1 -
2
-
3
-
4
-
5
-
6
-
7
-
8
-
9
-
10
-
11
-
12
-
13
-
14
-
15
-
16
-
17
-
18
-
19
-
20
-
21
-
22
-
23
-
24
-
25
-
26
-
27
-
28
-
29
-
30
-
31
-
32
-
33
-
34
-
35
-
36
-
 37
37 -
 38
38 -
 39
39 -
 40
40 -
 41
41 -
 42
42 -
 43
43 -
 44
44 -
 45
45 -
 46
46 -
 47
47 -
48
-
49
-
50
-
51
-
52
-
53
-
54
-
55
 |
 |
