Brother International MacBroidery„ Embroidery Lettering Software for Mac - Page 46
Adding Color Changes within Text, Segments
 |
View all Brother International MacBroidery„ Embroidery Lettering Software for Mac manuals
Add to My Manuals
Save this manual to your list of manuals |
Page 46 highlights
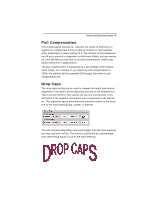
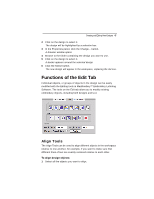
44 MacBroidery™ Embroidery Lettering Software 3 Click the Apply button to apply the change. You see the lettering altered accordingly. To move letters farther apart: 1 Select your text segment. 2 In the Text box (on the Properties panel), enter the "greater than" sign (>) between the letters you want to kern. For example, if you wanted more space between the "x" and "t" in the word Text, you would enter: Te>>>xt. 3 Click the Apply button to apply the change. You see the lettering altered accordingly. Adding Color Changes within Text Segments When you are creating designs involving lettering, you may find that you want to have two or more colors in a single line of text. This can be easily done using the Properties panel.
-
 1
1 -
2
-
3
-
4
-
5
-
6
-
7
-
8
-
9
-
10
-
11
-
12
-
13
-
14
-
15
-
16
-
17
-
18
-
19
-
20
-
21
-
22
-
23
-
24
-
25
-
26
-
27
-
28
-
29
-
30
-
31
-
32
-
33
-
34
-
35
-
36
-
37
-
38
-
39
-
40
-
 41
41 -
 42
42 -
 43
43 -
 44
44 -
 45
45 -
 46
46 -
 47
47 -
 48
48 -
 49
49 -
 50
50 -
 51
51 -
52
-
53
-
54
-
55
 |
 |

44
MacBroidery™
Embroidery Lettering Software
3
Click the Apply button to apply the change.
You see the lettering altered accordingly.
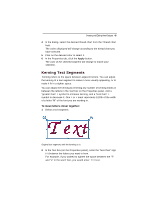
To move letters farther apart:
1
Select your text segment.
2
In the Text box (on the Properties panel), enter the “greater than”
sign (>) between the letters you want to kern.
For example, if you wanted more space between the "x" and "t" in
the word Text, you would enter: Te>>>xt.
3
Click the Apply button to apply the change.
You see the lettering altered accordingly.
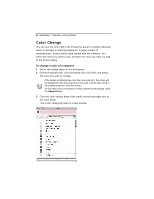
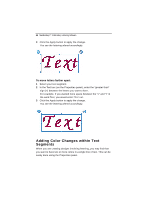
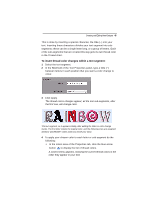
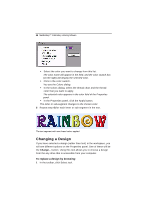
Adding Color Changes within Text
Segments
When you are creating designs involving lettering, you may find that
you want to have two or more colors in a single line of text. This can be
easily done using the Properties panel.