Canon LBP 2460 Service Manual
Canon LBP 2460 - B/W Laser Printer Manual
 |
View all Canon LBP 2460 manuals
Add to My Manuals
Save this manual to your list of manuals |
Canon LBP 2460 manual content summary:
- Canon LBP 2460 | Service Manual - Page 1
SERVICE MANUAL REVISION 1 DEC. 1997 COPYRIGHT © 1997 CANON INC. RY8-1383-010 CANON LBP-2460 REV.1 DEC. 1997 PRINTED IN JAPAN (IMPRIME AU JAPON) - Canon LBP 2460 | Service Manual - Page 2
in Japan Imprimé au Japon Use of this manual should be strictly supervised to avoid disclosure of confidential information. Prepared by PERIPHERAL PRODUCTS QUALITY ADVANCEMENT DIV. PERIPHERAL PRODUCTS TECHNICAL DOCUMENTATION DEPT. CANON INC. 5-1, Hakusan 7-chome, Toride-City, Ibaraki-Pref. 302 - Canon LBP 2460 | Service Manual - Page 3
Inc. NO. RAD-12E-0001 DATE DEC. 12,1997 LOCATION SUBJECT Revision of Service Manual Canon has published a revised version of LBP-2460 Service Manual (RY8-1383-000). Revision 1 (RY8-1383-010) includes supplementary materials as well as corrections, so please use it in place of the original. RY8 - Canon LBP 2460 | Service Manual - Page 4
- Canon LBP 2460 | Service Manual - Page 5
PREFACE This Service Manual contains basic information required for after-sales service of the LBP-2460 laser beam printer (hereinafter referred to as the "printer"). This information is vital to the service technician in maintaining the high print quality and performance of the printer. The 2,000- - Canon LBP 2460 | Service Manual - Page 6
computer and output by an Apple LaserWriter 16/600 PS laser beam printer. All graphics were produced with Aldus FreeHand (J), and all documents and page layouts were created with QuarkXPress (J). The video images were captured with Canon Hi-8 8mm video camcorder and MASS microsystems Quickimage 24 - Canon LBP 2460 | Service Manual - Page 7
THE PRINTER 1-8 V. INSTALLATION 1-14 VI. MAINTENANCE AND SERVICING BY Control 2-23 III. LASER/SCANNER SYSTEM .......... 2-26 A. Outline 2-26 B. Laser Control Circuit 2-27 the Electrical System 2-71 B. Duplexing Driver Input Signals 2-72 C. Duplexing Driver Output Signals 2-73 D. Paper Pick- - Canon LBP 2460 | Service Manual - Page 8
Pick-up Unit........... 3-17 E. Manual Feeding Pick-up Roller 3-19 F. Separation Pad 3-20 G. Pick-up/Feed/Separation Rollers 3-20 IV. EXPOSURE SYSTEM 3-21 A. Laser/Scanner Unit 3-21 V. ELECTROSTATIC IMAGING/ DEVELOPING/CLEANING SYSTEM 3-22 A. EP-W Cartridge 3-22 B. Transfer Charging Roller - Canon LBP 2460 | Service Manual - Page 9
TROUBLESHOOTING 4-47 A. Paper Jams 4-47 B. Incomplete Paper Feed 4-51 VIII. LOCATION OF ELECTRICAL Supply PCB 4-71 E. Video Controller PCB 4-72 F. Envelope Feeder Driver PCB 4-73 G. Option Controller PCB 4-74 H. Paper Deck Driver PCB 4-75 I. Paper-level Sensing Switch PCB 4-77 J. Paper- - Canon LBP 2460 | Service Manual - Page 10
- Canon LBP 2460 | Service Manual - Page 11
CHAPTER 1 PRODUCT INFORMATION I. FEATURES 1-1 II. SPECIFICATIONS 1-3 III. SAFETY INFORMATION ........ 1-7 IV. PARTS OF THE PRINTER 1-8 V. INSTALLATION 1-14 VI. MAINTENANCE AND SERVICING BY THE CUSTOMER 1-23 VII. OPERATION 1-25 - Canon LBP 2460 | Service Manual - Page 12
- Canon LBP 2460 | Service Manual - Page 13
of super fine toner. 3. Auto-duplexing The optional duplex unit enables the printer to conduct printer supports Hewlett-Packard's enhanced PCL5 printer language. When the optional Canon Translator module A4(an add-in ROM) is installed, the printer also supports Adobe PostScript Level 2. The printer - Canon LBP 2460 | Service Manual - Page 14
CHAPTER 1 This page intentionally left blank 1 - 2 - Canon LBP 2460 | Service Manual - Page 15
CHAPTER 1 II. SPECIFICATIONS A. Printer 1. Printer engine Type Desktop page printer (console type when paper deck is installed) Printing method Laser scanning system Toner Magnetic single-component dry toner Development Toner projection development system Toner supply By EP-W cartridge - Canon LBP 2460 | Service Manual - Page 16
Manual duplexing (Note 4) Environment Temperature Humidity Air pressure Power consumption Noise level (Officially announced level based on ISO 9296) Dimensions mm About 48kg (without EP-W cartridge), about 3kg (cartridge) 100 - 120V (±10%),50 printer until the end of the WAIT period. 4. When manual - Canon LBP 2460 | Service Manual - Page 17
CHAPTER 1 2. Video Controller CPU Memory (RAM) ROM DIMM Slots RAM SIMM Slots Host interface Translators Internal fonts Scaler RISC processor (Intel A80960HD-66 66MHz) 4 MB (Expandable to 96 megabytes in total with optional RAM SIMM) 2 3 Standard: IEEE1284 compliant parallel Option: Expansion - Canon LBP 2460 | Service Manual - Page 18
, C5, B5 ISO-typed envelope (90g/m2 recommended paper) Capacity 73mm stack or 100 envelopes Dimensions 368 (W) x 320 (D) x 140 (H) mm Weight About 3kg Power supply DC24V (supplied from the printer) 2. Duplex unit (Duplex Unit TP-9) Feeding speed About 19 sheets/min. (A4) Paper types A3 - Canon LBP 2460 | Service Manual - Page 19
and become difficult to remove. As toner easily breaks down vinyl materials, avoid letting toner come into contact with vinyl. C. Ozone Safety An infinitesimal amount of ozone gas (O ) 3 is generated during corona discharge from the charging roller used in this printer. The ozone gas is emitted only - Canon LBP 2460 | Service Manual - Page 20
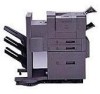
CHAPTER 1 IV. PARTS OF THE PRINTER A. External Views 1. Printer 1 2 3 4 5 6 7 10 9 8 Figure 1-4-1 11 12 1: Operation panel unit 2: Face-down tray Expansion board slots 17: Cleaning brush 18: EP-W cartridge 19: Pick-up unit door 13 16 15 14 Figure 1-4-2 17 18 19 1 - 8 Figure - Canon LBP 2460 | Service Manual - Page 21
2. Duplex unit CHAPTER 1 1: Duplexing feed roller 2: Duplex unit removal lever 2 1 Figure 1-4-4 3. Envelope feeder 1 3 2 Figure 1-4-5 1: Envelope guide 2: Extension tray 3: Weight 1 - 9 - Canon LBP 2460 | Service Manual - Page 22
CHAPTER 1 4. Paper deck 1 1: Feed cover 2: Tray 3: Interface connectors 4: Power receptacle 2 Figure 1-4-6 3 4 Figure 1-4-7 1 - 10 - Canon LBP 2460 | Service Manual - Page 23
B. Cross Sectional Views 1. Printer, Duplex unit 1 2 CHAPTER 1 34 56 7 26 25 24 23 22 21 20 19 18 17 16 15 14 13 12 11 10 9 8 1: Delivery roller 2: Laser/scanner unit 3: Developing cylinder 4: EP-W cartridge 5: Manual feeding pick-up roller 6: Separation pad 7: Multi-purpose tray 8: Feed - Canon LBP 2460 | Service Manual - Page 24
CHAPTER 1 2. Envelope feeder 1 23 4 1: Feed rollers 2: Separation guide 3: Separation rollers 4: Pick-up rollers Figure 1-4-9 1 - 12 - Canon LBP 2460 | Service Manual - Page 25
3. Paper deck 1 2 CHAPTER 1 34 5 67 1: Deck 2: Paper guides 3: Pick-up roller 4: Feed roller 1 5: Feed roller 2 6: Registration rollers 7: Separation roller Figure 1-4-10 1 - 13 - Canon LBP 2460 | Service Manual - Page 26
, it is important to demonstrate its performance in the same way as when it passes the factory inspection. The service engineer must sufficiently understand the performance of the printer, install it correctly in a location with an appropriate environment, and conduct sufficient checks of the unit - Canon LBP 2460 | Service Manual - Page 27
the tape and the black sheet from the printer. 3) Hold the cartridge on each side as shown in figure 1-5-7 and slowly rock it 5 to 6 times to evenly distribute the toner. 4) Place the cartridge on a flat surface. While holding down on the top of the cartridge with one hand, grasp the tab with the - Canon LBP 2460 | Service Manual - Page 28
that time. 1) Open the option controller packaging. 2) Remove the plastic bag from the optional controller. 3) Loosen the 2 screws on the back of the printer and pull out the PCB. 4) Remove the screw holding the option interface cover of the PCB. Screw Option interface cover Video controller PCB - Canon LBP 2460 | Service Manual - Page 29
5) Insert the option controller as shown below. 6) Set the option controller with the 3 supplied screws. Screws CHAPTER 1 7) Insert a connector. Option controller Figure 1-5-3 Connector Option controller Figure 1-5-4 8) Insert the PCB to the printer and tighten the 2 screws. 1 - 17 - Canon LBP 2460 | Service Manual - Page 30
the accessories. Confirm that the power cord, manuals and interface cable are included. 3) Remove the off the tape holding the latch of the paper guide. b. Installation 1) Carry the paper deck to the and the printer in the same direction, and have 4 people lift the printer. Lower the printer onto - Canon LBP 2460 | Service Manual - Page 31
and the outlet. 7. Operation confirmation 1) Load paper in the lower cassette. 2) Insert the power plug into the outlet and the printer, then turn the power switch ON. After the printer enters STANDBY mode, press the test print switch to make a test print. Check that the density of the output image - Canon LBP 2460 | Service Manual - Page 32
strong light. As there is toner in the cartridge, be sure to explain to the customer the need to be careful in handling and storing unsealed cartridges. a. Storage environment 1) Be sure to store in the aluminum bag. 2) Avoid locations exposed to direct sunlight, near windows, etc. Do not leave them - Canon LBP 2460 | Service Manual - Page 33
, as image quality will deteriorate after the valid period. 3. Handling 1) When loading a new cartridge into the printer, or when the toner in an already loaded cartridge hardens and blank spots appear on output images, hold the cartridge at each end as shown in the below figure and slowly rock it - Canon LBP 2460 | Service Manual - Page 34
CHAPTER 1 Figure 1-5-8 Note: If light (1500 lux) is exposed to the drum for 5 minutes, and it is left in a dark area for 5 minutes, it will recover to a normal state and will be no effect on prints. However be sure to not expose it to direct sunlight. The strength of sunrays are about 10000 lux to - Canon LBP 2460 | Service Manual - Page 35
SERVICING BY THE CUSTOMER The customer should do the following maintenance to maximize printer performance. Table 1-6-1 Item Cartridge Transfer guide area Customer maintenance Rock the cartridge to redistribute toner. If necessary relace it. When replacing the cartridge, clean the transfer guide - Canon LBP 2460 | Service Manual - Page 36
CHAPTER 1 Item Registration roller area Table 1-6-2 Customer maintenance When replacing the cartridge, clean the registration roller area with the soft dry cloth. 1 - 24 - Canon LBP 2460 | Service Manual - Page 37
The Operation Panel The operation panel is used to perform basic printer operations, make printer configuration changes that software applications cannot control, identify available typefaces, and check the status of the printer. The operation panel consists of the status indication display, eight - Canon LBP 2460 | Service Manual - Page 38
the problem. Off: Operation is normal and there is no error. · POWER indicator: 2 On: The printer is ready to print. Flashing: The printer is instance, if the message TONER LOW appears in the display panel, press CONTINUE to continue printing but be sure to change the toner as soon as possible. - Canon LBP 2460 | Service Manual - Page 39
on dual function keys are separated by a slash in the key name on the printer control panel. · +PLUS/-MINUS key: 11 With an item name displayed, press (when MANUAL FEED=ON), you have to press the CONTINUE key every time you need to feed a single sheet of paper. · MENU key: 15 With the printer off- - Canon LBP 2460 | Service Manual - Page 40
CHAPTER 1 Flashing: The printer is processig a print job. Do not turn the power off, otherwize you may lose print data. Off: The printer is off-line. You can now use the printer control panel keys to view and change settings. When off-line, the printer cannot accept data for printing. 1 - 28 - Canon LBP 2460 | Service Manual - Page 41
Panel Menus You can access the following menus though the operation panel: · PCL MENU · PS MENU (Note 1) · FEEDER MENU · CONFIG MENU · MEMCONFIG MENU (Note 1) · factory. The printer uses these settings changed. s Temporary default settings are those set by the application software for the current - Canon LBP 2460 | Service Manual - Page 42
page size, envelope feeder size, and display language. To perform a cold reset, press and hold down the ON LINE key while you turn on the printer. The printer displays the message COLD RESET followed by WARMING UP. When the printer comes on-line, the factory default settings are restored. 1 - 30 - Canon LBP 2460 | Service Manual - Page 43
UP, AUTO SELECT-DOWN TRAY SWITCH=ON * OFF MANUAL=OFF MPTSIZE=A4 * ON * LETTER, LEGAL, A3 2 software or PRINTER or MENU. RESET RESET=PRINTER MENU SHOW PAGE COUNT* TEST PRINT * PRINT PS FONTS * PRINT PCL FONTS * PRINT PS DEMO * PRINT PCL DEMO * CONTINUOUS TEST* PERSONALITY=AUTO * PS - Canon LBP 2460 | Service Manual - Page 44
CHAPTER 1 1 - 32 - Canon LBP 2460 | Service Manual - Page 45
and inactive at the supply voltage level. There is a microcomputer in this printer. But as the internal operation of the microcomputer cannot be checked, an I. BASIC OPERATION 2-1 II. ENGINE CONTROL SYSTEM ....... 2-4 III. LASER/SCANNER SYSTEM 2-26 IV. IMAGE FORMATION SYSTEM ..... 2-32 V. PICK - Canon LBP 2460 | Service Manual - Page 46
- Canon LBP 2460 | Service Manual - Page 47
2 I. BASIC OPERATION A. Functions Printer functions can be divided into six groups: the engine control system, the laser/scanner unit, the image formation controller PCB ENGIN CONTROL SYSTEM Operation panel Face-down tray LASER/SCANNER UNIT Scanning mirror DC controller PCB High-voltage Low- - Canon LBP 2460 | Service Manual - Page 48
paper. To deliver the final page and to clean the transfer charging roller. Remark During this period, the printer checks if the cartridge is installed and if there is toner in it. If the printer stays in the standby mode for longer than five hours, it drives the main motor for one second to - Canon LBP 2460 | Service Manual - Page 49
bias ON Development AC bias ON (Checks if the cartridge is installed and if there is toner in it) Has fixing temperature NO reached 150˚C? Main ON Standby During this period, checks if there is residual paper in the printer. If automatic paper delivery is required as a result of the check, - Canon LBP 2460 | Service Manual - Page 50
. When DC power is supplied from the power supply by turning ON the power switch of the printer and the printer enters the standby mode, the CPU outputs the signals that drive the loads such as laser diode, motors, and solenoids, based on the print start command and image data. The layout of - Canon LBP 2460 | Service Manual - Page 51
CHAPTER 2 IC 203 Expansion I/O IC 201 CPU IC 205 Gate array Figure 2-2-1 DC controller IC 205 Gate array Serial line I/O Envelope feeder Video controller Serial line Serial line Option controller Bus IC 201 CPU Bus Serial line I/O Duplex unit IC 203 I/O Expansion I/O Figure 2-2-2 2 - - Canon LBP 2460 | Service Manual - Page 52
CHAPTER 2 3. DC Controller Input/Output Signals PS1 Registration paper sensor J11-3 -1 -2 J209-5 -3 -4 P5VB3 /REGS DC controller PCB "L" when the sensor detects pape Pick-up unit paper sensor Paper pick-up unit door sensor Pick-up PCB PS2 J13-3 J1205-1 P5VBDOR J1201-4 J219-18 -2 -2 GND - Canon LBP 2460 | Service Manual - Page 53
J222-5 FSRTH -2 -6 The voltage drops as the fixing roller temperature rises. EP-W cartridge High-voltage power supply PCB Toner sensor ANTIN TB703 J701-A5 J220-A5 TONRS Detects no cartridge installed and toner out. Cassette paper-size sensing switch PCB Lower cassette paper-size sensing - Canon LBP 2460 | Service Manual - Page 54
CHAPTER 2 Laser/scanner unit J1001-9 Laser diode Laser driver -7 -6 -5 -3 -8/-4/-2 -1 J6-3 -2 BD PCB -1 J1-5 -4 -3 Scanner -2 motor -1 DC controller PCB J202-1 -3 -4 -5 -7 -2/-6/-8 -9 LLCONT PD /LENBL /LON VDO +5V The analog signal is output to adjust the intensity of the laser beam. - Canon LBP 2460 | Service Manual - Page 55
CHAPTER 2 Main motor MT1 J12-1 -2 -3/-4 -5/-6 J218-1 -2 -3/-4 DC controller PCB /MMRDY /MMOTD "L" when the main motor runs normally. "L" to run the main motor. +24VB -5/-6 Fixing unit/ Scanner unit fan FAN1 Power supply fan FAN2 Electrical unit fan FAN3 Fixing unit fan FAN4 J13-1 -2 - Canon LBP 2460 | Service Manual - Page 56
controller PCB /MPTSLD "L" to drive the lifting plate. If the plate is up it will drop, if down it wi rise. /MTPCLD "L" to rotate the manual feeding pick-up roller. Switch/sensor PCB J1402-2 -1 J1401-13 J205-10 +24VA /FUSLD "L" to deliver printed paper face up AC power Power supply Fixing - Canon LBP 2460 | Service Manual - Page 57
two heaters. Figure 2-2-8 shows the surface temperature distribution of the upper fixing roller. The fixing roller heater for the 100V model of this printer is different from that to the 220V model. Fixing main heater Surface temperature of the upper fixing roller °C Fixing sub heater The center - Canon LBP 2460 | Service Manual - Page 58
CHAPTER 2 Table 2-2-1 WAIT STBY Cassette feed PRINT Manual feed A3/A4/B4 size Legal size Other size temperatures of the upper fixing roller during waiting, standby, and printing. 2. Protective function The printer has a mechanism that check is that the rated voltage of the power supply matches the - Canon LBP 2460 | Service Manual - Page 59
CHAPTER 2 3. Fixing unit failure detection The CPU assumes a fixing unit failure in the following cases and reports it to the video controller. a. The rated voltage of the power supply is different to the rated voltage of the fixing roller heater. The CPU checks the POWER SUPPLY TYPE SENSE signal ( - Canon LBP 2460 | Service Manual - Page 60
CHAPTER 2 DC controller PCB +5V +5V +5V +5V Fixing roller heater Thermistor Thermoswitch FSRTH GNDT H Fixing roller J222-1 FSRTYP1 -4 FSRTYP2 -2 FSRTP1R -3 FSRTP2R +5V GATE ARRAY IC203 32 C14 11 C00 10 C01 9 C02 8 C03 6 C04 5 C05 4 C06 +5V 42 B12 43 B13 44 B14 45 B15 46 B16 47 B17 B27 CPU - Canon LBP 2460 | Service Manual - Page 61
CHAPTER 2 3) Reports the fixing unit failure to the video controller. 4. Fixing roller heater start sequence The sequence of operations from the power ON to the standby is as follows: 1) The CPU outputs the fixing sub heater drive signal and then the fixing main heater drive signal to prevent - Canon LBP 2460 | Service Manual - Page 62
CHAPTER 2 5. Envelope position lever function This printer can adjust the nip width in two steps by changing the spring pressure of the lower fixing roller. If an envelope wrinkles after it is - Canon LBP 2460 | Service Manual - Page 63
CHAPTER 2 This page intentionally left blank 2 - 17 - Canon LBP 2460 | Service Manual - Page 64
Sense Circuit [T705] Transfer Negative Voltage Transformer Toner detection Circuit [T704] Transfer Positive Voltage Transformer Negative TB701 To primary charging roller TB702 To developing cylinder TB703 From toner sensor To transfer charging roller J701-B2 /HVTCRTD Transfer Constant Current - Canon LBP 2460 | Service Manual - Page 65
CHAPTER 2 1. Outline In response to the instruction from the microprocessor (CPU) on the DC controller the /VSYNC signal going "L". A print bias is applied during the print sequence to transfer the toner onto the paper. A between-page bias is applied between pages. After the completion of printing - Canon LBP 2460 | Service Manual - Page 66
edge of a single side print and during the second side of a duplex print. e. Toner sensing/cartridge sensing The EP-W cartridge has a toner sensor. The DC controller detects the toner level and whether a cartridge is installed when the developing AC bias is applied to the developing cylinder by the - Canon LBP 2460 | Service Manual - Page 67
low-voltage power supply generates the required +24VDC and +5VD for the printer. +24VDC is supplied to the high-voltage power supply PCB to drive the on. The DC controller PCB generates +5VC and supplies it to the laser driver. This is shown in the block diagram below. Power supply Circuit Noise - Canon LBP 2460 | Service Manual - Page 68
and the power supply circuit does not output DC voltage, it is necessary to turn the power switch to OFF, correct the problem in the faulty load, then power the printer ON again. If excess-current flows through the AC line, the circuit breaker in the power supply turns OFF to cut - Canon LBP 2460 | Service Manual - Page 69
use of interface signals. a. System block diagram External device (host computer, etc.) Printer Video interface signals (See figure 2-2-15) Video controller PCB DC controller PCB SCANNER MOTOR DRIVE signal (/SCND) LASER DRIVE signal (VDO) Scanner Unit Laser driver Figure 2-2-14 2 - 23 - Canon LBP 2460 | Service Manual - Page 70
CHAPTER 2 b. Video interface signals Video controller PCB /BD /PPRDY /RDY /VSREQ /SBSY /STTS /PCLK /PDLV /PFED /SPCHG /CBSY /PRNT /VSYNC /CPRDY VDO /CMND /CCLK /FPCS /FPO /FPI FPCK DC controller PCB Figure 2-2-15 2 - 24 - Canon LBP 2460 | Service Manual - Page 71
controller sends the READY signal (/RDY) to the video controller to inform it that printer is ready to print. When the /RDY signal is "L" and data for a the laser driver through the DC controller. In response to the VDO signal, the laser driver switches the laser diode ON and OFF. The laser beam - Canon LBP 2460 | Service Manual - Page 72
the VIDEO signal (VDO) from the video controller and sends it to the laser driver in the laser/scanner unit. The laser driver turns the laser diode on and off according to the VDO signal and generates the modulated laser beam only when the VIDEO DATA ENABLE signal (/LENBL) from the DC controller - Canon LBP 2460 | Service Manual - Page 73
video controller. The VDO signal sent from the video controller to the DC controller is sent as is, to the switching circuit in the laser driver circuit. The microprocessor (CPU: IC201) outputs the INTENSITY CONTROL signals (APC1, APC2) from DA output ports to the analog adder circuit according to - Canon LBP 2460 | Service Manual - Page 74
to the printer and the paper size data. The paper size data is supplied to the CPU from the cassette-size sensing switch for cassette feed and by the paper size specification command from the video controller for manual feed. The VDO signal is sent from the DC controller to the laser driver. The - Canon LBP 2460 | Service Manual - Page 75
mm T2 2 mm 3 mm 3 mm Figure 2-3-3 Notes: 1. Indicates the area where the laser beam writes on the drum. 2. If no paper size is specified by the paper size specification command from the video controller during manual feed, the printer does not recognize the paper width. So the T1 and T2 values - Canon LBP 2460 | Service Manual - Page 76
is a three-phase, eight-pole DC brushless motor with a HALL element. It forms a unit with the scanner driver, which controls the scanner motor rotation at a constant speed. When the printer is turned ON, the oscillation frequency of the crystal oscillator (X202) is divided by the gate array (IC205 - Canon LBP 2460 | Service Manual - Page 77
CHAPTER 2 This page intentionally left blank 2 - 31 - Canon LBP 2460 | Service Manual - Page 78
the photosensitive drum, the laser beam modulated by the cartridge has a toner sensor that detects whether there is enough toner remaining and whether the cartridge is installed. If the toner in the cartridge becomes lower than the prescribed level or there is no cartridge installed in the printer - Canon LBP 2460 | Service Manual - Page 79
CHAPTER 2 Laser beam Cartridge Primary charging roller Cleaning blade Upper fixing roller Blade Developing cylinder Manual feeding pick-up bias monitor signal (HVTS) Transfer negative bias drive signal (/HVTRVSD) Toner level signal (TONRS) Image density adjustment signal (DENADJ) Developing AC - Canon LBP 2460 | Service Manual - Page 80
system is contained with a cartridge as shown in Figure 2-4-2. Laser beam Cartridge Primary charging roller Cleaning blade Photosensitive drum Blade Developing cylinder Transfer charging roller Static charge eliminator Figure 2-4-2 This printer's cartridge has a seamless photosensitive drum - Canon LBP 2460 | Service Manual - Page 81
CHAPTER 2 5. Drum cleaning stage Step 7 Drum cleaning Electrostatic latent image formation stage 2. Scanning exposure 1. Primary charge Drum cleaning stage 7. Drum cleaning Paper path Direction of drum rotation 3. Development Developing stage Print delivery Fixing stage 6. Fixing 5. - Canon LBP 2460 | Service Manual - Page 82
the stage, negative charges remain on the unexposed "dark" areas, where the laser beam struck (exposed) the drum surface. This image of negative charges on the applied to the photosensitive drum surface. For primary charge, the printer uses the charging method, which directly charges the drum. The - Canon LBP 2460 | Service Manual - Page 83
areas struck by the laser beam. These areas on the drum surface form the electrostatic latent image. 2. Development stage Particles of toner are placed onto the a visible image. This printer uses the toner projection development method with a singlecomponent toner. Step 3 Development Stirring - Canon LBP 2460 | Service Manual - Page 84
were exposed to the laser beam have a higher potential (are less negative) than the negatively charged toner particles on the developing printer has a stirring mechanism in the cartridge to ensure that toner is applied smoothly to the cylinder. 3. Transfer stage In the transfer stage, the toner - Canon LBP 2460 | Service Manual - Page 85
image on the photosensitive drum is not completely transferred onto the paper due to jamming, etc., the toner may adhere to the transfer charging roller. The printer removes the toner from the transfer charging roller by switching the transfer voltage between positive and negative in the specified - Canon LBP 2460 | Service Manual - Page 86
attraction and a slight physical adhesion, so even a light touch will smear the image. In the fixing stage, the toner image is fixed by heating the paper and applying pressure. This fuses the toner particles onto the paper to create a permanent image. Step 6 Fixing Halogen heater Upper fixing roller - Canon LBP 2460 | Service Manual - Page 87
next print image will be clear and distinct. Step 7 Drum cleaning Cleaning blade Photosensitive drum Cleaner container Sweeper strip Figure 2-4-13 The residual toner on the drum surface is scraped away with the cleaning blade to clean the drum surface in preparation for the next print. The removed - Canon LBP 2460 | Service Manual - Page 88
feed pick-up unit engages for manual feeding, the manual feeding pick-up roller turns and feeds a sheet of paper from the multi-purpose tray into the printer. The paper is controlled by the registration roller so that the leading edge of the toner image on the photosensitive drum matches the leading - Canon LBP 2460 | Service Manual - Page 89
CHAPTER 2 DC controller PCB 1 2 3 4 5 6 7 8 9 10 11 12 13 Switch/sensor PCB Pick-up PCB 14 15 16 17 Multi-purpose tray PCB PS1402 PS1401 PS1403 PS1 PS1301 PS1208 PS1302 PS2 SW1601 SW1602 SW1603 SW1604 PS1202 PS1205 PS1206 SW1601 SW1602 SW1603 SW1604 PS1207 PS1201 PS1203 PS1204 - Canon LBP 2460 | Service Manual - Page 90
PCB Multi-purpose tray PCB Face-down delivery roller MT1 Flapper Upper fixing roller CL1 CL2 Photosensitive drum CL3 Registration roller Manual feeding pick-up roller Face-up Fixing unit delivery roller delivery roller SL3 Lower fixing roller Upper cassette SMT1 Transfer charging - Canon LBP 2460 | Service Manual - Page 91
, feed roller 1, and separation roller on the lower cassette to enable the printer to feed paper from the lower cassette. Following this, the cassette pick-up . The paper picked up by the cassette pick-up roller is fed into the printer by feed rollers 1 and 2. If more than one sheet is picked up, - Canon LBP 2460 | Service Manual - Page 92
CHAPTER 2 Pick-up unit Pick-up PCB Remaining paper level 1 Almost full Remaining number of sheets (note) 430 sheetes or more 2 High 200 - 490 sheetes 3 Low 50 - 260 sheetes 4 Almost empty 110 sheetes or less Note : Plain paper (75g/m2 recommended paper) 1 PS1204 or PS1206 2 PS1203 or - Canon LBP 2460 | Service Manual - Page 93
CHAPTER 2 • Pick-up timing from the upper cassette (A4 : tow pages continuously print) Power switch ON STBY INTR PRINT PRINT signal (/PRNT) VERTICAL SYNC signal (/VSYNC) Main motor (MT1) Pick-up motor (SMT1) Cassette pick-up solenoid (SL1) Feed clutch (CL2) Registration clutch (CL1) Pick-up - Canon LBP 2460 | Service Manual - Page 94
cassette pick-up roller to the paper surface enabling it to pick up paper. When either the upper or lower cassette is installed in the printer, the upper or lower lifter gear is engaged into drive gear, so that the lifter can be raised. The cassette pick-up roller shaft is - Canon LBP 2460 | Service Manual - Page 95
CHAPTER 2 Cassette pick-up cam Cassette pick-up roller shaft Cassette feed solenoid Lower lifter Figure 2-5-7 2 - 49 - Canon LBP 2460 | Service Manual - Page 96
CHAPTER 2 b. Multi-feed prevention mechanism When feeding from the cassette, the printer uses the separation roller to prevent multi-feeding. Normally, the separation roller is imparted with a rotational force opposite to that of the feed roller. However, - Canon LBP 2460 | Service Manual - Page 97
feeding pick-up roller. Paper pressed against the manual feeding pick-up roller by the lifting plate is picked up by the pick-up roller. Unnecessary sheets are removed by the separation pad, and one sheet is fed into the printer by feed roller 2. The subsequent operations are almost the same as - Canon LBP 2460 | Service Manual - Page 98
CHAPTER 2 • Pick-up timing from the munual feed (A4 : tow pages continuously print) Power switch ON STBY INTR PRINT PRINT signal (/PRNT) VERTICAL SYNC signal (/VSYNC) Main motor (MT1) Lifting plate solenoid (SL2) Munual feed clutch (CL3) Registration clutch (CL1) Registration paper sensor (PS1) - Canon LBP 2460 | Service Manual - Page 99
CHAPTER 2 C. Fixing and Delivery Unit The upper and lower rollers of the fixing unit, and the face-up and face-down delivery rollers are driven by the main motor (MT1). The paper separated from the photosensitive drum is fed into the fixing unit, and sent from the fixing unit by the fixing roller - Canon LBP 2460 | Service Manual - Page 100
CHAPTER 2 The printer switches between face-up and face-down tray delivery with the face-up tray. If /FUSLD is "H", the paper is delivered through the face-down tray on the top of the printer. The paper delivered through the face-down tray is detected by the face-down tray delivery sensor (PS1402). - Canon LBP 2460 | Service Manual - Page 101
CHAPTER 2 D. Paper Jam Detection The following paper sensors are provided to detect whether paper is present and whether the paper is fed normally. • Registration paper sensor (PS1) • Pick-up unit paper sensor (PS2) • Fixing unit delivery sensor (PS1403) • Face-down tray delivery sensor (PS1402) - Canon LBP 2460 | Service Manual - Page 102
CHAPTER 2 2. Pick-up unit delay jam The CPU detects a pick-up unit delay jam has occurred if the paper has not reached the registration paper sensor (PS1) within the prescribed time after the paper has been picked up. Paper pick-up sensor (PS2) Jam check Registration paper sensor (PS1) Main motor - Canon LBP 2460 | Service Manual - Page 103
CHAPTER 2 4. Fixing unit delivery stationary jam The CPU detects a pick-up unit stationary jam has occurred if the paper has not passed through the fixing unit delivery sensor (PS1403) within the prescribed time after the VERTICAL SYNC signal (/VSYNC) has been received. (Unit: Seconds) PRINT ( - Canon LBP 2460 | Service Manual - Page 104
c The CPU detects that an initial residual jam has occurred if one of the following sensors detects the presence of paper even after the printer has performed an automatic delivery of the relevant paper. After the power switch is turned ON and the fixing roller has reached its prescribed temperature - Canon LBP 2460 | Service Manual - Page 105
CHAPTER 2 This page intentionally left blank 2 - 59 - Canon LBP 2460 | Service Manual - Page 106
The dot data is sent to the DC controller PCB to control laser diode emission. Figure 2-6-1 shows the layout of main ICs on The ASIC contains a circuit which controls the LBP, and separately processes the ROM and RAM. EEPROM is used to store printer factory defaults and those valuse changed from the control - Canon LBP 2460 | Service Manual - Page 107
CHAPTER 2 J6 ROM DIMM 1 ROM DIMM 2 AIR EEPROM J2 J1 J11 J10 RAM SIMM 1 RAM SIMM 2 RAM SIMM 3 ASIC J9 J8 CPU J7 J5 J4 J3 Figure 2-6-1 2 - 61 - Canon LBP 2460 | Service Manual - Page 108
CHAPTER 2 CPU 80960HD ROM DIMM (4MB) LA LD Extension I/F Hard disk I/F Buffer Buffer CIOA IOD Buffer Buffer AD A7 MD 3.3V DC/DC CONVERTER AIR Buffer Buffer Buffer EEPROM Option Controler Prarell I/F IEEE1284 Engine RAM SIMM (4MB) - Canon LBP 2460 | Service Manual - Page 109
is connected to the video controller PCB, and has the following functions. a. Displays status and error messages on the LCD. b. Displays the printer operating status on the LEDs. c. Selects the printing environment, operating mode, utility, and paper source with switches. d. Sounds the buzzer if - Canon LBP 2460 | Service Manual - Page 110
a block diagram of option controller. External device (host computer, etc.) Video Controller PCB DC Controller PCB Serial line Option Controller PCB CPU IC101 Serial line Printer Paper deck driver PCB Paper deck Figure 2-7-1 2 - 64 - Canon LBP 2460 | Service Manual - Page 111
bytes, and contains the communication data with the video controller and the paper deck. I/O J102 IC101 I/O CPU BUS IC110 S-RAM IC109 EP-ROM J101 Option driver PCBs (paper deck, etc.) Figure 2-7-2 Video Controller PCB 2 - 65 - Canon LBP 2460 | Service Manual - Page 112
PCB Option Controller PCB Paper deck driver PCB Serial line /VSYNC /PDLV /PFED RETURNBACK (GND) CPU (IC101) S-RAM (IC110) +5V GND Serial line PWRON GND Figure 2-7-3 The video controller supplies a +5V power supply to the option controller when the printer power is turned ON, and communication - Canon LBP 2460 | Service Manual - Page 113
. The envelope feeder is supplied with +24VDC from the printer. Envelope feeder driver PCB Envelope feeder pick-up motor Multi-purpose tray PCB (printer) DC controller PCB (printer) SMT11 J932-1 A -2 /A -3 B -4 /B Motor driver circuit Envelope feeder paper sensor PS931 J931-1 J136-1 J1304 - Canon LBP 2460 | Service Manual - Page 114
wise for about 1.9 seconds. This process picks-up and feeds the envelope into the printer. The envelope is stopped when it is 16mm past the registration paper sensor (PS1). Following this, the envelope feeder driver rotates the motor counter-clock wise according to the 2nd start command received for - Canon LBP 2460 | Service Manual - Page 115
CHAPTER 2 Power- ON STBY INTR PRINT PRINT signal (/PRNT) VERTICAL SYNC signal (/VSYNC) Main motor (MT1) Envelope feeder pick-up motor (SMT11) Pick-up command Registration sensor (PS1) Fixing unit delivery sensor (PS1403) About 1.0 Forward Backward About 0.1 About 1 1st Start 2nd Start About - Canon LBP 2460 | Service Manual - Page 116
-up direction (shown by white arrows in figure 2-8-4 below) Any extra envelopes are returned to the feeder while only one is sent through into the printer. C. Paper Jam Detection Paper jams are detected in the envelope feeder pick-up and feed path in the same fashion as in the main unit - Canon LBP 2460 | Service Manual - Page 117
paper sensor PS21 Switchback sensor PS22 Side registration guide home position sensor PS23 Duplex feed roller 1 home position sensor PS24 CPU IC2002 Duplexing driver PCB Serial line +24VA DC controller PCB Printer SMT21 Switchback motor SMT22 Side registration motor SL21 Switchback - Canon LBP 2460 | Service Manual - Page 118
roller 1 home position sensor PS24 J23-3 -1 -2 J2008-1 -3 -2 Duplexing driver PCB +5VB /DUPPS "L" when the sensor detects pape J2006-1 -3 -2 +5VB HRHGS "H" when the sensor detects home position of the side registration guide. J2007-1 -3 -2 +5VB /SWBKS "L" when the sensor detects pape J2007 - Canon LBP 2460 | Service Manual - Page 119
solenoid SL21 Duplex deflector solenoid SL22 Duplex feed cluch CL21 Switchback motor SMT21 Side registration motor SMT22 CHAPTER 2 Duplexing driver PCB J2009-2 -1 +24VA /PRRESLD When "L", pressure is relased from the switchback roller. J2002-2 -1 /DUPSLD When "L", paper enters the - Canon LBP 2460 | Service Manual - Page 120
duplexing unit the paper is aligned with the side registration guides and re-fed into the printer by the duplex feed rollers 1 and 2. The switchback according to signals sent from the CPU on the duplexing driver PCB. The side registration guides are driven by the side registration motor (SMT22) which - Canon LBP 2460 | Service Manual - Page 121
Duplexing driver 1 Switchback roller release plate Switchback roller 2 345 6 SL22 Duplex deflector Fixing delivery roller SL21 PS22 PS23 PS24 7 Fixing rollers Duplex feed roller 1 PS21 89 Second-pass pick-up wait position Feed roller 2 Duplex lower guide Side registration guide SMT22 - Canon LBP 2460 | Service Manual - Page 122
Switchback System When the CPU receives commands sent from the printer to the duplexing unit, it turns the duplex deflector (CW) into the standard feeding direction. Because the paper is fed along the duplex lower guide, it is sent into the duplex feed rollers side of the duplexing unit. Note: When - Canon LBP 2460 | Service Manual - Page 123
1 starts to rotate, to make sure that the edges of the page are aligned to the side registration guides. The side registration guide home position sensor (PS23) detects whether or not the guides are in their home position. When the power is turned ON, the CPU drives the side registration motor to - Canon LBP 2460 | Service Manual - Page 124
then stops the paper at the second-pass pick-up wait position and waits for second-pass pick-up command to be input from the printer. On receival of these commands the CPU controls the feeding speed of the switchback motor (SMT21) according to the paper feed speed of the - Canon LBP 2460 | Service Manual - Page 125
and that paper is being fed correctly. • duplexing unit paper sensor (PS21) • switchback paper sensor (PS22) Jams are detected by the CPU on the duplexing driver PCB by determining whether or not paper is at the appropriate sensor at the correct pre-set timing. When the CPU assesses that a jam has - Canon LBP 2460 | Service Manual - Page 126
CHAPTER 2 2. Switchback stationary jam When the paper has not passed through the switchback paper sensor (PS22) in the specified time after the duplexing pick-up process has begun, the CPU assesses that a switchback unit stationary jam has occurred. (Unit: Seconds) PRINT PRINT (Unit: Seconds) - Canon LBP 2460 | Service Manual - Page 127
stacker, etc.) via the paper deck. The video controller controls the printer and the various options by controlling the DC controller and the option controller in the printer. Video contoroller PCB DC controller PCB Option driver PCBs (stapler stacker, etc.) Option controller PCB Serial line - Canon LBP 2460 | Service Manual - Page 128
The diagram below outlines the flow of signals between the paper deck and the option controller. Option controller PCB Option driver PCBs (stapler stacker, etc.) Paper deck driver PCB CPU IC201 Lifter clutch Registration clutch Feed clutch Pick-up solenoid Sensor / switch Pick-up motor Deck motor - Canon LBP 2460 | Service Manual - Page 129
-2 J102-1 J101-10 -3 -8 -2 -9 Paper jam sensor PS32 J108-3 -1 -2 J102-4 J101-7 -6 -5 -5 -6 J207-1 -3 -2 +5V REGI J207-4 -6 -5 +5V JAM Paper deck driver PCB "L" when the sensor detects paper. "L" when the sensor detects paper. Tray paper-out sensor PS33 J111-3 -1 -2 J110-1 J109 - Canon LBP 2460 | Service Manual - Page 130
Outputs Deck motor MT31 J118-4 -3 -5/-6 -1/-2 Paper deck driver PCB J204-3 -4 -1/-2 DCMOT-RDY "L" when deck motor rotates normally. DCMOT-ON Deck motor is driven when "L". +24V -5/-6 Pick-up motor SMT31 J117-1 -2 -3 -4 J116-4 -3 -2 -1 J205-1 -2 -3 -4 FEDBND - Canon LBP 2460 | Service Manual - Page 131
CL32) is then turned ON, and the paper is sent through into the printer. The two photointerrupters (PS31,PS32) in the feed path detect the paper pass through the various sensors in the designated time, the paper deck driver assesses a paper jam and notifies the option controller while stopping the - Canon LBP 2460 | Service Manual - Page 132
DRIVE signal (PICKUPSL) FEED CLUTCH DRIVE signal (FEEDCL) REGISTRATION CLUTCH DRIVE signal (REGICL) CHAPTER 2 Option controller PCB Serial line Paper deck driver PCB MT31 SMT31 CL31 MT31: Deck motor SMT31: Pick-up motor SL31: Pick-up solenoid CL31: Lifter clutch CL32: Registration clutch CL33 - Canon LBP 2460 | Service Manual - Page 133
Option controller PCB Serial line Paper deck driver PCB CHAPTER 2 PAPER-LEVEL SENSING signal PAPER-SIZE SENSING signal +5V PAPER SURFACE SENSING signal (LIFT) TRAY PAPER-OUT SENSING signal (PAP-EXIST) PAPER JAM - Canon LBP 2460 | Service Manual - Page 134
option controller. SMT31 rotates the pick-up, feed, and separation rollers. The paper deck driver simultaneously turns the feed clutch (CL33) and pick-up solenoid (SL31) ON, and and the paper is sent through into the printer. Pick-up roller Feed roller 1 Separation roller Paper Pick-up solenoid Pick-up - Canon LBP 2460 | Service Manual - Page 135
Pick-up command Deck motor (MT31) Pick-up motor (SMT31) Pick-up solenoid (SL31) Registration clutch (CL32) Feed clutch (CL33) Registration paper sensor (PS31) Paper jam sensor (PS32) PRINT 0.3 About 0.15 About 0.61 About 1.18 Figure 2-10-8 CHAPTER 2 (Unit: Seconds) About 0.51 2 - 89 - Canon LBP 2460 | Service Manual - Page 136
The lifter is raised until the paper surface sensor (PS34) turns "H". When the paper level has dropped and PS34 has turned to "L", the paper deck driver re-activates CL31 and raises the lifter until PS34 returns to "H". If the lifter has not reached PS34 within the designated time after starting to - Canon LBP 2460 | Service Manual - Page 137
CHAPTER 2 SW31 PS34 PS34: Paper surface sensor SW31: Lifter abnormal position sensing switch Figure 2-10-10 2 - 91 - Canon LBP 2460 | Service Manual - Page 138
the sensors according to the pre-set 'check timing' in the memory. When the CPU assesses that a jam has occurred, the feed operation to the printer is stopped, and notification of the jam is sent to the option controller. 1. Pick-up delay jam If the paper has not reached the registration - Canon LBP 2460 | Service Manual - Page 139
CHAPTER 2 2. Feed unit delay jam If the paper has not reached the paper jam sensor (PS32) in the designated time after the registration clutch (CL32) is driven, the CPU assesses a feed unit delay jam. Registration clutch (CL32) Jam check Paper jam sensor (PS32) Pick-up motor (SMT31) (Unit: - Canon LBP 2460 | Service Manual - Page 140
printer is turned ON, the printer outputs commands to the option controller through the video controller. The option controller outputs a POWER ON signal (PWRON-IN) to the power supply through the paper deck driver on the paper deck driver PCB. This is deck driver PCB some form of trouble or from - Canon LBP 2460 | Service Manual - Page 141
it in a dark place to prevent light from affecting the drum inside the cartridge. 2. Remove the cartridge from the printer before disassembling or transporting the printer. 3. CAUTION: Before servicing the printer, disconnect its power cord from the electrical outlet. 4. Assembly is the reverse of - Canon LBP 2460 | Service Manual - Page 142
- Canon LBP 2460 | Service Manual - Page 143
Multi-purpose tray “ Pick-up unit door ” Duplexing unit door • Front cover ’ “ Figure 3-1-1 When cleaning, checking or repairing inside the printer, remove the necessary covers by following the procedures below. Œ Upper cover Œ Lock lever Figure 3-1-2 3) Close the upper cover and remove the - Canon LBP 2460 | Service Manual - Page 144
CHAPTER 3 2. Front cover 1) Open the upper cover. 2) Open the duplexing unit door. 3) Remove the 3 screws. Π5) Open the pick-up unit door, and disconnect the claw and remove the front cover. ΠΠDuplexing unit door Screws Figure 3-1-4 4) Open the delivery cover unit, and unclip the claw. Π- Canon LBP 2460 | Service Manual - Page 145
CHAPTER 3 3. Upper cover unit 1) Remove the face-down tray. 2) Remove the front cover. 3) Remove the 2 claws, and then the operation panel unit. 4) Disconnect the connector from the operation panel unit. 6) Remove the screw, and then the upper cover unit. ΠΠΠΠClaws Operation panel unit - Canon LBP 2460 | Service Manual - Page 146
the right rear cover. Ž 5. Delivery cover unit 1) Open the delivery cover unit. 2) Remove the 2 rods holding the delivery cover unit to the printer. 3) Slightly lift the delivery cover unit, pull out the right side first, then the left. Œ Œ Screws Claw Ž Right rear cover Figure 3-1-10 - Canon LBP 2460 | Service Manual - Page 147
CHAPTER 3 6. Multi-purpose tray 1) Open the multi-purpose tray. 2) Remove the 2 stoppers. 3) Undo the 2 claws holding the multi- purpose tray unit, and pull the tray out toward you. Π7. Right cover unit 1) Remove the front cover. 2) Remove the right rear cover. 3) Remove the hinge from the right - Canon LBP 2460 | Service Manual - Page 148
the left rear cover. Œ Œ Screws Left rear cover Figure 3-1-16 B. Fans 1. Summary There are 4 fan motors installed to circulate air within the printer and prevent the internal temperature from rising. • Fixing unit/scanner unit fan (FM1): Blows air from the fixing unit and the scanner unit - Canon LBP 2460 | Service Manual - Page 149
2. Removal from the printer a. Fixing unit/scanner unit fan (FM1) 1) Remove the right rear and rear covers. 2) Remove the upper cover unit. 3) Disconnect the connector. CHAPTER 3 6) Remove the cable from the guide. 7) Unhook the claw, then remove the fan duct. Œ Ž Œ Œ Connector Figure 3-1-18 - Canon LBP 2460 | Service Manual - Page 150
CHAPTER 3 b. Power supply fan (FM2) 1) Remove the right rear and rear covers. 2) Disconnect the connector. Πc. Electrical unit fan (FM3) 1) Remove the right rear and rear covers. 2) Remove the left rear cover. 3) Undo the connector. 4) Pinch the 2 claws holding the electrical unit fan and pull out - Canon LBP 2460 | Service Manual - Page 151
, and then the fan grounding plate. Disconnect the 4 claws to remove the fixing unit fan. Œ C. Operation Panel Unit 1. Removal from the printer 1) Open the upper cover unit. 2) Remove the front cover. 3) Remove the 2 claws, and then the operation panel unit. Ž Œ Connector Screw Ž Fan - Canon LBP 2460 | Service Manual - Page 152
CHAPTER 3 II. DRIVE SYSTEM A. Drive Unit 1. Removal from the printer 1) Remove the pick-up unit following steps 1-7 on Page 3-12. 2) Remove the screw, and then the cassette stay. ΠΠScrew Cassette stay Figure 3-2-1 3) Disconnect the claw, - Canon LBP 2460 | Service Manual - Page 153
B. Main Motor 1. Removal from the printer 1) Remove the high-voltage power supply unit following steps 1-2 on Page 3-36. 2) Undo the connector, remove the 4 screws and then the main motor. Ž Œ Œ Connector Ž Main motor Screws Figure 3-2-4 CHAPTER 3 3 - 11 - Canon LBP 2460 | Service Manual - Page 154
-up Unit 1. Removal from the printer 1) Pull out the upper and lower cassettes. 2) Perform steps 1-6 on Page 3-17 to remove the manual feed pick-up unit. 3) Remove on the unit. Take care not to get grease on the paper feed guide. 2. Be sure to grease the gears shown in figure 3-3-3 when exchanging, - Canon LBP 2460 | Service Manual - Page 155
CHAPTER 3 1 2 3 7 4 Œ 57T gear Upper lift-up cam Ž Pick-up cam 100T gear Lower lift-up cam ‘ 31T/47T gear ’ 20T/41T gear 5 6 Figure 3-3-3 3 - 13 - Canon LBP 2460 | Service Manual - Page 156
CHAPTER 3 2. Disassembly/reassembly a. Pick-up motor 1) Undo the connector. 2) Remove the 2 screws, and slide the pick-up motor out in the direction of the arrow. b. Feed clutch 1) Disconnect the connector. 2) Remove the screw, and disconnect the 2 claws to remove the pick-up PCB. Œ Ž Œ Œ - Canon LBP 2460 | Service Manual - Page 157
-up solenoid 1) Disconnect the connector. 2) Remove the screw and take out the cassette pick-up solenoid. Ž B. Delivery Unit 1. Removal from the printer 1) Remove the upper cover unit. 2) Remove the front cover. 3) Remove the right rear and rear covers. 4) Open the delivery cover unit. 5) Remove - Canon LBP 2460 | Service Manual - Page 158
Roller Unit 1. Removal from the printer 1) Open the upper cover. 2) Remove the clutch cover. 3) Open the transfer charging roller guide. Π2. Disassembly/reassembly a. Registration clutch 1) Remove the E-ring and the registration clutch. ΠΠTransfer charging roller guide Figure 3-3-10 4) Undo the - Canon LBP 2460 | Service Manual - Page 159
Bushing Registration lower roller Figure 3-3-14 D. Manual Feed Pick-up Unit 1. Removal from the printer 1) Remove the front cover. 2) Remove the guide. Œ Ž Œ Connector Ž Cable Cable guide Figure 3-3-15 6) Remove the 4 screws, and then the manual feed pick-up unit. Œ Œ Screws Manual - Canon LBP 2460 | Service Manual - Page 160
and the bushing. 3) Remove the 2 screws, then take out the drive side plate and the manual feed pick-up clutch. Œ b. Lifting plate solenoid 1) Perform steps 1-3 on Page 3-19 to remove the manual feeding pick-up roller. 2) Remove the E-ring and the bushing. Œ Ž ‘ Œ E-ring Bushing - Canon LBP 2460 | Service Manual - Page 161
CHAPTER 3 5) Remove the 2 screws, and then the lifting plate solenoid. ΠE. Manual Feeding Pick-up Roller 1. Removal from the printer 1) Open the multi-purpose tray. 2) Remove the cover. ΠScrews Lifting plate solenoid Figure 3-3-20 ΠΠCover Figure 3-3-21 3) While pressing the lifting plate - Canon LBP 2460 | Service Manual - Page 162
1) Open the multi-purpose tray. 2) Remove the cover. 3) Remove the manual feeding pick-up roller. 4) Use a flat-bladed screwdriver to remove the separation pad. ΠG. Pick-up/Feed/Separation Rollers 1. Removal from the printer 1) Pull out the upper and lower cassettes. 2) Grasp the knobs of each - Canon LBP 2460 | Service Manual - Page 163
unit is shown in the below figure. Œ 2. Removal from the printer 1) Remove the upper cover unit. 2) Disconnect the 3 connectors and the cable from the laser/scanner unit. Ž Œ Scanner unit Ž Laser unit BD PCB Figure 3-4-1 Œ Œ Connectors Cable Figure 3-4-2 3) Remove the 4 screws - Canon LBP 2460 | Service Manual - Page 164
image is formed on its surface based on print data according to the print process. The EP-W cartridge has been designed in such a way that it cannot be disassembled. Œ Ž protective shutter. (The protective shutter opens automatically when the cartridge is installed in the printer.) 3 - 22 - Canon LBP 2460 | Service Manual - Page 165
upper cover to remove the EP- W cartridge. 2) Open the protective shutter. 3) Apply toner to a flannel cloth and clean the section of the drum. 2. Do not use lint-free paper as it will scratch the drum. Do from the printer 1) Open the upper cover. 2) Open the transfer charging roller guide. 3) Pinch - Canon LBP 2460 | Service Manual - Page 166
unit, the apparatus that fuses the toner to the print paper, is shown below. Œ Ž 2. Removal from the printer 1) Open the delivery cover unit. upper guide Ž Fixing upper roller Thermistor Thermoswitch ‘ Fixing entrance guide ’ Fixing heater “ Fixing lower roller ” Separation lower guide • - Canon LBP 2460 | Service Manual - Page 167
CHAPTER 3 3. Disassembly/reassembly a. Fixing roller heater 1) Disconnect the 2 claws that hold the wire cover to the fixing unit, and then remove the wire cover. 3) Take out the 2 connectors. 4) Disconnect the heater claw of the holder and remove the holder. Then, gently pull out the fixing - Canon LBP 2460 | Service Manual - Page 168
CHAPTER 3 b. Thermoswitch 1) Remove the wire cover. 2) Remove the 4 screws and then the lead wire and the thermoswitch. Πc. Thermistor 1) Remove the wire cover. 2) Disconnect the connector and remove the cable from the fixing left cover. ΠScrews Thermoswitch Figure 3-6-7 3 - 26 ΠΠ- Canon LBP 2460 | Service Manual - Page 169
direction of the arrow. ŽŒ Œ Œ Œ Fixing unit fastening levers Envelope lever Ž Screws Separation lower guide Separation upper guide Figure 3-6-10 Œ E-ring Spring Ž Separation lower guide Figure 3-6-11 5) Remove the fixing roller heater following steps 1-4 on Page 3-25. 6) Remove - Canon LBP 2460 | Service Manual - Page 170
CHAPTER 3 9) Remove the screws and the right fixing cover. 10) Remove the 3 screws and the left fixing cover. 11) Remove the 4 gears. Œ Ž Œ Œ Screw Diode holder Ž Screw Right fixing cover Figure 3-6-12 Œ Screws Left fixing cover Figure 3-6-13 12) Remove the 2 screws, the grounding - Canon LBP 2460 | Service Manual - Page 171
CHAPTER 3 13) Remove the screw, undo the 2 claws, and take off the fixing roller cover. Œ Ž 15) Remove the C-ring from the gear. Œ Screw Claw Ž Fixing roller cover Figure 3-6-15 14) Remove the grounding ring. Œ Œ C-ring gear Figure 3-6-17 16) Removing the bushing. Œ Grounding ring - Canon LBP 2460 | Service Manual - Page 172
fixing upper roller. Œ e. Fixing lower roller 1) Remove the fixing upper roller following steps 1-18 from Page 3-27. 2) Disconnect the claw and remove the fixing entrance guide. Œ Ž Œ C-ring Bushing Ž Bearing Fixing upper roller Figure 3-6-19 Œ Claw Fixing entrance - Canon LBP 2460 | Service Manual - Page 173
4) Remove the fixing lower roller with its holder. 5) Remove the 2 holders and 2 bushings from the fixing lower roller. Ž Œ Œ Holders Bushings Ž Fixing lower roller Figure 3-6-22 CHAPTER 3 3 - 31 - Canon LBP 2460 | Service Manual - Page 174
out the video controller PCB unit. Œ Œ Screws Video controller PCB unit Figure 3-7-1 2) Remove the 2 screws. Œ Œ Screws Figure 3-7-2 3) Remove the 2 screws (M3), and then guide. 4) Remove the 2 screws (M4) and the 4 screws (M3), then take out the video controller PCB. Ž Œ Œ Screws (M3 - Canon LBP 2460 | Service Manual - Page 175
CHAPTER 3 B. Hard disk (optional) 1. Removal from the video controller PCB unit 1) Remove the video controller PCB unit. 2) Remove the connector. 3) Remove the 2 screws and slide the hard disk out in the direction of the arrow. C. DC Controller PCB 1) Remove the high-voltage power supply unit - Canon LBP 2460 | Service Manual - Page 176
PCB. Œ Œ Ž Œ Œ Connectors Ž Claw Screw Pick-up PCB Figure 3-7-6 E. Multi-purpose Tray PCB 1) Remove the manual feed pick-up unit following steps 1-6 on Page 3-17. 2) Remove the manual feed drive unit following steps 1-4 on Page 3-18. 3) Disconnect the connector. 4) Remove the screw and - Canon LBP 2460 | Service Manual - Page 177
CHAPTER 3 F. Switch/Sensor PCB 1) Remove the upper cover unit. 2) Remove the right rear and rear covers. 3) Remove the left rear cover. 4) Remove the connector, the 2 screws, and then the fan duct. 5) Remove the 4 screws. Ž Œ Œ Connector Ž Fan duct Screws Screws Figure 3-7-8 6) Remove - Canon LBP 2460 | Service Manual - Page 178
CHAPTER 3 10) Disconnect the connector, remove the 2 screws, and pull out the board. Disconnect the other connector and remove the switch/sensor PCB. Œ Ž G. High-voltage Power Supply PCB 1) Remove the right rear and rear covers. 2) Disconnect the 2 connectors, remove the 4 screws, then take out - Canon LBP 2460 | Service Manual - Page 179
CHAPTER 3 H. Cassette-size Sensing PCB 1) Remove the cassettes. 2) Remove the power supply following steps 1-6 on Page 3-37. 3) Disconnect the connector, remove the screw, then take out the cassette-size sensing cover. I. Power Supply 1) Remove the left rear and rear covers. 2) Disconnect the - Canon LBP 2460 | Service Manual - Page 180
CHAPTER 3 5) Remove the 4 connectors. Œ Œ Connectors Figure 3-7-18 6) Remove the 2 screws and the power supply unit fan. 7) Remove the 2 screws and take off the power supply unit. Ž Œ Œ Screws Power supply fan Ž Screws Power supply Figure 3-7-19 3 - 38 - Canon LBP 2460 | Service Manual - Page 181
CHAPTER 3 VIII. ENVELOPE FEEDER 1. Removal of the External Covers a. Rear Cover 1) Remove the screw and take off the rear cover. ΠΠScrew Rear cover Figure 3-8-1 Note: Before performing an operation check on the envelope feeder while the rear cover is off, be sure to either hold the - Canon LBP 2460 | Service Manual - Page 182
the snaps on both sides. Remove the upper cover and spring. Notes: 1. Ensure that the separation guide and upper cover are removed as one unit. However, in the event that the separation guide has already been removed, be sure to follow the position adjustment directions (refer to page 4-10) when - Canon LBP 2460 | Service Manual - Page 183
from underneath. Œ 3. Removal of the Envelope Feeder Pickup Motor 1) Remove the rear, front, lower and upper covers. 2) Remove the envelope side guides as shown in steps 1 and 2 of this page. 3) Remove the C-ring, the gear and the rack. Ž Œ Œ C-ring Ž Rack Gear Figure 3-8-9 4) Remove - Canon LBP 2460 | Service Manual - Page 184
CHAPTER 3 5) Remove the screw and take out the pickup motor. 4. Removal of the Envelope Feeder Driver PCB 1) Remove the rear, front, lower and upper covers. 2) Remove the envelope guides. 3) Remove the 2 connectors and the screw. ΠΠΠScrew Pick-up motor Figure 3-8-11 Note: After - Canon LBP 2460 | Service Manual - Page 185
CHAPTER 3 5. Removal of the Drive Unit 1) Remove the pick-up motor following steps 1 to 5 on page 3-40. 2) Remove the screw. Π6. Removal of the Envelope Feeder Pickup Roller 1) Follow steps 1 to 5 on page 3-40 and remove the pick-up motor. 2) Remove the drive unit. 3) Remove the 2 bushings and 2 - Canon LBP 2460 | Service Manual - Page 186
lower roller shaft. Remove the separation lower roller from the shaft. Œ Œ Ž Œ E-rings Bushings Ž Separation lower roller Figure 3-8-17 4) Remove the separation lower shaft from the guide. Then take the separation upper roller and torque limiter off the shaft - Canon LBP 2460 | Service Manual - Page 187
cover. 2) Remove the connector. 3) Take out the 2 screws, then the guide. Œ Screws Upper guide Figure 3-9-1 Note: When installing the upper guide, ensure that the guide is on the outside. Œ Ž Œ Œ Connector Ž Guide Screws Figure 3-9-3 4) Remove the 2 springs, then the switch back - Canon LBP 2460 | Service Manual - Page 188
the screw. Π3. Removal of the Switchback Roller Release Solenoid 1) Remove the lower guide. 2) Take out the 2 screws, then the PCB cover. ΠScrew Figure 3-9-5 6) Remove the 2 screws, then the lower guide. ΠScrews ΠPCB cover Figure 3-9-7 3) Remove the connector. ΠΠScrews ΠLower - Canon LBP 2460 | Service Manual - Page 189
and take off the solenoid. Π4. Removal of the Duplex Deflector Drive Solenoid 1) Remove the upper guide. 2) Remove the PCB cover, and the 4 connectors. ΠΠCable guide Switch-back roller release solenoid Figure 3-9-9 ΠConnectors Figure 3-9-10 3) Remove the connector. 4) Remove the cable - Canon LBP 2460 | Service Manual - Page 190
CHAPTER 3 5) Remove the 2 screws, and take off the motor base plate. 7) Remove the 2 screws and take off the duplex deflector drive solenoid. ΠScrews ΠMotor base plate Figure 3-9-12 6) Remove the screw and take off the solenoid cover. ΠΠScrews Duplex deflector drive solenoid - Canon LBP 2460 | Service Manual - Page 191
CHAPTER 3 5. Removal of the Switch-back Motor 1) Remove the upper guide. 2) Take off the PCB cover and remove the connector. Π4) Take out the 2 screws, then slide the switch-back motor in the direction of the arrow - Canon LBP 2460 | Service Manual - Page 192
PCB cover, then remove the connector. Π7. Removal of the Duplex Feed Clutch 1) Remove the upper guide. 2) Take off the PCB cover and undo the connector. ΠΠConnector Figure 3-9-18 3) Undo the cable guides. 4) Take out the 2 screws and slide the side registration motor in the direction of the - Canon LBP 2460 | Service Manual - Page 193
8. Removal of the Duplexing Driver PCB 1) Take off the PCB cover, and remove the 9 connectors. ΠΠConnectors Figure 3-9-22 2) Undo the 2 claws holding the PCB and remove the duplexing driver PCB. ΠΠClaws Duplexing driver PCB Figure 3-9-23 CHAPTER 3 3 - 51 - Canon LBP 2460 | Service Manual - Page 194
CHAPTER 3 X. OPTION CONTROLLER 1. Removal from the printer 1) Turn OFF the printer. 2) Remove all the interface cables. 3) Loosen the 2 screws and pull out the video controller PCB unit. ΠΠScrews Video controller PCB unit Figure 3-10-1 4) Remove the - Canon LBP 2460 | Service Manual - Page 195
CHAPTER 3 XI. PAPER DECK A. External Covers 1. Front cover 1) Pull out the tray. 2) Remove the paper guide. 3) Remove the 4 screws, undo the left and right claws, and take off the front cover. Œ Ž Œ Screws Ž Front cover Claws Figure 3-11-1 2. Left cover 1) Remove the - Canon LBP 2460 | Service Manual - Page 196
CHAPTER 3 5. Rear cover 1) Remove the 4 screws, and take off the rear cover. ΠΠScrews Rear cover Figure 3-11-5 B. Drive Unit 1. Removal from the main unit. 1) Remove the right and rear covers. 2) Pull out the tray. 3) Remove the 2 connectors and 4 screws then take out the drive unit. Π- Canon LBP 2460 | Service Manual - Page 197
CHAPTER 3 2. Disassembly/ assembly a. Lifter clutch 1) Remove the screw. 2) Remove the clutch cover and bushing, then take out the lifter clutch. Œ Ž Œ Screw Ž Bushing Clutch cover Lifter clutch Figure 3-11-7 b. Deck motor 1. Removal from the main unit 1) Remove the 4 screws, and take - Canon LBP 2460 | Service Manual - Page 198
CHAPTER 3 6) Remove the connector from the stay, then take the cable out of the band. 7) Remove the screw, then take out the limit switch. ΠD. Pick-up Unit 1. Removal from the main unit. 1) Remove the feed unit by following steps 1 to 3 on page 3-58. 2) Pull out the tray. 3) Remove the right - Canon LBP 2460 | Service Manual - Page 199
the pickup, feed and separation rollers so not to get grease on them. Be careful also not to get grease on the paper feed guide. Œ Claws Ž Connector Œ Gear cover Figure 3-11-14 3) Remove the 5 screws. 4) Remove the gear side plate with the gear. Œ Œ Screws Ž Gear Ž Gear side plate - Canon LBP 2460 | Service Manual - Page 200
CHAPTER 3 5) Remove the screw, then take out the pick-up solenoid. Π4) Remove the 2 screws and then the pickup motor. ΠΠScrew Pick-up solenoid Figure 3-11-16 b. Pick-up motor 1) Remove the gear side plate by following steps 1 to 4 on this page. 2) Remove the gear. 3) Remove the 3 screws - Canon LBP 2460 | Service Manual - Page 201
CHAPTER 3 E. Feed Unit 1. Removal from the main unit. 1) Drop the feed unit forward. 2) Remove the connector. 3) Rotate the feed spacer. 4) Remove the 2 screws then the feed unit. Œ Ž Œ Feed unit Ž Feed spacer Connector Screws Figure 3-11-19 2. Disassembly/ reassembly a. Feed clutch 1) - Canon LBP 2460 | Service Manual - Page 202
CHAPTER 3 5) Remove the connector, 2 bushings, shaft, pin, and gear from the feed clutch. Œ b. Registration clutch 1) Remove the gear side plate by following steps 1 to 4 on page 3-56. 2) Remove the connector. 3) Remove the E-ring and then the registration clutch. Ž Œ Feed clutch Ž - Canon LBP 2460 | Service Manual - Page 203
CHAPTER 3 c. Feed roller 1) Remove the feed cluch by following steps 1 to 4 on page 3-58. 2) Remove the E-ring, gear, pin and bushing. d. Registration roller 1) Remove the registration clutch by following steps 1 to 3 on page 3-59. 2) Remove the 2 E-rings and the bushing. Œ Ž Œ E-ring Ž Bushing - Canon LBP 2460 | Service Manual - Page 204
CHAPTER 3 F. Tray 1. Removal from the main unit 1) Remove the front cover. 2) Remove the right and left covers. 3) Remove the screw and the stopper. Π2. Disassembly a. Lifter 1) Remove the 2 screws, the damper, then the gear. ΠΠScrew Stopper Figure 3-11-28 4) Remove the screw and stopper - Canon LBP 2460 | Service Manual - Page 205
CHAPTER 3 4) Remove the 2 screws then the reference plate. Π6) Remove the screw then the wire cover. ΠΠScrews Reference plate. Figure 3-11-32 5) Remove the screw then the wire cover. ΠΠScrew Wire cover Figure 3-11-34 7) Remove the E-ring, the rubber ring then the gear. 8) - Canon LBP 2460 | Service Manual - Page 206
CHAPTER 3 9) Remove the E-ring and the 2 pulleys. 10) Remove the wire from the pulleys. Œ Ž 12) Remove the 2 screws and the wire cover. Œ E-ring Ž Wire Pulleys Figure 3-11-36 11) Remove the 3 screws then the reference plate. Œ Œ Screws Reference plate. Figure 3-11-37 Œ Screws Œ - Canon LBP 2460 | Service Manual - Page 207
14) Remove the 2 screws from the tray, then remove either the front or rear wire units. ΠScrews ΠFront wire unit Figure 3-11-40 ΠScrews ΠRear wire unit Figure 3-11-41 CHAPTER 3 3 - 65 - Canon LBP 2460 | Service Manual - Page 208
CHAPTER 3 3. Assembly a. Front wire 1) Insert the pulley alignment pin in the right side(looking from the front) of the shaft. 2) Wind the wire one and a half times starting from the second groove from the front of pulley 1 and insert it on to the shaft. 3) Wind the wire one and a half times - Canon LBP 2460 | Service Manual - Page 209
CHAPTER 3 b. Rear wire 1) Insert the pulley alignment pin in the left side(looking from the front) of the shaft. 2) Wind the wire one and a half times starting from the second groove from the front of pulley 2 and insert it on to the shaft. 3) Wind the wire one and a half times starting from the - Canon LBP 2460 | Service Manual - Page 210
cover. 2) Remove the rear cover. 3) Take out the 8 connectors. 4) After removing the 2 screws and the 2 PCB holding pins take out the paper deck driver PCB. H. Power Supply 1. Removal from the main unit. 1) Take off the rear cover. 2) Remove the connector and 2 screws, then take out the power - Canon LBP 2460 | Service Manual - Page 211
CHAPTER 3 I. Paper-size Sensing Switch PCB 1. Removal from the main unit. 1) Remove the rear cover. 2) Pull out the tray. 3) Remove the screw and the PCB base plate. 4) Undo the 3 claws, then remove the paper-size sensing switch PCB followed by the connector. ΠJ. Paper-level Sensing Switch - Canon LBP 2460 | Service Manual - Page 212
CHAPTER 3 3 - 70 - Canon LBP 2460 | Service Manual - Page 213
CHAPTER 4 TROUBLESHOOTING I. MAINTENANCE AND SERVICING 4-1 II. TOOLS 4-5 III. MEASUREMENT AND ADJUSTMENT 4-14 IV. INITIAL CHECK 4-18 V. IMAGE DEFECTS 4-19 VI. MALFUNCTION TROUBLESHOOTING 4-28 VII. PAPER FEEDING TROUBLESHOOTING 4-47 VIII. LOCATION OF ELECTRICAL PARTS/FUNCTION 4-54 IX. - Canon LBP 2460 | Service Manual - Page 214
- Canon LBP 2460 | Service Manual - Page 215
affect system performance.) These parts should be replaced during a regular service visit closest to the end of the parts expected life. B. parts should be replaced when faulty. Table 4-1-1 Printer As of November , 1997 No. Part name 1 Manual feeding pick-up roller 2 Separation pad 3 Fixing - Canon LBP 2460 | Service Manual - Page 216
CHAPTER 4 D. Service Checkpoints 1. Printer a. Cartridge • Photosensitive drum As a rule, do not touch or clean the drum. When cleaning is unavoidable, never use solvents. Do not expose to light. For details, see Chapter 3. b. Manual feeding pick-up roller, cassette pick-up roller, separation - Canon LBP 2460 | Service Manual - Page 217
CHAPTER 4 1 23 45 6 14 13 1: Fixing separation claw 2: Photosensitive drum 3: Transfer guide 4: Registration roller unit 5: Separation pad 6: Manual feeding pick-up roller 7: Feed roller 12 11 10 9 8 7 Figure 4-1-1 8: Separation roller 9: Pick-up roller 10: Transfer charging roller 11: - Canon LBP 2460 | Service Manual - Page 218
CHAPTER 4 2. Paper deck (Option) a. Pick-up roller, separation roller, and feed roller Clean with lint-free paper, either dry or moistened with ethyl/isopropyl alcohol. Replace if badly worn. 12 3 1: Pick-up roller 2: Feed roller 3: Separation roller Figure 4-1-2 4 - 4 - Canon LBP 2460 | Service Manual - Page 219
4 II. TOOLS A. Standard Tools The standard tools required for servicing the printer are listed below. Table 4-2-1 No. Tool name 1 Tool 23 Brush 24 Penlight 25 Plastic bottle 26 Solder 27 Desoldering wick 28 Lint-free paper 29 Soldering iron 30 Oiler 31 Plastic jar 32 Digital multimeter Tool No - Canon LBP 2460 | Service Manual - Page 220
the following special tools are required when servicing the printer. No. Tool name 1 Printer driver tester Tool No. RY9-0104 Table 4-2-2 Shape P RINTER DRIVER bit 16 b it 1 5 b checking printer operations. 2 Thickness gauge RY9-0088 A Used for installing the sepa- 1.0 ration guide of - Canon LBP 2460 | Service Manual - Page 221
and motors. c. In the event of a printer failure, the error information sent from the printer to the video controller (external device) can be displayed on the tester LED. Note: This manual covers the basic operation of the printer driver tester. For a move defailed explanation please refer - Canon LBP 2460 | Service Manual - Page 222
CHAPTER 4 2. Operation Panel PRINTER DRIVER DATA bit 16 bit 15 bit 14 bit 13 bit 0 0 0 2 OFF SET UP 1 10 11 RY9-0104 CANON INC. MADE IN JAPAN Figure 4-2-2 DATA LED Monitors the status of the various loads and sensors sent from the printer with the 16 LEDs. +24VA LED Lights up when +24VA is - Canon LBP 2460 | Service Manual - Page 223
status of the sensors Mode and loads sent from the printer) 1 Operator call/ service call 2 Service call/ misprint details/ warning 3 Pick-up unit sets up various data sent from the printer) Print density select Ready inhibit/ forced laser emission/ sleep setting Multi-purpose tray - Canon LBP 2460 | Service Manual - Page 224
Clip Connector 2 Connector 1 Figure 4-2-3 Note: When operating the printer driver tester, electrostatic energy can cause operation failures. Therefore, when connecting operations > 1) Turn the printer power OFF. 2) Remove the rear cover. (See Chap. 3 of the Service Manual.) 3) Connect the tester - Canon LBP 2460 | Service Manual - Page 225
light up. PRINTER DRIVER DATA bit 16 Laser malfunction 13 Main motor malfunction 12 Scanner motor malfunction D 11 Fan motor malfunction I 10 S 9 Lifting plate malfunction P L 8 Side registration guide malfunction A7 Y 6 Misprint 5 Cartridge-out 4 Paper-out 3 Door open 2 Jam 1 Printer - Canon LBP 2460 | Service Manual - Page 226
. 5) By turning the TEST PRINT switch ON once, a test print can be made. PRINTER DRIVER DATA bit 16 bit 15 bit 14 bit 13 bit 12 bit 11 bit 10 bit 9 0 0 0 0 0 0 0 2 OFF SET UP 1 10 11 RY9-0104 CANON INC. MADE IN JAPAN Horizontal lines (image pattern) setting Duplex print setting Face-up - Canon LBP 2460 | Service Manual - Page 227
16 Lights when the upper cassette pick-up function is ready in the printer 2 Lights when there envelopes are loaded in the envelope feeder. 1 when paper present at the second-feed position 8 RDYINH set (Note 1) 7 6 Forced laser emission 5 4 3 Display panel light up test 2 Sleep mode (1: deep mode, - Canon LBP 2460 | Service Manual - Page 228
width). If the nip width is not correct, a fixing problem may occur. Follow the procedure below to check the nip width. 1) Produce an all-black print using an EP-W cartridge, and take the print to the customer's premises. (Use the printer driver tester to output the all-black print.) 2) Put the all - Canon LBP 2460 | Service Manual - Page 229
of the margins on left side is necessary. This procedure is outlined below. 1) Load 20 - 30 sheets of paper into the cassette. Then, using the printer driver tester, print several pages of all-black or horizontal line test prints. 2) Measure the distance (a) between the left edge of the page to the - Canon LBP 2460 | Service Manual - Page 230
CHAPTER 4 step 2) above. If the margin needs further adjustment repeat steps 1) to 3) again. Leading edge of paper a The value of "a" drops by 0.5mm for each notch moved. Figure 4-3-3 The value of "a" rises by 0.5mm for each notch moved. 4 - 16 - Canon LBP 2460 | Service Manual - Page 231
B. Electrical Adjustment The printer does not require electrical adjustment in the field. CHAPTER 4 4 - 17 - Canon LBP 2460 | Service Manual - Page 232
, there is a chance that the toner is not even. Rock the toner cartridge as shown in Chap. 1 and make a print to check that it has evened out. 4. Other During winter, particularly when moving the printer into a warm room from a cold location such as a warehouse, various problems can occur due to - Canon LBP 2460 | Service Manual - Page 233
image defect appears, a test print can be made to identify the problem. 1. Engine test print Test print patterns of horizontal lines are printed in this test print. The test prints can be made by using the printer driver checker which can make all four test patterns (vertical lines, horizontal lines - Canon LBP 2460 | Service Manual - Page 234
print a sheet of the pattern shown below. Canon Inc., LBP-2460 Printer Configuration Page PCL MENU COPIES = 1 PAGESIZE PS FONTS PRINT PCL FONTS PRINT PS DEMO PRINT PCL DEMO CONTINUOUS TEST LANGUAGE MENU LANG = ENGLISH RESET MENU/PRINTER RESET = PRINTER RESET = MENU INSTALLED OPTIONS PAPER DECK PS - Canon LBP 2460 | Service Manual - Page 235
B. Examples of Image Defects (The paper is fed vertically.) CHAPTER 4 I-1 Light I-2 Dark I-3 Completely blank I-4 All black I-5 Dots vertically in a line I-6 Dirt on back of paper I-7 Vertical streaks/lines I-8 Smudged horizontal bands I-9 Dirty I-10 Blank spots I-11 White vertical lines - Canon LBP 2460 | Service Manual - Page 236
Troubleshooting I-1 Light 1. The image density is not adjusted correctly. Action: Adjust the image density by operating the external device. 2. Lack of toner Action: Replace the cartridge. 3. Open the upper cover and remove the EP-W cartridge If the problem continues after cleaning - Canon LBP 2460 | Service Manual - Page 237
shutter arm or laser shutter does not move smoothly, or parts are damaged, replace them. 3. The developing bias contact of the high-voltage power supply is not making a good connection with the cartridge contact. Action: If the contacts are dirty, clean them. If the problem continues after cleaning - Canon LBP 2460 | Service Manual - Page 238
contact. Action: If the contacts are dirty, clean them. If the problem continues after cleaning, or parts are deformed or damaged, replace them. damaged peripherally. Action: Replace the cartridge. 2. The fixing entry guide is dirty. Action: Clean the fixing entry guide. 3. The fixing upper roller - Canon LBP 2460 | Service Manual - Page 239
the paper. Instruct the customer problem continues, replace the cartridge. 2. The photosensitive drum is scratched. Action: Replace the cartridge. 3. Foreign matter is on the laser outlet of the printer or the laser inlet of the cartridge. Action: Remove the foreign matter. 4. The fixing entry guide - Canon LBP 2460 | Service Manual - Page 240
are loose. Action: Reconnect the J202, J206, and J207 connectors properly. 2. The laser/scanner unit connectors are loose. Action: Reconnect J1001, J1 and J6. 3. The laser/scanner unit is faulty. Action: Replace the laser/scanner unit. 4. The DC controller PCB is defective. Action: Replace the DC - Canon LBP 2460 | Service Manual - Page 241
CHAPTER 4 Table 4-5-1 Periods of appearance of dirt, blank spots on images Problem location Diameter (mm) Period on image (mm) Dirt Transfer charging roller Fixing upper roller Fixing lower roller Pick-up roller Feed roller Separation roller Photosensitive - Canon LBP 2460 | Service Manual - Page 242
touch a metal part of the printer to discharge static energy, as it can cause damage to the PCBs. • the laser/scanner unit cannot be adjusted in the field, so do not attempt to disassemble it. Prepare the printer driver tester for executing the troubleshooting malfunctions described in this section - Canon LBP 2460 | Service Manual - Page 243
doesn't clear with power cycle or COLD RESET. This message has lower priority than printer error messages such as "toner low" or "memory overflow" DISK FULL Disk is 95% full. The printer goes offline Delete pcl/ps fonts/macros/files (also at power up with a "disk full" or format the disk - Canon LBP 2460 | Service Manual - Page 244
Toner is low. Replace the toner cartridge as soon as possible. The printer will continue to operate, but the images will degrade. Toner Cartridge is missing. Add toner cartridge resume printing. Load Manual tray with paper size. Like No Action Required. "Load" but for manual feed only. The - Canon LBP 2460 | Service Manual - Page 245
. STACKER OPTION The Stapler Stacker has been removed or is Re-connect the Stapler Stacker ERROR no longer properly connected. to the printer. CHECK INPUT A paper jam occured near the input tray. Check the area specified. TRAY OPEN FRONT A paper jam occured near the front cover. Check the - Canon LBP 2460 | Service Manual - Page 246
CHAPTER 4 Message Meaning Action 6 PAPER JAM 7 PAPER JAM 8 PAPER JAM 9 PAPER JAM 10 PAPER JAM 11 PAPER JAM 12 PAPER JAM 13.1 PAPER JAM CHECK PAPER DECK 13.2 PAPER JAM CHECK PAPER DECK 13.3 PAPER JAM CHECK PAPER DECK 14.1 PAPER JAM OPEN RIGHT COVER area. the paper path. The upper cover must be - Canon LBP 2460 | Service Manual - Page 247
printer. DUPLEX COVER The delivery cover is open. Close the cover. OPEN OPT CONTROLLER There is a problem Error - Replace the hard disk. FOR SERVICE MEMORY ALLOC GRS has been unable to allocate 2. Replace the NIC. OPTION ERROR 43 PS OPTION Option PS ROM (DIMM) diagnostic error. An option - Canon LBP 2460 | Service Manual - Page 248
network installed in printer. cards. The Fuser warm up time out. Fuser overheating. See M-1 of page 4-40 Fuser Error. See M-3 of page 4-41 Unknown Scanner Error. See M-5 of page 4-41 Scanner start up failure. Scanner rotation failure. Scanner Beam failure. See M-4 of page 4-41 Laser - Canon LBP 2460 | Service Manual - Page 249
the Aux Tray has See M-11 of page 4-43 TRAY CALL FOR failed. SERVICE CHECK INPUT A paper jam occured near the input tray. Check the area specified . After loading new STAPLES TEST from the TEST MENU staples cartridge, the "LOAD & TEST STAPLES" message will remain on the UI until STAPLE TEST is - Canon LBP 2460 | Service Manual - Page 250
the staple cartridge is full or not). The printer will not staple jobs correctly if STAPLE TEST is not executed. See service manual of stapler stacker. See service manual of stapler stacker. See service manual of stapler stacker. See service manual of stapler stacker. See service manual of stapler - Canon LBP 2460 | Service Manual - Page 251
SERVICE ON again. If it does not remedy the problem, replace the resident NVRAM. 64 ERROR CALL SRAM in AIR chip error. Replace the video controller FOR SERVICE printer powered on with continue. context saving enabled, but due to manual recofiguration, there is not enough memory to support - Canon LBP 2460 | Service Manual - Page 252
OFFLINE. Press ONLINE. PRINTING... Usually displayed when printing an item form the TEST MENU, or when attempting to go offline while the printer is busy. READY Printer is ready to receive data and print. No action required. REMOVE A paper jam or misfeed has occurred in or Take the action - Canon LBP 2460 | Service Manual - Page 253
CHAPTER 4 Message Meaning Action PRINTCART CLEAR PAPERPATH RESETTING PRINTER RESTORING DEFAULTS SRAM ERROR CALL SERVICE WARNING UP... near the unit specified.. Displays when TEST/RESET PRINTER No action required. item is selected. Displays when TEST/FACTORY DEFALTS No action required. item - Canon LBP 2460 | Service Manual - Page 254
CHAPTER 4 B. Malfunction Troubleshooting M-1 Fixing Unit Failure (Abnormal Temperature) 1. The thermistor has shorted. Action: Turn the power OFF and remove the fixing unit. Measure the resistance between - Canon LBP 2460 | Service Manual - Page 255
connector J18, and connector J207 on the DC controller PCB. 2. The scanner motor driver is defective. Action: Use the printer driver tester to rotate the scanner motor. If it does not rotate, replace the laser/scanner unit. 3. The DC controller PCB is defective. Action: Replace the DC controller - Canon LBP 2460 | Service Manual - Page 256
side do not conduct when the door switch (SW1401) is on, replace the switch/sensor PCB. 3. The main motor is defective. Action: Use the printer driver tester to rotate the main motor. If it does not rotate, replace it. 4. The DC controller PCB is defective. Action: Replace the DC controller PCB - Canon LBP 2460 | Service Manual - Page 257
parts are damaged. Action: Replace any damage parts. 2. The lifting plate position sensor is defective. Action: Check the sensor state using the printer driver tester. If it is defective, replace the multi-purpose tray PCB. 3. The lifting plate solenoid is defective. Action: Disconnect lifting plate - Canon LBP 2460 | Service Manual - Page 258
PCB. 2. Gears are damaged. Action: Replace any damaged gears. 3. The horizontal registration guide home position sensor is defective. Action: Check the sensor state using the printer driver tester. If it is defective, replace the sensor. 4. The horizontal registration motor is defective. Action - Canon LBP 2460 | Service Manual - Page 259
the power supply. 8. Cable, DC load and paper deck driver PCB Action: Turn OFF the printer power switch, and check the lines and DC loads from the paper deck driver PCB. If there are no problems with either of them, replace the paper deck driver PCB. M-15 No DC Power Input 1. The - Canon LBP 2460 | Service Manual - Page 260
pressed as the paper guides are not properly inserted. Action: Insert the paper guides correctly. 3. The side and end guides are not installed in lower it. Turn the printer power ON. Measure the voltage between connectors J208-8 (LIFT) and J208-10 (GND) on the paper deck driver PCB. Replace the - Canon LBP 2460 | Service Manual - Page 261
PCB is defective. Action: Make a test print from the multi-purpose tray using the printer driver tester. If the paper is picked up correctly, replace the video controller PCB. 2. Gears are damaged. Action: Remove the manual feed pick-up unit and check the gears. Replace any damaged gears. 3. The - Canon LBP 2460 | Service Manual - Page 262
1. Video controller PCB is defective. Action: Use the printer driver tester to make a test print from the envelope feeder. If the -2 (TEST-1) and JP201-1 (GND) on the paper deck driver PCB, turn the printer power switch ON. If the pick-up motor does not rotate at that - Canon LBP 2460 | Service Manual - Page 263
J102-7 and J102-8 on the clutch side. If it is not about 210 , replace the registration clutch. 3. Defective paper deck driver PCB Action: Replace the paper deck driver PCB. M-23 Poor Output from the High-Voltage Power Supply 1. A terminal of the high-voltage contacts is dirty - Canon LBP 2460 | Service Manual - Page 264
) 1. Poor contact in the deck motor drive signal line connector Action: Reconnect deck motor connector J118 and connector J204 on the paper deck driver PCB. 2. Faulty deck motor Action: Measure the voltage between connectors J204-4 (DCMOT-ON) and J204-2 (GND) on the paper deck - Canon LBP 2460 | Service Manual - Page 265
CHAPTER 4 VII. PAPER FEEDING TROUBLESHOOTING A. Paper Jams Paper in the printer passes through five major units: (1) duplexing unit, (2) fixing and delivery unit, (3) envelope feeder unit, (4) pick-up unit, and (5) paper deck unit. The following explains troubleshooting for jams in each of these - Canon LBP 2460 | Service Manual - Page 266
recommended paper and on how to store paper. 2. If jams occur in the manual feed pick-up unit, perform step 6 and subsequent steps. 3. If jams occur Action: Check using the steps of M-21 "Registration Roller not rotating (printer)". 5. The registration roller is worn, deformed, or dirty. Action: - Canon LBP 2460 | Service Manual - Page 267
fixing entrance guide is dirty, damaged, or clogged with toner. Action: Clean the guide. 4. The fixing separation guide is dirty, damaged, or clogged with toner. Action: Clean the guide. 5. The : Check the state of each sensor using the printer driver tester. Replace any defective sensors. 4 - 53 - Canon LBP 2460 | Service Manual - Page 268
is to be fed, causing a paper jam due to a difference in timing. Action: Insert the guides correctly. 3. Paper is folded. Action: Replace the paper. 4. More paper than the specified amount during printing. Action: Check according to instructions in M-20 "No paper pick-up form Paper Deck". 4 - 54 - Canon LBP 2460 | Service Manual - Page 269
. Advise the customer to use the recommended paper. 2. If this problem occurs with the multi-purpose tray, perform step 5 and subsequent steps is skewed, check the pick-up unit. 4. The fixing entrance guide is dirty. Action: Clean the guide. 5. The fixing lower roller is dirty. Action: Replace the - Canon LBP 2460 | Service Manual - Page 270
paper feed slot Action: Advise the customer not to over load the paper feed slot with paper. 3. The paper guide is worn or deformed. Action: Check the paper feed path, and replace the guide if it is damaged or deformed. T-4 Skewing 1. The recommended paper is not being used. Action - Canon LBP 2460 | Service Manual - Page 271
CHAPTER 4 This page intentionally left blank 4 - 57 - Canon LBP 2460 | Service Manual - Page 272
CHAPTER 4 VIII. LOCATION OF ELECTRICAL PARTS/FUNCTION A. Switches SW1401 SW101 SW1601 SW1602 SW1603 SW1604 SW1601 SW1602 SW1603 SW1604 4 - 58 SW31 SW601 SW602 SW701 SW702 SW703 SW704 Figure 4-8-1 - Canon LBP 2460 | Service Manual - Page 273
CHAPTER 4 Symbol Name Switch Table 4-8-1 Code Role SW101 Power switch SW1401 Door switch SW1601 Lower cassette-size sensing switch SW1602 Lower cassette-size sensing switch SW1603 Lower cassette-size sensing switch SW1604 Lower cassette-size sensing switch SW1601 Upper cassette-size sensing - Canon LBP 2460 | Service Manual - Page 274
CHAPTER 4 B. Sensors PS1402 PS1401 PS1403 TH TP PS1302 PS1 PS1208 PS1202 PS2 PS1207 PS1201 PS1301 PS1206 PS1205 PS3 PS1204 PS1203 PS22 PS24 PS23 PS21 PS931 Figure 4-8-2 4 - 60 - Canon LBP 2460 | Service Manual - Page 275
PS1403 Fixing unit delivery sensor PS21 Duplexing unit paper sensor (duplexing unit) PS22 Switchback sensor (duplexing unit) PS23 Side registration guide home position sensor (duplexing unit) PS24 Duplex feed roller 1 home position sensor (duplexing unit) PS931 Envelope feeder paper sensor - Canon LBP 2460 | Service Manual - Page 276
CHAPTER 4 PS33 PS34 PS35 PS32 PS31 Figure 4-8-3 4 - 62 - Canon LBP 2460 | Service Manual - Page 277
CHAPTER 4 Table 4-8-3 Symbol Name Photointerrrupter Code PS31 PS32 PS33 PS34 PS35 Role Registration paper sensor (paper deck) Paper jam sensor (paper deck) Tray paper-out sensor (paper deck) Paper surface sensor (paper deck) Door sensor (paper deck) 4 - 63 - Canon LBP 2460 | Service Manual - Page 278
CHAPTER 4 C. Clutches and Solenoids SL3 SL1 CL1 CL3 CL2 SL2 CL21 SL22 SL21 Figure 4-8-4 4 - 64 - Canon LBP 2460 | Service Manual - Page 279
CL31 CL32 Symbol CL Name Clutch Solenoid Figure 4-8-5 Table 4-8-4 Code Role CL1 CL2 CL3 CL21 CL31 CL32 CL33 Registration clutch Feed clutch Manual feed clutch Duplex feed clutch (duplexing unit) Lifter clutch (paper deck) Registration clutch (paper deck) Feed clutch (paper deck) SL1 SL2 SL3 - Canon LBP 2460 | Service Manual - Page 280
CHAPTER 4 D. Motor and Others FAM4 FAM1 H2 H1 FAM3 MT1 SMT1 FAM2 SMT21 SMT22 SMT11 Figure 4-8-6 4 - 66 - Canon LBP 2460 | Service Manual - Page 281
CHAPTER 4 SMT31 MT31 Symbol M Name Motor Fan motor Fixing heater Figure 4-8-7 Table 4-8-5 Code Role MT1 Main motor SMT1 Pick-up motor SMT11 Envelope feeder pick-up motor (envelope feeder) SMT21 Switchback motor (duplexing unit) SMT22 Side registration motor (duplexing unit) SMT31 Pick-up - Canon LBP 2460 | Service Manual - Page 282
CHAPTER 4 E. PC Boards 5 1 2 6 4 6 3 7 8 Figure 4-8-8 4 - 68 - Canon LBP 2460 | Service Manual - Page 283
supply PCB 3 Pick-up PCB 4 Multi-purpose tray PCB 5 Switch/sensor PCB 6 Cassette size detection PCB 7 Duplexing driver PCB 8 Envelope feeder driver PCB 9 Paper deck driver PCB 10 Paper-level sensing switch PCB 11 Paper-size sensing switch PCB Figure 4-8-9 Table 4-8-6 Function Controls print - Canon LBP 2460 | Service Manual - Page 284
CHAPTER 4 F. Connectors J1001 J6 J1 J3 J1401 J18 J12 J13 J202 J205 J203 J208 J215 J206 J207 J210 J218 J216 J221 J1601A J12 J1601B 4 - 70 J25 J26 J1402 J225 J14 J219 J15 J16 J209 J17 J11 J1201 J13 J1204 J1205 J1203 J1202 J1206 J14 Figure 4-8-10 - Canon LBP 2460 | Service Manual - Page 285
CHAPTER 4 J54 J51 J204 J52 J53 J19 J213 J214 J50 J10 J24 J102 J222 J217 J1302 J1304 J1303 J1301 J19 J22 J20 J23 J21 J2009 J2005 J2008 J2007 J2001 J2004 J2002 J2006 J2003 J931 J24 J932 Figure 4-8-11 4 - 71 - Canon LBP 2460 | Service Manual - Page 286
CHAPTER 4 J210 J206 J205 J204 J203 J209 J207 J208 J120 J601 J114 J116 J701 J101 J119 J901 J118 J113 J11 2 J111 J115 J117 J110 J205 J108 J203 J102 J107 Figure 4-8-12 4 - 72 - Canon LBP 2460 | Service Manual - Page 287
factory use. They require special tools and measuring instruments, and must be set with high precision. Do not touch them during after-sales service. Notes: 1. Some LEDs receive leakage current during normal operation, causing a dim glow even when they should be OFF. 2. Potentiometers which may be - Canon LBP 2460 | Service Manual - Page 288
CHAPTER 4 B. Switch/Sensor PCB J1402 21 1 3 SW1401 4 2 14 J1401 1 Figure 4-9-2 Table 4-9-2 SW No. Function SW1401 Door switch C. Cassette Paper-size Sensing Switch PCB J1601 1 5 SW1604 SW1603 SW1602 SW1601 Figure 4-9-3 Table 4-9-3 SW No. SW1601 SW1602 SW1603 SW1604 Function Cassette - Canon LBP 2460 | Service Manual - Page 289
D. High-voltage Power Supply PCB VR701 VR702 B10 B1 A10 J701 A1 TB703 TB702 TB701 TB704 1 2 T704 6 5 7 Figure 4-9-4 Table 4-9-4 VR No. VR701 VR702 Function For factory use CHAPTER 4 TB706 TB705 4 - 75 - Canon LBP 2460 | Service Manual - Page 290
CHAPTER 4 E. Video Controller PCB JP1 J6 J2 J1 J11 J10 J9 J5 J4 J3 Figure 4-9-5 Table 4-9-5 JP No. JP1 Function For factory use J8 J7 4 - 76 - Canon LBP 2460 | Service Manual - Page 291
F. Envelope Feeder Driver PCB VR2 VR1 Figure 4-9-6 Table 4-9-6 VR No. VR1 VR2 Function For factory use CHAPTER 4 4 J931 1 J932 1 4 4 - 77 - Canon LBP 2460 | Service Manual - Page 292
A1 CHAPTER 4 G. Option Controller PCB 1 SW101 5 1 0 15 1 6 1 1 J102 JP101 ON OFF Figure 4-9-7 Table 4-9-7 SW No. SW101 Function For factory use Table 4-9-8 JP No. JP101 Function For factory use B10 B1 J101 A10 4 - 78 - Canon LBP 2460 | Service Manual - Page 293
H. Paper Deck Driver PCB 1 1 1 J208 3 1 J211 11 0 1 J207 J210 J201 1 6 11 CHAPTER 4 15 10 5 J206 2 reserved +5V PWRON-IN signal After shorting out TEST-1 and GND, and turning ON the printer, test mode is entered. Once in test mode, the paper pick-up operation runs continuously - Canon LBP 2460 | Service Manual - Page 294
sheet of paper at a time in the tray. If multiple sheets are loaded in the tray, the paper deck will continuously feed paper into the printer until running out causing a paper jam. 2. Test mode will not be entered if the power is turned ON before shorting TEST-1 and GND. 3. Test-1 must - Canon LBP 2460 | Service Manual - Page 295
I. Paper-level Sensing Switch PCB 1 J701 3 SW601 SW602 Figure 4-9-9 Table 4-9-10 SW No. SW601 SW602 Function Paper level sensing switch (See table 2-10-1 of page 2-87.) J. Paper-size Sensing Switch PCB 5 J701 1 SW704 SW703 SW702 SW701 Figure 4-9-10 Table 4-9-11 SW No. SW701 SW702 SW703 - Canon LBP 2460 | Service Manual - Page 296
Use Cleaning: plastic, rubber, external parts Cleaning: oil and toner stains 3 Lubricating oil 4 Lubricating agent 5 Lubricating agent 6 Apply to gears Apply to gears of the pick-up unit Apply to gears of the manual feed pick-up unit Remarks • Purchase locally • Flammable: keep away from flame • - Canon LBP 2460 | Service Manual - Page 297
APPENDIX I. GENERAL TIMING CHART A-1 II. GENERAL CIRCUIT DIAGRAM.... A-3 III. LIST OF SIGNALS A-7 - Canon LBP 2460 | Service Manual - Page 298
- Canon LBP 2460 | Service Manual - Page 299
bias (AC) 17 Developing bias (DC) 18 Transfer voltage 19 Static charge eliminator bias Negative bias 20 Upper fixing roller bias 21 Laser diode 169°C control 180°C control High-speed rotation 3.0 0.52 About 1.1 About 0.9 0.52 High-speed rotation Rotation 0.06 0.03 0.75 0.06 0.03 - Canon LBP 2460 | Service Manual - Page 300
GENERAL TIMING CHART-2/2 Operation Power switch ON WAIT STBY INTR 1 Fixing roller heater (H1, H2) 2 PRINT signal (/PRNT) 3 VERTICAL SYNC signal (/VSYNC) 4 Switchable motor (SMT21) 5 Duplex deflector drive solenoid (SL22) 6 Duplex feed clutch (CL21) 7 Fixing unit delivery sensor (PS1403) 8 - Canon LBP 2460 | Service Manual - Page 301
6 5 4 3 2 1 J3 6 5 4 3 2 1 3 from Fixing unit J56M Operation panel Laser driver PCB 9 8 7 6 5 4 3 2 1 J1001 9 8 7 6 5 4 3 2 1 Main motor 2 1 Lifting plate solenoid SL2 2 1 CL Manual feed clutch SL3 3 3 SW1602 2 2 SW1603 1 1 PS21 Side registration guide home position sensor - Canon LBP 2460 | Service Manual - Page 302
paper sensor A SL J107 3 2 1 J108 3 2 1 J203 4 3 2 1 J205 4 3 2 1 J111 3 2 1 J112 3 2 1 J113 3 2 1 Power supply B C Paper deck driver PCB J102 1 2 3 4 5 6 7 8 9 10 J101 10 9 8 7 6 5 4 3 2 1 J115 1 2 J110 1 2 3 4 5 6 7 8 9 J114 2 1 J109 9 8 7 6 5 4 3 2 1 J121 1 2 J120 2 1 +24V +24V PWRON - Canon LBP 2460 | Service Manual - Page 303
GENERAL CIRCUIT DIAGRAM-3/3 6 5 4 3 2 1 J1/2 J3 J4 J5 J11 J7 A1 VCC A2 LD1 B1 GND B2 LD0 1 GND 2 MD0 37 GND 38 GND 1 GND 2 MD0 37 GND 38 GND 1 GND 2 MD0 37 GND 38 GND 1 nRESET 23 WR1 2 GND 24 GND 1 GND 2 GND D Hard disk (option) Option controll interface board A3 LD3 B3 - Canon LBP 2460 | Service Manual - Page 304
APPENDIX A-6 - Canon LBP 2460 | Service Manual - Page 305
L STATUS BUSY signal I L COMMAND BUSY signal O L PAPER FEED signal O O O I H VIDEO signal O L FRONT PANEL SERIAL INPUT signal I H FRONT PANEL SERIAL CLOCK signal I L PRINTER POWER READY signal I L PRINT signal O L PRINTER CLOCK signal I L CONTROLLER CLOCK signal O L PAPER DELIVERY signal O O A - 7 - Canon LBP 2460 | Service Manual - Page 306
+24VA 1 FAN1D 2 /FAN1S 3 GND 1 /REGCLD 2 +24VA I/O Logic O Signal name O L BEAM DETECTION signal O LASER OUTPUT signal I PHOTO DETECTION signal O L VIDEO DATA ENABLE signal O L FORCED LASER ON signal O H VIDEO signal O O L FRONT PANEL SERIAL OUTPUT signal I L FRONT PANEL SERIAL - Canon LBP 2460 | Service Manual - Page 307
STATUS signal O SERVICE COMMAND signal O O O I L DUPLEXING UNIT SENSE signal I L DUPLEXING UNIT STATUS signal O H DUPLEXING UNIT COMMAND signal O L SERIAL CLOCK O O O L MANUAL FEED CLUTCH DRIVE signal O L LIFTING PLATE SOLENOID DRIVE signal I L LIFTING PLATE SENSE signal I L MULTI - Canon LBP 2460 | Service Manual - Page 308
-LEVEL SENSE signal 1 I L RIGHT DOOR OPEN SENSE signal O O I TRANSFER BIAS MONITOR signal O L TRANSFER NEGATIVE BIAS DRIVE signal I TONER LEVEL signal O IMAGE DENSITY ADJUSTMENT signal O L DEVELOPING AC BIAS DRIVE signal O L DEVELOPING BIAS FREQUENCY OUTPUT signal O O TRANSFER BIAS - Canon LBP 2460 | Service Manual - Page 309
BIAS DRIVE signal O L DEVELOPING DC BIAS DRIVE signal O I I I I FIXING MAIN HEATER TYPE SENSE signal I FIXING SUB HEATER TYPE SENSE signal I FIXING ROLLER TEMPERATURE SENSE signal I TONER LEVEL signal O H FAN MOTOR 4 DRIVE signal I L FAN MOTOR 4 ROTATING DETECTION signal A - 11 - Canon LBP 2460 | Service Manual - Page 310
APPENDIX B. Input/output signals to option controller PCB Connector J101 J102 Pin Abbreviation I/O Logic A1 +5V A2 RESET I A3 /PRINT IL A4 /SPCHG IL A5 /PDLV IL A6 /undetermined 1 I A7 N.C. A8 /CKEN IL A9 /TX IL A10 GND B1 +5V B2 N.C. B3 /VSYNC IL B4 /PFED IL B5 - Canon LBP 2460 | Service Manual - Page 311
C. Input/output signals to paper deck driver PCB Connector J201 J202 J203 J204 J205 J206 Pin Abbreviation I/O Logic Signal name 1 TXI I L SERIAL IN signal 2 GND 3 RXO O L SERIAL OUT signal 4 CONTO O L Communication ready - Canon LBP 2460 | Service Manual - Page 312
APPENDIX Connector J207 J208 J209 J210 Pin Abbreviation 2 LIFTCL 1 +5V 2 GND 3 REGI 4 +5V 5 GND 6 JAM 7 REGICL 8 +24V 9 FEEDCL 10 +24V 1 +24V 2 PICKUPSL 3 +5V 4 GND 5 PAP-EXIST 6 +5V 7 GND 8 LIFT 9 +5V 10 GND 11 DOOR 1 GND 2 PAP-SIZE4 3 PAP-SIZE3 4 PAP - Canon LBP 2460 | Service Manual - Page 313
Prepared by PERIPHERAL PRODUCTS QUALITY ADVANCEMENT DIV. PERIPHERAL PRODUCTS TECHNICAL DOCUMENTATION DEPT. CANON INC. Printed in Japan REVISION 0 ( APRIL 1997 ) REVISION 1 ( DEC. 1997 ) 5-1, Hakusan 7-chome, Toride-City, Ibaraki-Pref. 302, Japan - Canon LBP 2460 | Service Manual - Page 314
The printing paper contains 70% waste paper. PRINTED IN JAPAN (IMPRIME AU JAPON) 1297AT1.40 CANON INC.
-
 1
1 -
 2
2 -
 3
3 -
 4
4 -
 5
5 -
 6
6 -
 7
7 -
8
-
9
-
10
-
11
-
12
-
13
-
14
-
15
-
16
-
17
-
18
-
19
-
20
-
21
-
22
-
23
-
24
-
25
-
26
-
27
-
28
-
29
-
30
-
31
-
32
-
33
-
34
-
35
-
36
-
37
-
38
-
39
-
40
-
41
-
42
-
43
-
44
-
45
-
46
-
47
-
48
-
49
-
50
-
51
-
52
-
53
-
54
-
55
-
56
-
57
-
58
-
59
-
60
-
61
-
62
-
63
-
64
-
65
-
66
-
67
-
68
-
69
-
70
-
71
-
72
-
73
-
74
-
75
-
76
-
77
-
78
-
79
-
80
-
81
-
82
-
83
-
84
-
85
-
86
-
87
-
88
-
89
-
90
-
91
-
92
-
93
-
94
-
95
-
96
-
97
-
98
-
99
-
100
-
101
-
102
-
103
-
104
-
105
-
106
-
107
-
108
-
109
-
110
-
111
-
112
-
113
-
114
-
115
-
116
-
117
-
118
-
119
-
120
-
121
-
122
-
123
-
124
-
125
-
126
-
127
-
128
-
129
-
130
-
131
-
132
-
133
-
134
-
135
-
136
-
137
-
138
-
139
-
140
-
141
-
142
-
143
-
144
-
145
-
146
-
147
-
148
-
149
-
150
-
151
-
152
-
153
-
154
-
155
-
156
-
157
-
158
-
159
-
160
-
161
-
162
-
163
-
164
-
165
-
166
-
167
-
168
-
169
-
170
-
171
-
172
-
173
-
174
-
175
-
176
-
177
-
178
-
179
-
180
-
181
-
182
-
183
-
184
-
185
-
186
-
187
-
188
-
189
-
190
-
191
-
192
-
193
-
194
-
195
-
196
-
197
-
198
-
199
-
200
-
201
-
202
-
203
-
204
-
205
-
206
-
207
-
208
-
209
-
210
-
211
-
212
-
213
-
214
-
215
-
216
-
217
-
218
-
219
-
220
-
221
-
222
-
223
-
224
-
225
-
226
-
227
-
228
-
229
-
230
-
231
-
232
-
233
-
234
-
235
-
236
-
237
-
238
-
239
-
240
-
241
-
242
-
243
-
244
-
245
-
246
-
247
-
248
-
249
-
250
-
251
-
252
-
253
-
254
-
255
-
256
-
257
-
258
-
259
-
260
-
261
-
262
-
263
-
264
-
265
-
266
-
267
-
268
-
269
-
270
-
271
-
272
-
273
-
274
-
275
-
276
-
277
-
278
-
279
-
280
-
281
-
282
-
283
-
284
-
285
-
286
-
287
-
288
-
289
-
290
-
291
-
292
-
293
-
294
-
295
-
296
-
297
-
298
-
299
-
300
-
301
-
302
-
303
-
304
-
305
-
306
-
307
-
308
-
309
-
310
-
311
-
312
-
313
-
314
 |
 |

COPYRIGHT
©
1997
CANON
INC.
CANON
LBP-2460
REV.1 DEC.
1997
PRINTED
IN JAPAN
(IMPRIME AU JAPON)
RY8-1383-010
DEC. 1997
REVISION 1
SERVICE
MANUAL