Dell 1125 dell Users Guide - Page 106
Rear View - laser printer manual
 |
UPC - 043232161187
View all Dell 1125 manuals
Add to My Manuals
Save this manual to your list of manuals |
Page 106 highlights
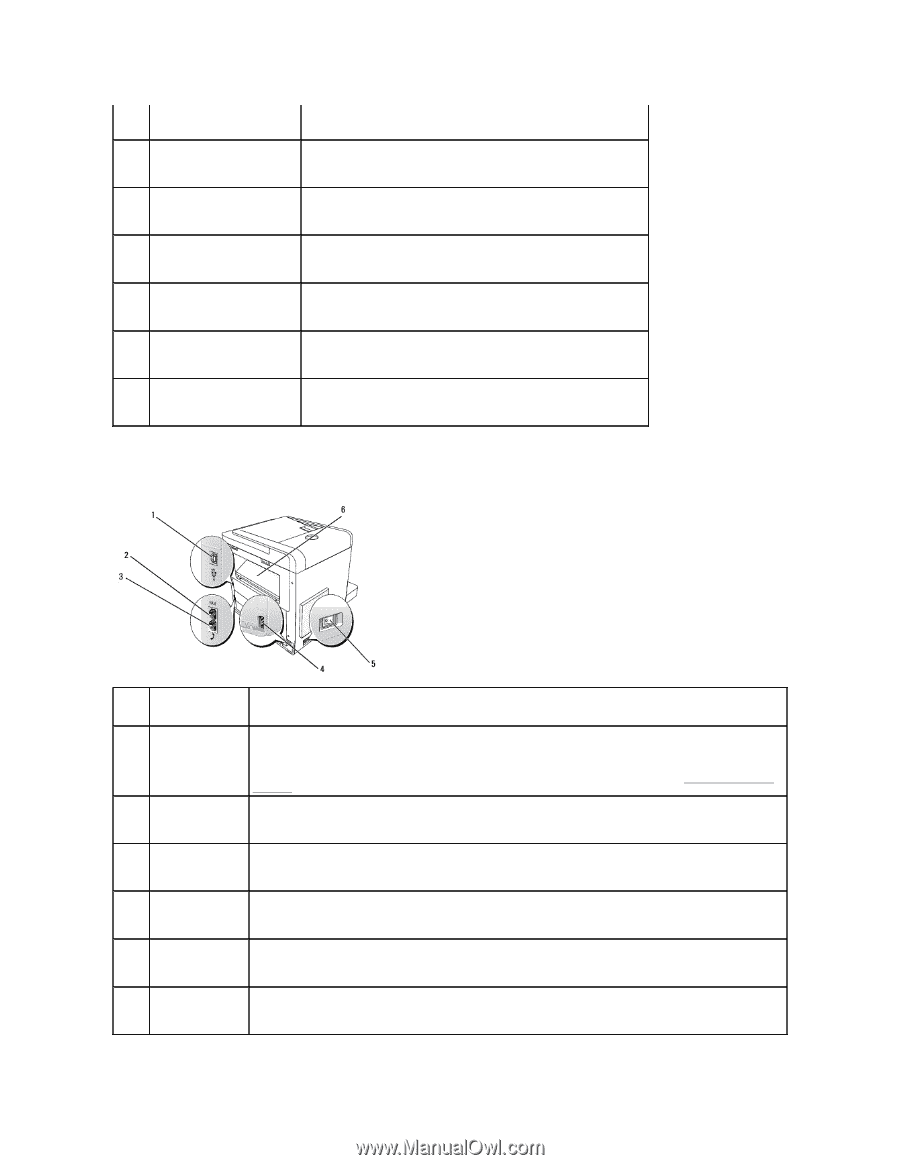
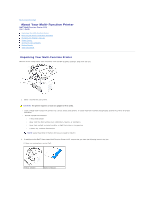
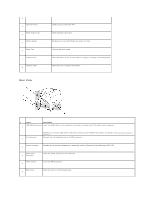
2. Operator Panel 3. Paper Output Tray 4. Manual Feeder 5. Paper Tray 6. Scanner Glass 7. Scanner Cover 8. Rear View Enables you to control the MFP. Holds document job output. Enables you to load print media one sheet at a time. Contains the print media. Place documents on the scanner glass for copying, scanning, and sending faxes. Open this cover to access the scanner. # 1. Name: Description USB Cable Connector Insert the USB cable into this connector and connect the other end of the cable to your computer. Fax Connector 2. NOTE: Do not connect USB cable to the printer until you have installed the software and drivers. See Installing Software in Windows. Connect the wall telephone line to the FAX connector. Phone Connector 3. Enables you to connect a telephone or answering machine (Optional) to the Dell Laser MFP 1125. Power Cord 4. Connector Insert the power cord jack to this connector. Power Switch 5. Turns the MFP on and off. Rear Cover 6. Open this cover to remove paper jams.
-
 1
1 -
2
-
3
-
4
-
5
-
6
-
7
-
8
-
9
-
10
-
11
-
12
-
13
-
14
-
15
-
16
-
17
-
18
-
19
-
20
-
21
-
22
-
23
-
24
-
25
-
26
-
27
-
28
-
29
-
30
-
31
-
32
-
33
-
34
-
35
-
36
-
37
-
38
-
39
-
40
-
41
-
42
-
43
-
44
-
45
-
46
-
47
-
48
-
49
-
50
-
51
-
52
-
53
-
54
-
55
-
56
-
57
-
58
-
59
-
60
-
61
-
62
-
63
-
64
-
65
-
66
-
67
-
68
-
69
-
70
-
71
-
72
-
73
-
74
-
75
-
76
-
77
-
78
-
79
-
80
-
81
-
82
-
83
-
84
-
85
-
86
-
87
-
88
-
89
-
90
-
91
-
92
-
93
-
94
-
95
-
96
-
97
-
98
-
99
-
100
-
 101
101 -
 102
102 -
 103
103 -
 104
104 -
 105
105 -
 106
106 -
 107
107 -
 108
108 -
 109
109 -
 110
110 -
 111
111
 |
 |