Dell 1125 dell Users Guide - Page 46
Printer Settings - review
 |
UPC - 043232161187
View all Dell 1125 manuals
Add to My Manuals
Save this manual to your list of manuals |
Page 46 highlights
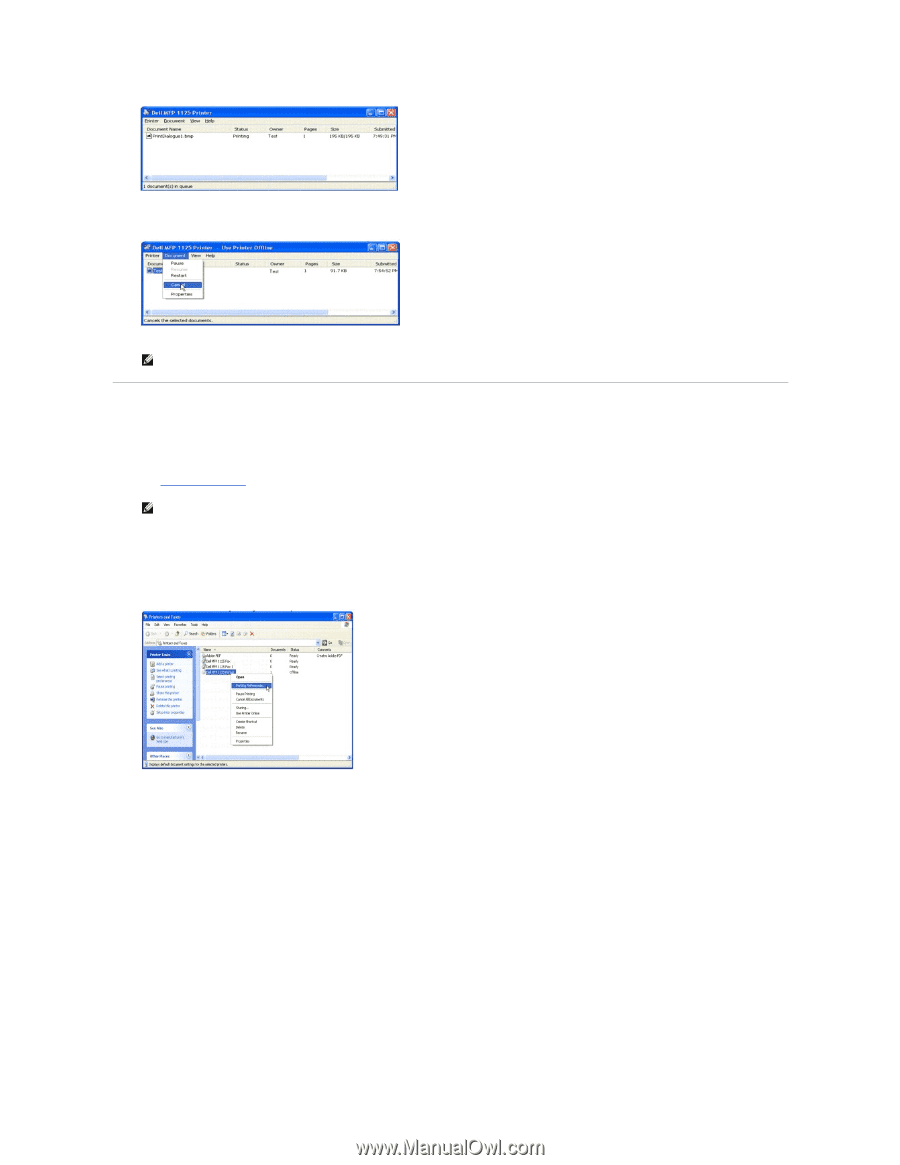
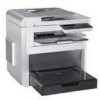
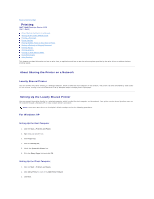
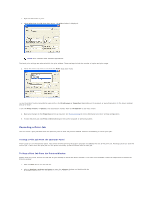
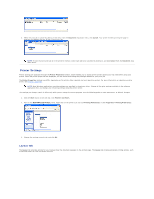
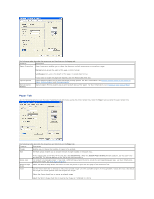
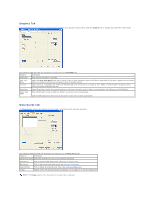
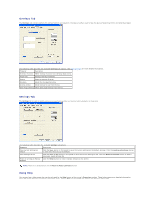
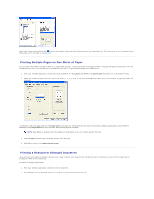
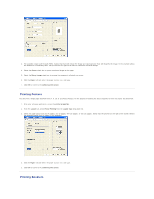
3. Select the print job to cancel by clicking it and then, from the Document drop down menu, click Cancel. Your printer finishes printing the page in progress and deletes the rest of the current print job. NOTE: If more than one print job is in the printer's memory, select each job to be cancelled by clicking it, and click Cancel from the Document drop down menu. Printer Settings Printer settings are accessed through the Printer Properties window, which enables you to access all the printer options you may need when using your printer. When the printer properties are displayed, you can review and change any settings needed for your print job. The Printer Properties window may differ, depending on the printer driver selected and your operating system. For more information on selecting a printer driver, see Printing a Document. NOTE: Most Windows applications override settings you specified in the printer driver. Change all the print settings available in the software application first, and change any remaining settings using the printer driver. The settings you change remain in effect only while you are using the current program. See the following guide to make permanent, or default, changes. 1. Click the Start button in the task bar, click Printers and Faxes. 2. Point to the Dell MFP 1125 Printer printer. Right-click on the printer icon and click Printing Preferences or click Properties® Printing Preferences. 3. Change the settings on each tab and click OK. Layout Tab The Layout tab provides options for you to adjust how the document appears on the printed page. The Layout tab includes advanced printing options, such as Multiple Pages per Side and Poster Printing.
-
 1
1 -
2
-
3
-
4
-
5
-
6
-
7
-
8
-
9
-
10
-
11
-
12
-
13
-
14
-
15
-
16
-
17
-
18
-
19
-
20
-
21
-
22
-
23
-
24
-
25
-
26
-
27
-
28
-
29
-
30
-
31
-
32
-
33
-
34
-
35
-
36
-
37
-
38
-
39
-
40
-
 41
41 -
 42
42 -
 43
43 -
 44
44 -
 45
45 -
 46
46 -
 47
47 -
 48
48 -
 49
49 -
 50
50 -
 51
51 -
52
-
53
-
54
-
55
-
56
-
57
-
58
-
59
-
60
-
61
-
62
-
63
-
64
-
65
-
66
-
67
-
68
-
69
-
70
-
71
-
72
-
73
-
74
-
75
-
76
-
77
-
78
-
79
-
80
-
81
-
82
-
83
-
84
-
85
-
86
-
87
-
88
-
89
-
90
-
91
-
92
-
93
-
94
-
95
-
96
-
97
-
98
-
99
-
100
-
101
-
102
-
103
-
104
-
105
-
106
-
107
-
108
-
109
-
110
-
111
 |
 |