Dell 1125 dell Users Guide - Page 74
Setting up the Fax System
 |
UPC - 043232161187
View all Dell 1125 manuals
Add to My Manuals
Save this manual to your list of manuals |
Page 74 highlights
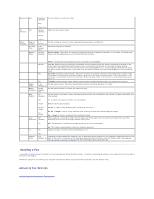
NOTE: To enter consecutive letters that appear on the same numeric key, for example in the name HARRY, press the Scroll (>) button to advance to the next field, for example, press 4 twice (H), 2 once (A), 7 three times (R), (>), 7 three times (R) and 9 three times (Y) and press Select (P). NOTE: To insert a space in a name, press Scroll (>) twice to advance the cursor two places and type as normal. Keypad Letters Key Alpha Mode Numeric Mode 1 1 2 ABCabc 2 3 DEFdef 3 4 GHIghi 4 5 JKLjkl 5 6 MNOmno 6 7 PQRSpqrs 7 8 TUVtuv 8 9 WXYZwxyz 9 0 0 * Toggles between alpha and numeric mode Toggles between alpha and numeric mode # # # Changing Numbers or Names To edit a number or name, enter the required menu function and type the correct entry over the existing entry and press Select (P). OR Enter the required menu function and press Cancel(V) to clear the LCD and type the correct entry and press Select (P) NOTE: If you make a mistake while entering a number or name, press the Scroll () buttons to place the cursor under the incorrect digit or character. Then enter the correct number or character and press Select (P). Inserting a Pause For some telephone systems, it is necessary to dial an access code and listen for a second dial tone, if an outside line is required, for example. A pause must be entered in the number in order for the access code to function. To enter a pause in a number, press the Pause ( ) button at the required pause point. For example, if an outside line is required for the requested number, enter: 9 (,) 12345678 The comma represents a pause in dialing to allow for the second dial tone to be established. Setting up the Fax System Setting Fax Default options available in the operator panel menu defines how all faxes are sent and received unless temporary changes are made using other menus. See the following guide to make changes to Fax Default settings. Setting Fax Default Options 1. Press Scroll () to select Fax and press Select (P). 2. Press Scroll () to select Fax Default and press Select (P). 3. Press Scroll () to select the required option (see table below) and press Select (P). 4. Press Scroll () to select the required setting and press Select (P). 5. Press Cancel (V) to return to the Standby mode. The following table shows the options available in the Fax Defaults menu. Menu Submenu Options Description
-
 1
1 -
2
-
3
-
4
-
5
-
6
-
7
-
8
-
9
-
10
-
11
-
12
-
13
-
14
-
15
-
16
-
17
-
18
-
19
-
20
-
21
-
22
-
23
-
24
-
25
-
26
-
27
-
28
-
29
-
30
-
31
-
32
-
33
-
34
-
35
-
36
-
37
-
38
-
39
-
40
-
41
-
42
-
43
-
44
-
45
-
46
-
47
-
48
-
49
-
50
-
51
-
52
-
53
-
54
-
55
-
56
-
57
-
58
-
59
-
60
-
61
-
62
-
63
-
64
-
65
-
66
-
67
-
68
-
 69
69 -
 70
70 -
 71
71 -
 72
72 -
 73
73 -
 74
74 -
 75
75 -
 76
76 -
 77
77 -
 78
78 -
 79
79 -
80
-
81
-
82
-
83
-
84
-
85
-
86
-
87
-
88
-
89
-
90
-
91
-
92
-
93
-
94
-
95
-
96
-
97
-
98
-
99
-
100
-
101
-
102
-
103
-
104
-
105
-
106
-
107
-
108
-
109
-
110
-
111
 |
 |
