Dell 1125 dell Users Guide - Page 4

Paper Feed Jam, Fuser Area Jam - paper tray
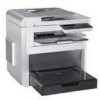
Page 4 highlights

Clear Paper Jam Drum area paper jam Clear Paper Jam Drum area Drum Area Jam To avoid tearing the paper, pull the jammed paper out gently and slowly. Follow the steps below to clear jams. Paper Feed Jam 1. Open and close the front cover. The jammed paper automatically exits the printer. If the paper does not exit, go to the next step. 2. Remove the paper tray cover. 3. Remove the paper by gently pulling it straight out. If you cannot see the paper or the paper does not move when pulled, check the fuser area. For more information, see Fuser Area Jam. 4. Insert the paper tray into the printer until it snaps into place. Printing automatically resumes. Fuser Area Jam CAUTION: The fuser area is hot. Allow a reasonable amount of cooling time to elapse before opening the rear cover. 1. Open and close the front cover. The jammed paper automatically exits the printer. If the paper does not exit, go to the next step. 2. Gently pull the paper out of the output tray.

  • 1
  • 2
  • 3
  • 4
  • 5
  • 6
  • 7
  • 8
  • 9
  • 10
  • 11
  • 12
  • 13
  • 14
  • 15
  • 16
  • 17
  • 18
  • 19
  • 20
  • 21
  • 22
  • 23
  • 24
  • 25
  • 26
  • 27
  • 28
  • 29
  • 30
  • 31
  • 32
  • 33
  • 34
  • 35
  • 36
  • 37
  • 38
  • 39
  • 40
  • 41
  • 42
  • 43
  • 44
  • 45
  • 46
  • 47
  • 48
  • 49
  • 50
  • 51
  • 52
  • 53
  • 54
  • 55
  • 56
  • 57
  • 58
  • 59
  • 60
  • 61
  • 62
  • 63
  • 64
  • 65
  • 66
  • 67
  • 68
  • 69
  • 70
  • 71
  • 72
  • 73
  • 74
  • 75
  • 76
  • 77
  • 78
  • 79
  • 80
  • 81
  • 82
  • 83
  • 84
  • 85
  • 86
  • 87
  • 88
  • 89
  • 90
  • 91
  • 92
  • 93
  • 94
  • 95
  • 96
  • 97
  • 98
  • 99
  • 100
  • 101
  • 102
  • 103
  • 104
  • 105
  • 106
  • 107
  • 108
  • 109
  • 110
  • 111

To avoid tearing the paper, pull the jammed paper out gently and slowly. Follow the steps below to clear jams.
Paper Feed Jam
1.
Open and close the front cover. The jammed paper automatically exits the printer.
If the paper does not exit, go to the next step.
2.
Remove the paper tray cover.
3.
Remove the paper by gently pulling it straight out.
If you cannot see the paper or the paper does not move when pulled, check the fuser area. For more information, see
Fuser Area Jam
.
4.
Insert the paper tray into the printer until it snaps into place.
Printing automatically resumes.
Fuser Area Jam
1.
Open and close the front cover. The jammed paper automatically exits the printer.
If the paper does not exit, go to the next step.
2.
Gently pull the paper out of the output tray.
Clear Paper Jam
Drum area paper jam
Clear Paper Jam
Drum area
Drum Area Jam
CAUTION:
The fuser area is hot. Allow a reasonable amount of cooling time to elapse before opening the rear cover.