Dell 1125 dell Users Guide - Page 61
ID Copying, Clone Copying
 |
UPC - 043232161187
View all Dell 1125 manuals
Add to My Manuals
Save this manual to your list of manuals |
Page 61 highlights
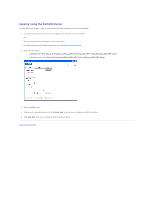
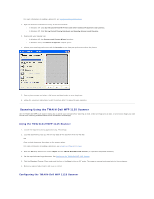
l 2-Up: Combines two original one-sided documents on to one sheet of paper. See 2-Up. l Collation: Enabling Collation creates multiple copies of multipage documents and orders them as the original document e.g. Three copies of a 10-page document are output from page one through page 10 three times. Normal copy mode outputs three copies of page 1, three copies of page 2 etc. See Collation. ID Copying When you copy using this feature, the printer prints one side on the upper half of the paper and the other side on the lower half without reducing the original size. This feature helps copy small-sized documents, such as name cards. NOTE: If the original document is larger than the printable area, some portions may not be printed. See the following guide to make a copy of the ID. 1. Load the document to be copied on the scanner glass, and close the cover (Using the Scanner Glass) 2. Press Scroll () to select Copy and press Select (P). 3. Press Scroll () to select Layout and press Select (P). 4. Press Scroll () to select ID Copy and press Select (P). 5. If necessary, customize the copy settings including the number of copies, and contrast by using the Copy menus, see Setting Copy Options. 6. Press Start (u) to begin copying. Your printer begins scanning the front side. When ID Copy Flip Card Over is displayed on the LCD, open the scanner cover and flip the document over with the second side facing down. Close the scanner cover. NOTE: If you press the Cancel (V) button the printer cancels the copy job and returns to Standby mode. 7. Press Select (P) again to copy the second side and output the ID Copy. Clone Copying Perform the following steps to use Clone copying: NOTE: You cannot adjust the copy size using the Zoom menu while making a clone copy. See the following guide to use Clone copying: 1. Load the document to be copied on the scanner glass, and close the cover. 2. Press Scroll () to select Copy and press Select (P). 3. Press Scroll () to select Layout and press Select (P). 4. Press Scroll () to select Clone and press Select (P). 5. If necessary, customize the copy settings including number of copies, contrast, and image quality by using the Copy menus. See Setting Copy Options. 6. Press Start (u) to begin copying. 2-Up See the following steps to use 2-Up copying: 1. Load the documents in the ADF. 2. Press Scroll () to select Copy and press Select (P). 3. Press Scroll () to select Layout and press Select (P).
-
 1
1 -
2
-
3
-
4
-
5
-
6
-
7
-
8
-
9
-
10
-
11
-
12
-
13
-
14
-
15
-
16
-
17
-
18
-
19
-
20
-
21
-
22
-
23
-
24
-
25
-
26
-
27
-
28
-
29
-
30
-
31
-
32
-
33
-
34
-
35
-
36
-
37
-
38
-
39
-
40
-
41
-
42
-
43
-
44
-
45
-
46
-
47
-
48
-
49
-
50
-
51
-
52
-
53
-
54
-
55
-
 56
56 -
 57
57 -
 58
58 -
 59
59 -
 60
60 -
 61
61 -
 62
62 -
 63
63 -
 64
64 -
 65
65 -
 66
66 -
67
-
68
-
69
-
70
-
71
-
72
-
73
-
74
-
75
-
76
-
77
-
78
-
79
-
80
-
81
-
82
-
83
-
84
-
85
-
86
-
87
-
88
-
89
-
90
-
91
-
92
-
93
-
94
-
95
-
96
-
97
-
98
-
99
-
100
-
101
-
102
-
103
-
104
-
105
-
106
-
107
-
108
-
109
-
110
-
111
 |
 |
