Dell 1125 dell Users Guide - Page 73

Setting the Printer ID, Using the Number Keypad to Enter Characters - network

Page 73 highlights

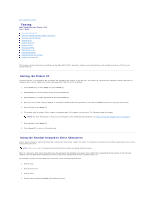
Back to Contents Page Faxing Dell™ Multi-Function Printer 1125 User's Guide Setting the Printer ID Using the Number Keypad to Enter Characters Setting up the Fax System Sending a Fax Sending a PC-Fax Receiving a Fax Automatic Dialing Other Ways to Fax Additional Features Using Advanced Fax Settings Sending Fax from a PC This chapter contains information on settings up the DELL MFP 1125 for operation, sending, and receiving faxes, and sending faxes from a PC (local and shared network). Setting the Printer ID In most countries, it is required by law to indicate the originating fax number on any fax sent. The printer ID, containing the telephone number and name or company name, can be added to the top of each page sent from the printer as follows: 1. Press Scroll () to select Setup and press Select (P). 2. Press Scroll () to select Device Setup and press Select (P). 3. Press Scroll () to select My Phone No and press Select (P). 4. Enter your fax number using the keypad. If a mistake is made while entering numbers, press the left Scroll (

  • 1
  • 2
  • 3
  • 4
  • 5
  • 6
  • 7
  • 8
  • 9
  • 10
  • 11
  • 12
  • 13
  • 14
  • 15
  • 16
  • 17
  • 18
  • 19
  • 20
  • 21
  • 22
  • 23
  • 24
  • 25
  • 26
  • 27
  • 28
  • 29
  • 30
  • 31
  • 32
  • 33
  • 34
  • 35
  • 36
  • 37
  • 38
  • 39
  • 40
  • 41
  • 42
  • 43
  • 44
  • 45
  • 46
  • 47
  • 48
  • 49
  • 50
  • 51
  • 52
  • 53
  • 54
  • 55
  • 56
  • 57
  • 58
  • 59
  • 60
  • 61
  • 62
  • 63
  • 64
  • 65
  • 66
  • 67
  • 68
  • 69
  • 70
  • 71
  • 72
  • 73
  • 74
  • 75
  • 76
  • 77
  • 78
  • 79
  • 80
  • 81
  • 82
  • 83
  • 84
  • 85
  • 86
  • 87
  • 88
  • 89
  • 90
  • 91
  • 92
  • 93
  • 94
  • 95
  • 96
  • 97
  • 98
  • 99
  • 100
  • 101
  • 102
  • 103
  • 104
  • 105
  • 106
  • 107
  • 108
  • 109
  • 110
  • 111

Back to Contents Page
Faxing
Dellâ„¢ Multi
-Function Printer 1125
User's Guide
Setting the Printer ID
Using the Number Keypad to Enter Characters
Setting up the Fax System
Sending a Fax
Sending a PC
-
Fax
Receiving a Fax
Automatic Dialing
Other Ways to Fax
Additional Features
Using Advanced Fax Settings
Sending Fax from a PC
This chapter contains information on settings up the DELL MFP 1125 for operation, sending, and receiving faxes, and sending faxes from a PC (local and
shared network).
Setting the Printer ID
In most countries, it is required by law to indicate the originating fax number on any fax sent. The printer ID, containing the telephone number and name or
company name, can be added to the top of each page sent from the printer as follows:
1.
Press
Scroll
(
<>
) to select
Setup
and press
Select
(
P
).
2.
Press
Scroll
(
<>
) to select Device
Setup and press
Select
(
P
).
3.
Press
Scroll
(
<>
) to select My Phone No
and press
Select
(
P
).
4.
Enter your fax number using the keypad. If a mistake is made while entering numbers, press the left
Scroll
(
<
) button to overtype the last digit.
5.
Once satisfied, press
Select
(
P
).
6.
The prompt asks for a name. Enter a name or company name. For example, you can enter The Company using the keypad.
7.
Once satisfied, press
Select
(
P
).
8.
Press
Cancel
(
V
) to return to Standby mode.
Using the Number Keypad to Enter Characters
Certain menu selections, such as My Phone No in the Device Setup menu, require text input. The majority of the keys on the number keypad have three or four
letters printed on them.
When in a text entry field, press the number key that represents the character you require one to eight times (depending on the position of the character
required, see the table below) followed by the next numeric key representing the next character and so on.
For example, to enter the name JOHN into a text field, enter the following keystrokes.
1.
Press
5
once.
2.
Press
6
three times.
3.
Press
4
twice.
4.
Press
6
twice, followed by
Select
(P)to confirm the entry.
NOTE:
For more information on how to use the keypad to enter alphanumeric characters, see
Using the Number Keypad to Enter Characters
.
NOTE:
The 1, 0, #, and * keys do not have printed letters as they are special characters keys.