Dell Broadcom NetXtreme Family of Adapters Broadcom NetXtreme 57XX User Guide - Page 21
NDIS2 Driver Software: Broadcom NetXtreme 57XX User Guide
 |
View all Dell Broadcom NetXtreme Family of Adapters manuals
Add to My Manuals
Save this manual to your list of manuals |
Page 21 highlights
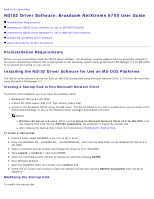
Back to Contents Page NDIS2 Driver Software: Broadcom NetXtreme 57XX User Guide Preinstallation Requirements Installing the NDIS2 Driver Software for Use on MS-DOS Platforms Installing the NDIS2 Driver Software for Use in IBM-OS/2 Environments Configuring the NDIS2 Driver Software Using Keywords for the B57.dos Drivers Preinstallation Requirements Before you can successfully install the NDIS2 driver software, the Broadcom network adapter must be physically installed in the server. Networking software that is appropriate to the operating system (such as Microsoft LAN Manager 2.2 for MS-DOS) must already be running on your server. Installing the NDIS2 Driver Software for Use on MS-DOS Platforms The NDIS2 driver software can be run from an MS-DOS startup disk using Microsoft Network Client 3.0 or from the hard disk using Microsoft LAN Manager 2.2. Creating a Startup Disk to Run Microsoft Network Client To perform this installation you must have the following items: Windows NT Server 4.0 CD-ROM A blank MS-DOS system disk (3.5" high-density floppy disk) Access to the Broadcom NDIS2 driver file (B57.dos). This file is located on the Dell-provided driver source media in the DOS Utilities package, or any of the Windows driver packages downloaded from Dell. NOTES: Windows NT Server 4.0 users. When running Setup for Microsoft Network Client v3.0 for MS-DOS, click any network card from the list (NE2000 Compatible, for example) to create the startup disk. After creating the startup disk, follow the instructions in Modifying the Startup Disk. To create a startup disk 1. Create a folder called NCADMIN in the root of the C drive. 2. Copy the NCADMIN.CN_, NCADMIN.EX_, and NCADMIN.HL_ files from the I386 folder on the Windows NT Server 4.0 CD-ROM. 3. Open a command prompt window and change the directory to C:\NCADMIN. 4. Type expand -r ncadmin.* and press ENTER. 5. Close the command prompt window by typing exit and then pressing ENTER. 6. Start Windows Explorer. 7. Open the NCADMIN folder and double-click ncadmin.exe. 8. Follow the on-screen instructions to make the network startup disk (choose NE2000 Compatible from the list of adapters). Modifying the Startup Disk To modify the startup disk
-
 1
1 -
2
-
3
-
4
-
5
-
6
-
7
-
8
-
9
-
10
-
11
-
12
-
13
-
14
-
15
-
 16
16 -
 17
17 -
 18
18 -
 19
19 -
 20
20 -
 21
21 -
 22
22 -
 23
23 -
 24
24 -
 25
25 -
 26
26 -
27
-
28
-
29
-
30
-
31
-
32
-
33
-
34
-
35
-
36
-
37
-
38
-
39
-
40
-
41
-
42
-
43
-
44
-
45
-
46
-
47
-
48
-
49
-
50
-
51
-
52
-
53
-
54
-
55
-
56
-
57
-
58
-
59
-
60
-
61
-
62
-
63
-
64
-
65
-
66
-
67
-
68
-
69
-
70
-
71
-
72
-
73
-
74
-
75
-
76
-
77
-
78
-
79
-
80
-
81
-
82
-
83
-
84
-
85
-
86
-
87
-
88
-
89
-
90
-
91
-
92
-
93
-
94
-
95
-
96
-
97
-
98
-
99
-
100
-
101
-
102
-
103
-
104
-
105
-
106
-
107
-
108
-
109
-
110
-
111
-
112
-
113
-
114
-
115
-
116
-
117
-
118
-
119
-
120
-
121
-
122
-
123
-
124
-
125
-
126
-
127
-
128
-
129
-
130
-
131
-
132
-
133
-
134
-
135
-
136
-
137
-
138
-
139
-
140
-
141
-
142
-
143
-
144
-
145
-
146
-
147
-
148
-
149
-
150
-
151
-
152
-
153
-
154
-
155
-
156
-
157
-
158
-
159
-
160
-
161
-
162
-
163
-
164
-
165
-
166
-
167
-
168
-
169
-
170
-
171
-
172
-
173
-
174
-
175
-
176
-
177
-
178
 |
 |