Dell Broadcom NetXtreme Family of Adapters Broadcom NetXtreme 57XX User Guide - Page 36
Installing NetWare Server 6.5 Driver Software
 |
View all Dell Broadcom NetXtreme Family of Adapters manuals
Add to My Manuals
Save this manual to your list of manuals |
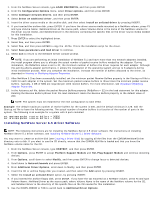
Page 36 highlights
1. From the NetWare Server console, type LOAD NWCONFIG, and then press ENTER. 2. From the Configuration Options menu, select Driver options, and then press ENTER. 3. Select Configure network drivers, and then press ENTER. 4. Select Select an additional driver, and then press ENTER. 5. Insert the driver source media or the archive disk, and then select Install an unlisted driver by pressing INSERT. 6. If you inserted the archive disk, press ENTER. If you have the driver source media mounted as a NetWare volume, press F3 and type Volume Name: NetWare\Driver as the source path, where Volume Name is the name of the NetWare volume for the driver source media, and NetWare\Driver is the directory containing the specific files on the driver source media needed for this installation. 7. Press ENTER to select the highlighted driver. 8. Select Yes, and then press ENTER. 9. Select Yes, and then press ENTER to copy the .ldi file. This is the installation script for the driver. 10. Select Save parameters and load driver to continue. 11. Select Exit to return to the NetWare Server console prompt. NOTE: If you are performing an initial installation of NetWare 5.1 and have more than two network adapters installed, the install program allows you to allocate the actual number of packet receive buffers needed by the adapter. During installation, the RxBuffers value is set to 32, the minimum number of buffers the driver requires for each adapter. Although this setting affects adapter performance, it allows the installation of the operating system and up to 8 adapters during initial installation process. After you complete the installation, increase the number of buffers allocated to the driver, as described in Viewing or Modifying Adapter Properties. 12. After NetWare 5.1has been successfully installed, set the minimum packet Receive Buffers property in the Startup.ncf file to 1500 for each adapter in the system. Set the maximum packet receive buffers to three times the minimum packet receive buffers. Typically, 4 MB of RAM are required per 1000 receive buffers. For more information, see Viewing or Modifying Adapter Properties. 13. In the Autoexec.ncf file, delete the packet Receive Buffers property (RxBuffers = 32) in the load statement for this adapter. Deleting the Receive Buffers phrase from the load statement resets the Receive Buffers property to the default value of 200. NOTE: The system must be restarted for the new configuration to take effect. Example: The default maximum number of receive buffers for the system is 500, and the default minimum is 128. Edit the Startup.ncf file to have the following entries. The actual number of receive buffers is a function of the number of ports in the system. The following is an example for a system with 8 ports installed: set maximum packet receive buffers = 36000 set minimum packet receive buffers = 12000 Installing NetWare Server 6.5 Driver Software NOTE: The following instructions are for installing the NetWare Server 6.5 driver software. For instructions on installing NetWare Server 5.1 driver software, see Installing NetWare Server 5.1 Driver Software. You may want to create an archive disk (see Creating a Driver Disk) by copying all the files from the CDROM\NetWare\Driver directory onto a disk. If you elect to use the CD directly, ensure that the CDROM.NLM file is loaded and that you know the NetWare volume name for the CD. 1. From the NetWare Server console, type HDETECT, and then press ENTER. 2. From Options, press ENTER to accept Platform Support Module and Hot-Plug Support Module and continue detecting devices. 3. From Options, scroll down to select Modify, and then press ENTER to change focus to detected devices. 4. Scroll down to Network boards and press ENTER. 5. From Additional Driver Options, scroll down to Modify, and then press ENTER. 6. Insert the CD or archive floppy disk you created, and then select the Add option by pressing INSERT. 7. Select the Install an unlisted driver option, by pressing INSERT. 8. If you inserted the archive floppy disk, press ENTER. If you have the CD mounted as a NetWare volume, press F3 and type Volume Name: NetWare\Driver as the source path, where Volume Name is the name of the NetWare volume for the CD, and NetWare\Driver is the directory of the specific files on the CD needed for this installation. 9. Use the DOWN ARROW or TAB to switch back to Additional Driver Options.
-
 1
1 -
2
-
3
-
4
-
5
-
6
-
7
-
8
-
9
-
10
-
11
-
12
-
13
-
14
-
15
-
16
-
17
-
18
-
19
-
20
-
21
-
22
-
23
-
24
-
25
-
26
-
27
-
28
-
29
-
30
-
 31
31 -
 32
32 -
 33
33 -
 34
34 -
 35
35 -
 36
36 -
 37
37 -
 38
38 -
 39
39 -
 40
40 -
 41
41 -
42
-
43
-
44
-
45
-
46
-
47
-
48
-
49
-
50
-
51
-
52
-
53
-
54
-
55
-
56
-
57
-
58
-
59
-
60
-
61
-
62
-
63
-
64
-
65
-
66
-
67
-
68
-
69
-
70
-
71
-
72
-
73
-
74
-
75
-
76
-
77
-
78
-
79
-
80
-
81
-
82
-
83
-
84
-
85
-
86
-
87
-
88
-
89
-
90
-
91
-
92
-
93
-
94
-
95
-
96
-
97
-
98
-
99
-
100
-
101
-
102
-
103
-
104
-
105
-
106
-
107
-
108
-
109
-
110
-
111
-
112
-
113
-
114
-
115
-
116
-
117
-
118
-
119
-
120
-
121
-
122
-
123
-
124
-
125
-
126
-
127
-
128
-
129
-
130
-
131
-
132
-
133
-
134
-
135
-
136
-
137
-
138
-
139
-
140
-
141
-
142
-
143
-
144
-
145
-
146
-
147
-
148
-
149
-
150
-
151
-
152
-
153
-
154
-
155
-
156
-
157
-
158
-
159
-
160
-
161
-
162
-
163
-
164
-
165
-
166
-
167
-
168
-
169
-
170
-
171
-
172
-
173
-
174
-
175
-
176
-
177
-
178
 |
 |
