Dell S2810dn Dell Smart Printer Users Guide - Page 208
Sharing the Printer Using the Google Cloud Print Service, Canceling Registration to Google Cloud
 |
View all Dell S2810dn manuals
Add to My Manuals
Save this manual to your list of manuals |
Page 208 highlights
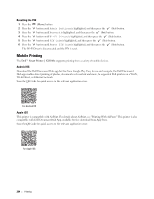
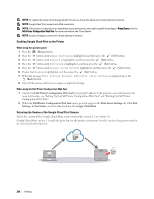
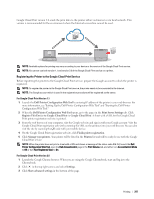
4 Click Manage under the Google Cloud Print menu. NOTE: If a message is displayed under New Devices to request you to sign in to Chrome, click sign in and sign in to Chrome. 5 Click Register for the printer you want to register. NOTE: If Bonjour (mDNS) is set to off, the new printer will not show in New devices. In this case, launch the Dell Printer Configuration Web Tool, open the Port Settings page in the Print Server Settings tab, and turn Bonjour (mDNS) to On. 6 When the window to confirm the registration appears, click Register. The window appears to show that the printer is being added. 7 Go to the printer, and follow the instructions displayed on the operator panel. 8 When the printer name appears in the My devices list, the registration is completed. NOTE: It may take about 5 minutes or more until the printer name appears in the My devices list. Sharing the Printer Using the Google Cloud Print Service You can share the printer registered for the Google Cloud Print service with other users. 1 Launch the Google Chrome browser. When you are using the Google Chromebook, start and log in to the Chromebook. 2 Click in the top right corner, and select Settings. 3 Click Show advanced settings in the bottom of the page. 4 Click Manage under the Google Cloud Print menu. NOTE: If a message is displayed to request you to sign in to Chrome, click sign in and sign in to Chrome. 5 Click Manage for the printer you want to share. 6 In the Google Cloud Print window, click Share. 7 In the window to specify the printer sharing, enter the Google accounts of the users you want to invite to share the printer, and click Share. NOTE: When the invited users log in to the Google Cloud Print web page, a message appears to show that the printer owner made the sharing settings. Accept the sharing invitation. Canceling Registration to Google Cloud Print 1 Launch the Dell Printer Configuration Web Tool, open the Google Cloud Print page in the Print Server Settings tab. 2 Click Cancel Registration. 3 Confirm that the button changes to Register This Device to Google Cloud Print. Printing via Google Cloud Print The printing procedure varies depending on the application or the device you are using. You can see the application list that supports Google Cloud Print service on the Google web site. Printing From an Application on a Mobile Device The following procedure uses the Google Drive application on an Android mobile device as an example. 1 Install the Google Drive application on your mobile device. NOTE: You can download the application from Google Play. 2 Access the Google Drive application from your mobile device and select the document. 3 Select Print from the application menu. 208 Printing
-
 1
1 -
2
-
3
-
4
-
5
-
6
-
7
-
8
-
9
-
10
-
11
-
12
-
13
-
14
-
15
-
16
-
17
-
18
-
19
-
20
-
21
-
22
-
23
-
24
-
25
-
26
-
27
-
28
-
29
-
30
-
31
-
32
-
33
-
34
-
35
-
36
-
37
-
38
-
39
-
40
-
41
-
42
-
43
-
44
-
45
-
46
-
47
-
48
-
49
-
50
-
51
-
52
-
53
-
54
-
55
-
56
-
57
-
58
-
59
-
60
-
61
-
62
-
63
-
64
-
65
-
66
-
67
-
68
-
69
-
70
-
71
-
72
-
73
-
74
-
75
-
76
-
77
-
78
-
79
-
80
-
81
-
82
-
83
-
84
-
85
-
86
-
87
-
88
-
89
-
90
-
91
-
92
-
93
-
94
-
95
-
96
-
97
-
98
-
99
-
100
-
101
-
102
-
103
-
104
-
105
-
106
-
107
-
108
-
109
-
110
-
111
-
112
-
113
-
114
-
115
-
116
-
117
-
118
-
119
-
120
-
121
-
122
-
123
-
124
-
125
-
126
-
127
-
128
-
129
-
130
-
131
-
132
-
133
-
134
-
135
-
136
-
137
-
138
-
139
-
140
-
141
-
142
-
143
-
144
-
145
-
146
-
147
-
148
-
149
-
150
-
151
-
152
-
153
-
154
-
155
-
156
-
157
-
158
-
159
-
160
-
161
-
162
-
163
-
164
-
165
-
166
-
167
-
168
-
169
-
170
-
171
-
172
-
173
-
174
-
175
-
176
-
177
-
178
-
179
-
180
-
181
-
182
-
183
-
184
-
185
-
186
-
187
-
188
-
189
-
190
-
191
-
192
-
193
-
194
-
195
-
196
-
197
-
198
-
199
-
200
-
201
-
202
-
 203
203 -
 204
204 -
 205
205 -
 206
206 -
 207
207 -
 208
208 -
 209
209 -
 210
210 -
 211
211 -
 212
212 -
 213
213 -
214
-
215
-
216
-
217
-
218
-
219
-
220
-
221
-
222
-
223
-
224
-
225
-
226
-
227
-
228
-
229
-
230
-
231
-
232
-
233
-
234
-
235
-
236
-
237
-
238
-
239
-
240
-
241
-
242
-
243
-
244
-
245
-
246
-
247
-
248
-
249
-
250
-
251
-
252
-
253
-
254
-
255
-
256
-
257
-
258
-
259
-
260
-
261
-
262
-
263
-
264
-
265
-
266
-
267
-
268
-
269
-
270
-
271
-
272
-
273
-
274
-
275
-
276
-
277
-
278
-
279
-
280
-
281
-
282
-
283
-
284
-
285
-
286
-
287
-
288
-
289
-
290
-
291
-
292
-
293
-
294
-
295
-
296
-
297
-
298
-
299
-
300
-
301
-
302
-
303
-
304
-
305
-
306
-
307
-
308
-
309
-
310
-
311
-
312
-
313
-
314
-
315
-
316
 |
 |