Dell S2810dn Dell Smart Printer Users Guide - Page 79
Installing Printer Drivers on Macintosh Computers, Installing the Drivers and Software
 |
View all Dell S2810dn manuals
Add to My Manuals
Save this manual to your list of manuals |
Page 79 highlights
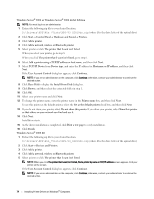
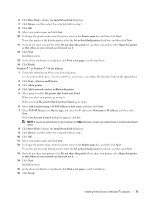
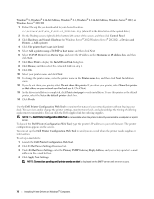
10 Installing Printer Drivers on Macintosh Computers Installing the Drivers and Software 1 Run the Software and Documentation disc on the Macintosh computer. 2 Double-click the Dell S2810dn Installer icon, and then click Continue. 3 When the popup dialog box prompts you for confirming the program included in the installation package, click Continue. 4 Click Continue on the Important Information screen. 5 Select a language for the Software License Agreement screen. 6 After reading the Software License Agreement, click Continue. 7 If you agree to the terms of the Software License Agreement, click Agree to continue the installation process. 8 Confirm the installation location. 9 Click Install to perform the standard installation. If you want to select a custom installation, click Customize to select items that you want to install. • Dell Printer S2810dn Driver • Dell Printer Status Monitor 10 For Mac OS X 10.5 and Mac OS X 10.6: Type the administrator's name and password, and then click OK. For OS X 10.7, 10.8, OS X 10.9 and OS X 10.10: Type the administrator's name and password, and then click Install Software. 11 When the installation is complete, click Close. Adding a Printer on Mac OS X 10.5, Mac OS X 10.6, OS X 10.7, OS X 10.8, OS X 10.9, or OS X 10.10 When Using a USB connection 1 Turn on the printer. 2 Connect the USB cable between the printer and the Macintosh computer. The printer is automatically added to your Macintosh computer. When Using IP Printing 1 Turn on the printer. 2 Ensure that Macintosh computer and the printer are connected via network. If you use wired connection, connect the LAN cable between the printer and the network. If you use wireless connection, ensure that wireless connection is configured properly on your Macintosh computer and the printer. 3 For Mac OS X 10.5 and Mac OS X 10.6: Open the System Preferences, and click Print & Fax. For OS X 10.7 and OS X 10.8: Open the System Preferences, and click Print & Scan. For OS X 10.9 and OS X 10.10: Open the System Preferences, and click Printers & Scanners. 4 Click the Plus (+) sign, select Add Printer or Scanner (Add Other Printer or Scanner for OS X 10.7), and select IP. For Mac OS X 10.5 and Mac OS X 10.6, just click the Plus (+) sign and select IP. Installing Printer Drivers on Macintosh Computers 79
-
 1
1 -
2
-
3
-
4
-
5
-
6
-
7
-
8
-
9
-
10
-
11
-
12
-
13
-
14
-
15
-
16
-
17
-
18
-
19
-
20
-
21
-
22
-
23
-
24
-
25
-
26
-
27
-
28
-
29
-
30
-
31
-
32
-
33
-
34
-
35
-
36
-
37
-
38
-
39
-
40
-
41
-
42
-
43
-
44
-
45
-
46
-
47
-
48
-
49
-
50
-
51
-
52
-
53
-
54
-
55
-
56
-
57
-
58
-
59
-
60
-
61
-
62
-
63
-
64
-
65
-
66
-
67
-
68
-
69
-
70
-
71
-
72
-
73
-
 74
74 -
 75
75 -
 76
76 -
 77
77 -
 78
78 -
 79
79 -
 80
80 -
 81
81 -
 82
82 -
 83
83 -
 84
84 -
85
-
86
-
87
-
88
-
89
-
90
-
91
-
92
-
93
-
94
-
95
-
96
-
97
-
98
-
99
-
100
-
101
-
102
-
103
-
104
-
105
-
106
-
107
-
108
-
109
-
110
-
111
-
112
-
113
-
114
-
115
-
116
-
117
-
118
-
119
-
120
-
121
-
122
-
123
-
124
-
125
-
126
-
127
-
128
-
129
-
130
-
131
-
132
-
133
-
134
-
135
-
136
-
137
-
138
-
139
-
140
-
141
-
142
-
143
-
144
-
145
-
146
-
147
-
148
-
149
-
150
-
151
-
152
-
153
-
154
-
155
-
156
-
157
-
158
-
159
-
160
-
161
-
162
-
163
-
164
-
165
-
166
-
167
-
168
-
169
-
170
-
171
-
172
-
173
-
174
-
175
-
176
-
177
-
178
-
179
-
180
-
181
-
182
-
183
-
184
-
185
-
186
-
187
-
188
-
189
-
190
-
191
-
192
-
193
-
194
-
195
-
196
-
197
-
198
-
199
-
200
-
201
-
202
-
203
-
204
-
205
-
206
-
207
-
208
-
209
-
210
-
211
-
212
-
213
-
214
-
215
-
216
-
217
-
218
-
219
-
220
-
221
-
222
-
223
-
224
-
225
-
226
-
227
-
228
-
229
-
230
-
231
-
232
-
233
-
234
-
235
-
236
-
237
-
238
-
239
-
240
-
241
-
242
-
243
-
244
-
245
-
246
-
247
-
248
-
249
-
250
-
251
-
252
-
253
-
254
-
255
-
256
-
257
-
258
-
259
-
260
-
261
-
262
-
263
-
264
-
265
-
266
-
267
-
268
-
269
-
270
-
271
-
272
-
273
-
274
-
275
-
276
-
277
-
278
-
279
-
280
-
281
-
282
-
283
-
284
-
285
-
286
-
287
-
288
-
289
-
290
-
291
-
292
-
293
-
294
-
295
-
296
-
297
-
298
-
299
-
300
-
301
-
302
-
303
-
304
-
305
-
306
-
307
-
308
-
309
-
310
-
311
-
312
-
313
-
314
-
315
-
316
 |
 |