Dell S2810dn Dell Smart Printer Users Guide - Page 69
USB Cable Connection, Typical Installation recommended, Custom Installation, Finish, Ready to Print - driver download
 |
View all Dell S2810dn manuals
Add to My Manuals
Save this manual to your list of manuals |
Page 69 highlights
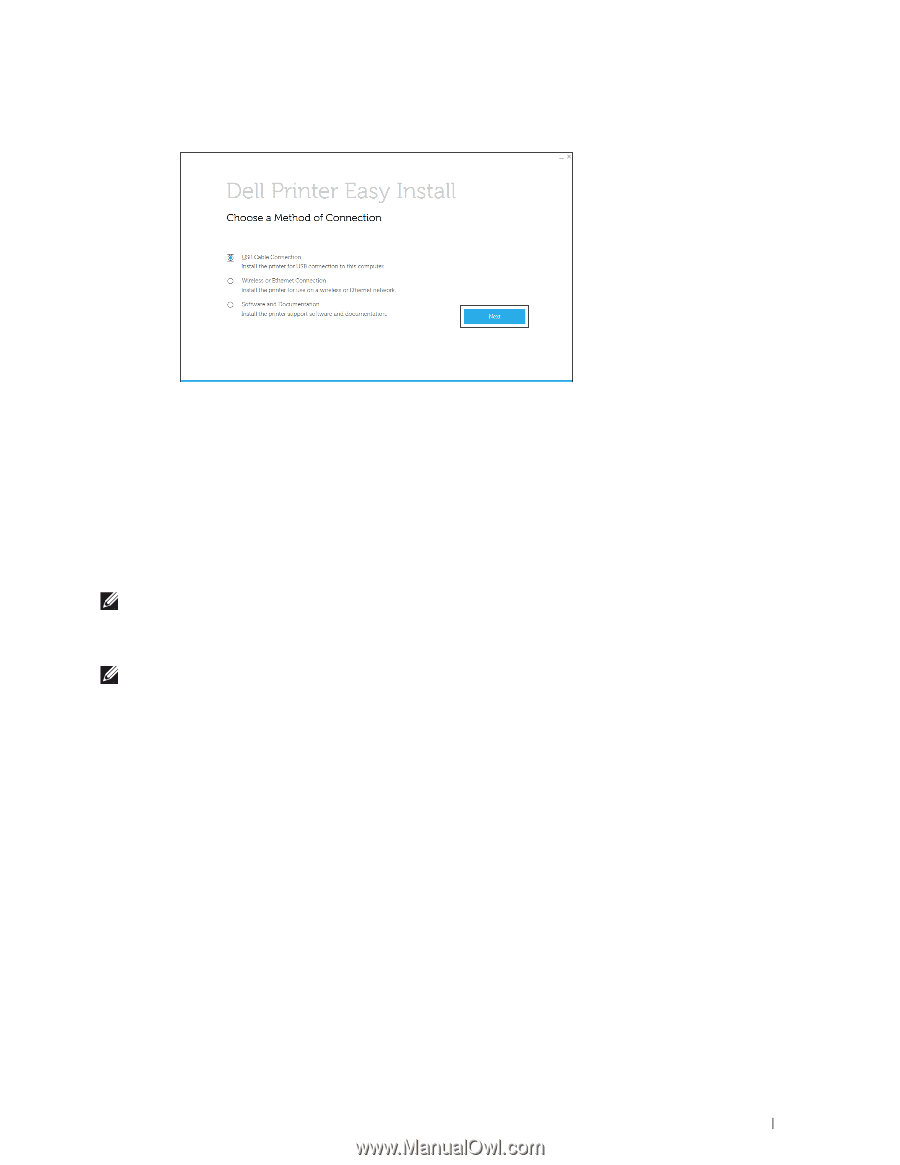
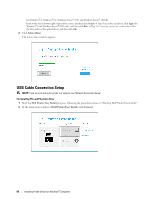
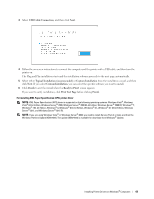
3 Select USB Cable Connection, and then click Next. 4 Follow the on-screen instructions to connect the computer and the printer with a USB cable, and then turn the printer on. The Plug and Play installation starts and the installation software proceeds to the next page automatically. 5 Select either Typical Installation (recommended) or Custom Installation from the installation wizard, and then click Next. If you select Custom Installation, you can select the specific software you want to install. 6 Click Finish to exit the wizard when the Ready to Print! screen appears. If you want to verify installation, click Print Test Page before clicking Finish. For installing XML Paper Specification (XPS) printer driver NOTE: XML Paper Specification (XPS) driver is supported on the following operating systems: Windows Vista®, Windows Vista® 64-bit Edition, Windows Server® 2008, Windows Server® 2008 64-bit Edition, Windows Server® 2008 R2, Windows® 7, Windows® 7 64-bit Edition, Windows® 8, Windows® 8 64-bit Edition, Windows® 8.1, Windows® 8.1 64-bit Edition, Windows Server® 2012, and Windows Server® 2012 R2. NOTE: If you are using Windows Vista® or Windows Server® 2008, you need to install Service Pack 2 or later, and then the Windows Platform Update (KB971644). The update (KB971644) is available for download from Windows® Update. Installing Printer Drivers on Windows® Computers 69
-
 1
1 -
2
-
3
-
4
-
5
-
6
-
7
-
8
-
9
-
10
-
11
-
12
-
13
-
14
-
15
-
16
-
17
-
18
-
19
-
20
-
21
-
22
-
23
-
24
-
25
-
26
-
27
-
28
-
29
-
30
-
31
-
32
-
33
-
34
-
35
-
36
-
37
-
38
-
39
-
40
-
41
-
42
-
43
-
44
-
45
-
46
-
47
-
48
-
49
-
50
-
51
-
52
-
53
-
54
-
55
-
56
-
57
-
58
-
59
-
60
-
61
-
62
-
63
-
 64
64 -
 65
65 -
 66
66 -
 67
67 -
 68
68 -
 69
69 -
 70
70 -
 71
71 -
 72
72 -
 73
73 -
 74
74 -
75
-
76
-
77
-
78
-
79
-
80
-
81
-
82
-
83
-
84
-
85
-
86
-
87
-
88
-
89
-
90
-
91
-
92
-
93
-
94
-
95
-
96
-
97
-
98
-
99
-
100
-
101
-
102
-
103
-
104
-
105
-
106
-
107
-
108
-
109
-
110
-
111
-
112
-
113
-
114
-
115
-
116
-
117
-
118
-
119
-
120
-
121
-
122
-
123
-
124
-
125
-
126
-
127
-
128
-
129
-
130
-
131
-
132
-
133
-
134
-
135
-
136
-
137
-
138
-
139
-
140
-
141
-
142
-
143
-
144
-
145
-
146
-
147
-
148
-
149
-
150
-
151
-
152
-
153
-
154
-
155
-
156
-
157
-
158
-
159
-
160
-
161
-
162
-
163
-
164
-
165
-
166
-
167
-
168
-
169
-
170
-
171
-
172
-
173
-
174
-
175
-
176
-
177
-
178
-
179
-
180
-
181
-
182
-
183
-
184
-
185
-
186
-
187
-
188
-
189
-
190
-
191
-
192
-
193
-
194
-
195
-
196
-
197
-
198
-
199
-
200
-
201
-
202
-
203
-
204
-
205
-
206
-
207
-
208
-
209
-
210
-
211
-
212
-
213
-
214
-
215
-
216
-
217
-
218
-
219
-
220
-
221
-
222
-
223
-
224
-
225
-
226
-
227
-
228
-
229
-
230
-
231
-
232
-
233
-
234
-
235
-
236
-
237
-
238
-
239
-
240
-
241
-
242
-
243
-
244
-
245
-
246
-
247
-
248
-
249
-
250
-
251
-
252
-
253
-
254
-
255
-
256
-
257
-
258
-
259
-
260
-
261
-
262
-
263
-
264
-
265
-
266
-
267
-
268
-
269
-
270
-
271
-
272
-
273
-
274
-
275
-
276
-
277
-
278
-
279
-
280
-
281
-
282
-
283
-
284
-
285
-
286
-
287
-
288
-
289
-
290
-
291
-
292
-
293
-
294
-
295
-
296
-
297
-
298
-
299
-
300
-
301
-
302
-
303
-
304
-
305
-
306
-
307
-
308
-
309
-
310
-
311
-
312
-
313
-
314
-
315
-
316
 |
 |