Epson 680Pro Service Manual - Page 55
Table 3-11. No Ink Cartridge or Ink Out error indication, Table 3-10. Paper jam error indication
 |
UPC - 010343832138
View all Epson 680Pro manuals
Add to My Manuals
Save this manual to your list of manuals |
Page 55 highlights
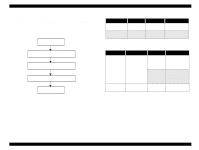
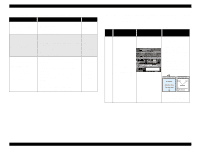
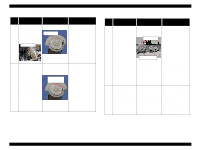
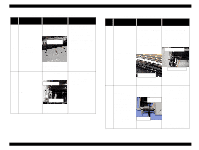
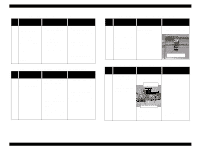
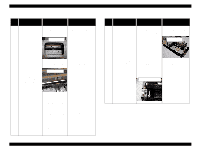
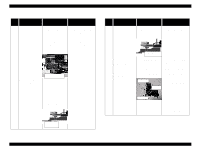
EPSON Stylus COLOR 680/777/777i Table 3-10. Paper jam error indication Step No. Detail phenomenon Check point Remedy When the paper is 1. Check if the CN4 1. Connect the CN4 loaded from the ASF connector cable for connector cable to the and ejected without HP/PE sensor cable is CN4 on the Main board. any printing. After disconnected on the eject the paper, Main board or sensor. paper eject sequence 2. Check if the HP/PE 2. Replace the HP/PE 5 is continued. sensor operates sensor with new one. correctly by using the If any print job is sent to the printer, General error is displayed. tester. Refer to Table 3-2. 3. If the problem is not solved, replace the Main board with new one. Table 3-11. No Ink Cartridge or Ink Out error indication Step No. Detail phenomenon Check point Remedy A [No Ink Cartridge] 1. Check to ascertain that 1. Set the ink cartridge in or [Ink Out Error] an ink cartridge has place. message is displayed been set in place. 2. Remove and then reset when the power to 2. Check the remaining the ink cartridge in place. the printer is switched on. ink with the printer driver or STM3. 3. Replace the ink cartridge (faulty CSIC.) 1 3. Check to ascertain that 4. Replace the ink cartridge the head FFC is been (faulty CSIC.) attached correctly to the head. 4. Check to ascertain that the head FFC has been attached correctly to the main board. Revision B Table 3-12. Multiple papers are always loaded Step No. Detail phenomenon Check point Remedy Check if the Paper return • Assemble the torsion plate is operating spring 25.7 in the ASF correctly in the ASF frame. Any error indication is when the paper is loaded. not displayed on the 1 monitor. But, multiple papers are always loaded from ASF. Torsion spring 25.7 Table 3-13. Paper is always loaded without any print job Step No. Detail phenomenon Check point Remedy Paper is always loaded 1. Check if the tip of the 1. Replace the Change from ASF without any print job. Change lever has any damage. lever with new one. ASF hopper Change lever continue to flapping when the printer is turned on. 1 comp. spring 1.47 2. Check if the Compression spring 1.47 comes off from the Change lever. 2. Set the Compression spring 1.47 in the Change lever. Troubleshooting Troubleshooting with LED Error Indications 55
-
 1
1 -
2
-
3
-
4
-
5
-
6
-
7
-
8
-
9
-
10
-
11
-
12
-
13
-
14
-
15
-
16
-
17
-
18
-
19
-
20
-
21
-
22
-
23
-
24
-
25
-
26
-
27
-
28
-
29
-
30
-
31
-
32
-
33
-
34
-
35
-
36
-
37
-
38
-
39
-
40
-
41
-
42
-
43
-
44
-
45
-
46
-
47
-
48
-
49
-
 50
50 -
 51
51 -
 52
52 -
 53
53 -
 54
54 -
 55
55 -
 56
56 -
 57
57 -
 58
58 -
 59
59 -
 60
60 -
61
-
62
-
63
-
64
-
65
-
66
-
67
-
68
-
69
-
70
-
71
-
72
-
73
-
74
-
75
-
76
-
77
-
78
-
79
-
80
-
81
-
82
-
83
-
84
-
85
-
86
-
87
-
88
-
89
-
90
-
91
-
92
-
93
-
94
-
95
-
96
-
97
-
98
-
99
-
100
-
101
-
102
-
103
-
104
-
105
-
106
-
107
-
108
-
109
-
110
-
111
-
112
-
113
-
114
-
115
-
116
-
117
-
118
-
119
-
120
-
121
-
122
-
123
-
124
-
125
-
126
-
127
-
128
-
129
-
130
-
131
-
132
-
133
-
134
-
135
-
136
-
137
-
138
-
139
-
140
-
141
-
142
-
143
-
144
-
145
 |
 |