Epson 680Pro Service Manual - Page 68
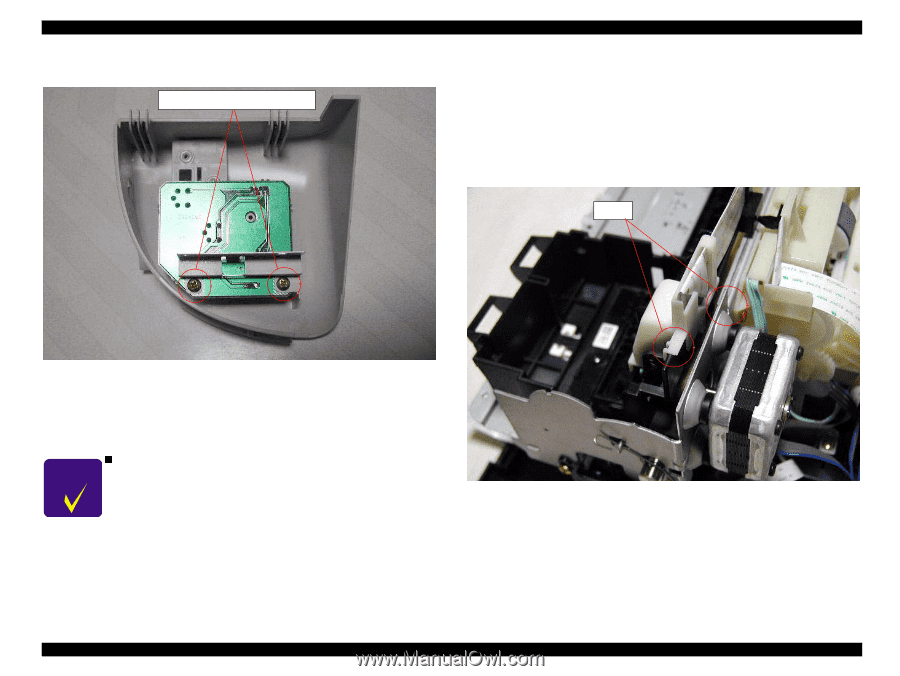
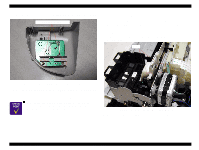
Printhead removal, Removing 2 screws for C383PNL board
 |
UPC - 010343832138
View all Epson 680Pro manuals
Add to My Manuals
Save this manual to your list of manuals |
Page 68 highlights
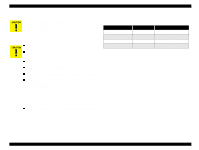
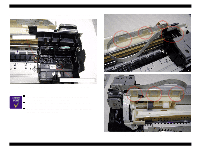
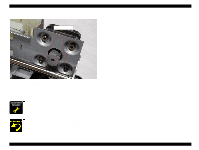
EPSON Stylus COLOR 680/777/777i Revision B 3. Remove 2 screws (C.B.P-TITE 3x8 F/Zn) and detach the Sub Right Panel Housing from the Operation Panel Assembly. C.B.P-TITE 3x8 F/Zn 4.2.3 Printhead removal 1. Remove the Housing from the printer. (Refer to Section 4.2.1.) 2. Open the Cover Cartridge and remove the both black and color ink cartridge. 3. Remove the Cover Cartridges for black and color ink cartridges from the CR Assembly. 4. Remove the Head FFC Holder from the CR Assembly by releasing two hooks. Refer to Figure 4-x. Hooks Figure 4-5. Removing 2 screws for C383PNL board 4. Remove the Panel Shield Plate and the C383PNL board from the Operation Panel Assembly. 5. Disconnect the Panel FFC from the connector on the C383PNL board. CHECK P O IN T n Removing the Operation Panel Assembly also separates the stacker assembly from the Printer Mechanism, since the Stacker Assembly is held with Operation Panel. Figure 4-6. Removing the Head FFC Holder 5. Disconnect the Printhead's FFC from the connector on the Printhead. Disassembly and Assembly Disassembly 68
-
 1
1 -
2
-
3
-
4
-
5
-
6
-
7
-
8
-
9
-
10
-
11
-
12
-
13
-
14
-
15
-
16
-
17
-
18
-
19
-
20
-
21
-
22
-
23
-
24
-
25
-
26
-
27
-
28
-
29
-
30
-
31
-
32
-
33
-
34
-
35
-
36
-
37
-
38
-
39
-
40
-
41
-
42
-
43
-
44
-
45
-
46
-
47
-
48
-
49
-
50
-
51
-
52
-
53
-
54
-
55
-
56
-
57
-
58
-
59
-
60
-
61
-
62
-
 63
63 -
 64
64 -
 65
65 -
 66
66 -
 67
67 -
 68
68 -
 69
69 -
 70
70 -
 71
71 -
 72
72 -
 73
73 -
74
-
75
-
76
-
77
-
78
-
79
-
80
-
81
-
82
-
83
-
84
-
85
-
86
-
87
-
88
-
89
-
90
-
91
-
92
-
93
-
94
-
95
-
96
-
97
-
98
-
99
-
100
-
101
-
102
-
103
-
104
-
105
-
106
-
107
-
108
-
109
-
110
-
111
-
112
-
113
-
114
-
115
-
116
-
117
-
118
-
119
-
120
-
121
-
122
-
123
-
124
-
125
-
126
-
127
-
128
-
129
-
130
-
131
-
132
-
133
-
134
-
135
-
136
-
137
-
138
-
139
-
140
-
141
-
142
-
143
-
144
-
145
 |
 |