Epson FX-286 User Manual - Page 14
Installing the paper feed knob, Selecting the Right Location - platen knob
 |
View all Epson FX-286 manuals
Add to My Manuals
Save this manual to your list of manuals |
Page 14 highlights
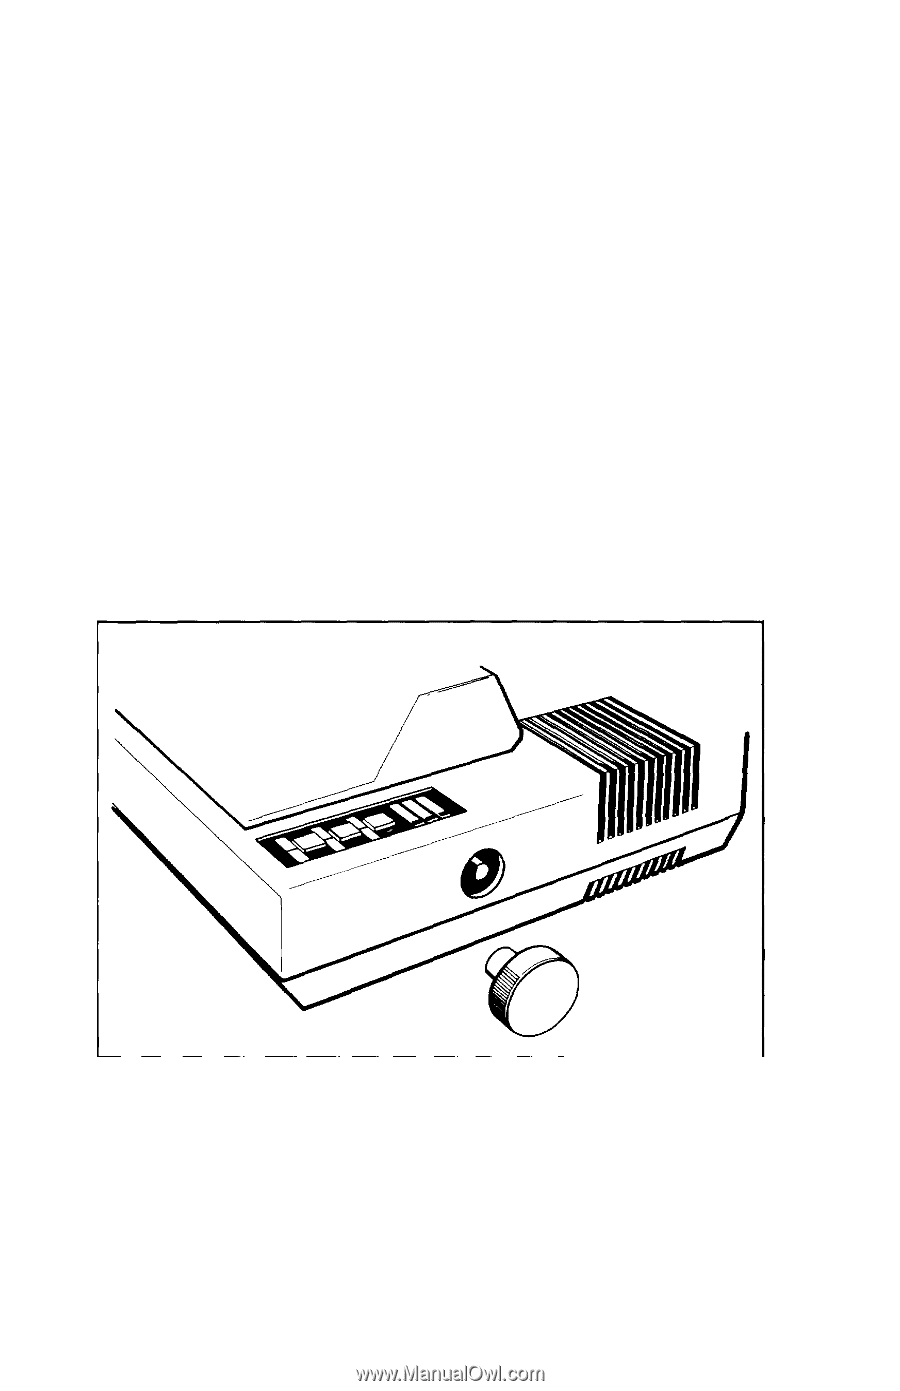
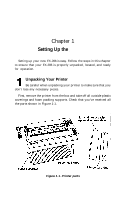
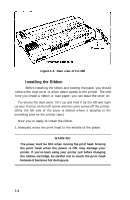
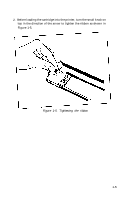
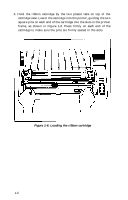
Once you've confirmed that you've received all the necessary parts, remove the sheet of paper wrapped around the printer's platen (the black roller). This sheet of paper protects the paper-out sensor during shipping, so be sure to replace it if you ship or store your printer. Tilt the dust cover up and remove the two foam pads on the underside of the cover. (The pads protect the pin-feed holders on the tractor unit during shipping, so be sure to save them.) There is also a clear plastic overlay on the control panel to protect against scratching and discoloration. It's up to you whether you want to remove the overlay or leave it on. Installing the paper feed knob Before proceeding, you should install the paper feed knob. To install the knob, simply push it onto the shaft on the right side of the printer, as shown in Figure 1-2. The shaft has one flat side that must be matched with the flat side of the hole in the knob. Figure 1-2. Installing the paper feed knob 2 Selecting the Right Location The most important consideration in choosing a location for your printer is that it be close enough to connect a cable to your computer. But also keep the following tips in mind: 1-2
-
 1
1 -
2
-
3
-
4
-
5
-
6
-
7
-
8
-
 9
9 -
 10
10 -
 11
11 -
 12
12 -
 13
13 -
 14
14 -
 15
15 -
 16
16 -
 17
17 -
 18
18 -
 19
19 -
20
-
21
-
22
-
23
-
24
-
25
-
26
-
27
-
28
-
29
-
30
-
31
-
32
-
33
-
34
-
35
-
36
-
37
-
38
-
39
-
40
-
41
-
42
-
43
-
44
-
45
-
46
-
47
-
48
-
49
-
50
-
51
-
52
-
53
-
54
-
55
-
56
-
57
-
58
-
59
-
60
-
61
-
62
-
63
-
64
-
65
-
66
-
67
-
68
-
69
-
70
-
71
-
72
-
73
-
74
-
75
-
76
-
77
-
78
-
79
-
80
-
81
-
82
-
83
-
84
-
85
-
86
-
87
-
88
-
89
-
90
-
91
-
92
-
93
-
94
-
95
-
96
-
97
-
98
-
99
-
100
-
101
-
102
-
103
-
104
-
105
-
106
-
107
-
108
-
109
-
110
-
111
-
112
-
113
-
114
-
115
-
116
-
117
-
118
-
119
-
120
-
121
-
122
-
123
-
124
-
125
-
126
-
127
-
128
-
129
-
130
-
131
-
132
-
133
-
134
-
135
-
136
-
137
-
138
-
139
-
140
-
141
-
142
-
143
-
144
-
145
-
146
-
147
-
148
-
149
-
150
-
151
-
152
-
153
-
154
-
155
-
156
-
157
-
158
-
159
-
160
-
161
-
162
-
163
-
164
-
165
-
166
-
167
-
168
-
169
-
170
-
171
-
172
-
173
-
174
-
175
-
176
-
177
-
178
-
179
-
180
-
181
-
182
-
183
-
184
-
185
-
186
-
187
-
188
-
189
-
190
-
191
-
192
-
193
-
194
-
195
-
196
-
197
-
198
-
199
-
200
-
201
-
202
-
203
-
204
-
205
-
206
-
207
-
208
-
209
-
210
-
211
-
212
-
213
-
214
-
215
-
216
-
217
-
218
-
219
-
220
-
221
-
222
-
223
 |
 |