HP 1240 HP Fax 1240 - (English) Getting Started Guide - Page 51
set fax options, set the date and time
 |
UPC - 829160181998
View all HP 1240 manuals
Add to My Manuals
Save this manual to your list of manuals |
Page 51 highlights
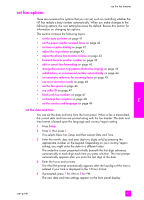
set fax options use the fax features There are numerous fax options that you can set, such as controlling whether the HP Fax redials a busy number automatically. When you make changes to the following options, the new setting becomes the default. Review this section for information on changing fax options. This section contains the following topics: • set the date and time on page 41 • set the paper size for received faxes on page 42 • set tone or pulse dialing on page 42 • adjust the ring volume on page 42 • adjust the phone line monitor volume on page 43 • forward faxes to another number on page 43 • edit or cancel fax forwarding on page 43 • change the answer ring pattern (distinctive ringing) on page 44 • redial a busy or unanswered number automatically on page 44 • set automatic reduction for incoming faxes on page 45 • use error correction mode on page 46 • set the fax speed on page 46 • use caller ID on page 47 • block junk fax numbers on page 47 • set backup fax reception on page 48 • set the country and language on page 49 set the date and time You can set the date and time from the front panel. When a fax is transmitted, the current date and time are printed along with the fax header. The date and time format is based upon the language and country/region setting. 1 Press Setup. 2 Press 3, then press 1. This selects Basic Fax Setup and then selects Date and Time. 3 Enter the month, day, and year (last two digits only) by pressing the appropriate number on the keypad. Depending on your country/region setting, you might enter the date in a different order. The underline cursor presented initially beneath the first digit advances automatically to each digit each time you press a button. The time prompt automatically appears after you enter the last digit of the date. 4 Enter the hours and minutes. The AM/PM prompt automatically appears after the last digit of the time is entered if your time is displayed in the 12-hour format. 5 If prompted, press 1 for AM or 2 for PM. The new date and time settings appear on the front panel display. fax user guide 41
-
 1
1 -
2
-
3
-
4
-
5
-
6
-
7
-
8
-
9
-
10
-
11
-
12
-
13
-
14
-
15
-
16
-
17
-
18
-
19
-
20
-
21
-
22
-
23
-
24
-
25
-
26
-
27
-
28
-
29
-
30
-
31
-
32
-
33
-
34
-
35
-
36
-
37
-
38
-
39
-
40
-
41
-
42
-
43
-
44
-
45
-
 46
46 -
 47
47 -
 48
48 -
 49
49 -
 50
50 -
 51
51 -
 52
52 -
 53
53 -
 54
54 -
 55
55 -
 56
56 -
57
-
58
-
59
-
60
-
61
-
62
-
63
-
64
-
65
-
66
-
67
-
68
-
69
-
70
-
71
-
72
-
73
-
74
-
75
-
76
-
77
-
78
-
79
-
80
-
81
-
82
-
83
-
84
-
85
-
86
-
87
-
88
-
89
-
90
-
91
-
92
-
93
-
94
-
95
-
96
-
97
-
98
-
99
-
100
-
101
-
102
-
103
-
104
-
105
-
106
-
107
-
108
-
109
-
110
-
111
-
112
-
113
-
114
-
115
-
116
-
117
-
118
-
119
-
120
-
121
-
122
-
123
-
124
-
125
-
126
-
127
-
128
-
129
-
130
-
131
-
132
-
133
-
134
-
135
-
136
-
137
-
138
-
139
-
140
-
141
-
142
-
143
-
144
-
145
-
146
-
147
-
148
 |
 |
