HP 500X HP JetDirect Print Servers 600N/400N/500X/300X Administrator's Guide - - Page 152
Verifying the Configuration, Shared, Finish
 |
UPC - 088698574287
View all HP 500X manuals
Add to My Manuals
Save this manual to your list of manuals |
Page 152 highlights
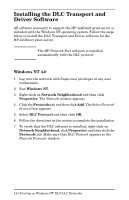
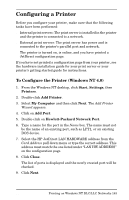
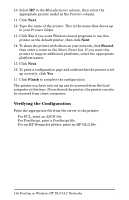
10. Select HP in the Manufacturers column, then select the appropriate printer model in the Printers column. 11. Click Next. 12. Type the name of the printer. This is the name that shows up in your Printers folder. 13. Click Yes if you want Windows-based programs to use this printer as the default printer, then click Next. 14. To share the printer with others on your network, click Shared, then enter a name in the Share Name box. If you want this printer to support additional platforms, select the appropriate platform names. 15. Click Next. 16. To print a configuration page and confirm that the printer is set up correctly, click Yes. 17. Click Finish to complete the configuration. The printer you have just set up can be accessed from the local computer at this time. If you shared the printer, the printer can also be accessed from client computers. Verifying the Configuration Print the appropriate file from the server to the printer: q For PCL, print an ASCII file. q For PostScript, print a PostScript file. q For an HP DesignJet plotter, print an HP-GL/2 file. 146 Printing on Windows NT DLC/LLC Networks EN
-
 1
1 -
2
-
3
-
4
-
5
-
6
-
7
-
8
-
9
-
10
-
11
-
12
-
13
-
14
-
15
-
16
-
17
-
18
-
19
-
20
-
21
-
22
-
23
-
24
-
25
-
26
-
27
-
28
-
29
-
30
-
31
-
32
-
33
-
34
-
35
-
36
-
37
-
38
-
39
-
40
-
41
-
42
-
43
-
44
-
45
-
46
-
47
-
48
-
49
-
50
-
51
-
52
-
53
-
54
-
55
-
56
-
57
-
58
-
59
-
60
-
61
-
62
-
63
-
64
-
65
-
66
-
67
-
68
-
69
-
70
-
71
-
72
-
73
-
74
-
75
-
76
-
77
-
78
-
79
-
80
-
81
-
82
-
83
-
84
-
85
-
86
-
87
-
88
-
89
-
90
-
91
-
92
-
93
-
94
-
95
-
96
-
97
-
98
-
99
-
100
-
101
-
102
-
103
-
104
-
105
-
106
-
107
-
108
-
109
-
110
-
111
-
112
-
113
-
114
-
115
-
116
-
117
-
118
-
119
-
120
-
121
-
122
-
123
-
124
-
125
-
126
-
127
-
128
-
129
-
130
-
131
-
132
-
133
-
134
-
135
-
136
-
137
-
138
-
139
-
140
-
141
-
142
-
143
-
144
-
145
-
146
-
 147
147 -
 148
148 -
 149
149 -
 150
150 -
 151
151 -
 152
152 -
 153
153 -
 154
154 -
 155
155 -
 156
156 -
 157
157 -
158
-
159
-
160
-
161
-
162
-
163
-
164
 |
 |