HP 500X HP JetDirect Print Servers 600N/400N/500X/300X Administrator's Guide - - Page 26
Selecting a Zone, The HP LaserJet Utility only enables
 |
UPC - 088698574287
View all HP 500X manuals
Add to My Manuals
Save this manual to your list of manuals |
Page 26 highlights
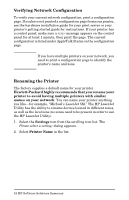
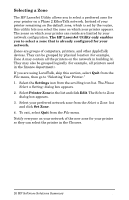
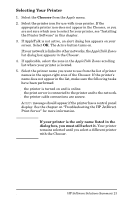
Selecting a Zone The HP LaserJet Utility allows you to select a preferred zone for your printer on a Phase 2 EtherTalk network. Instead of your printer remaining on the default zone, which is set by the router, this utility lets you select the zone on which your printer appears. The zones on which your printer can reside are limited by your network configuration. The HP LaserJet Utility only enables you to select a zone that is already configured for your network. Zones are groups of computers, printers, and other AppleTalk devices. They can be grouped by physical location (for example, Zone A may contain all the printers on the network in building A). They may also be grouped logically (for example, all printers used in the finance department). If you are using LocalTalk, skip this section, select Quit from the File menu, then go to "Selecting Your Printer." 1. Select the Settings icon from the scrolling icon list. The Please Select a Setting: dialog box appears. 2. Select Printer Zone in the list and click Edit. The Select a Zone dialog box appears. 3. Select your preferred network zone from the Select a Zone: list and click Set Zone. 4. To exit, select Quit from the File menu. Notify everyone on your network of the new zone for your printer so they can select the printer in the Chooser. 20 HP Software Solutions Summary EN
-
 1
1 -
2
-
3
-
4
-
5
-
6
-
7
-
8
-
9
-
10
-
11
-
12
-
13
-
14
-
15
-
16
-
17
-
18
-
19
-
20
-
 21
21 -
 22
22 -
 23
23 -
 24
24 -
 25
25 -
 26
26 -
 27
27 -
 28
28 -
 29
29 -
 30
30 -
 31
31 -
32
-
33
-
34
-
35
-
36
-
37
-
38
-
39
-
40
-
41
-
42
-
43
-
44
-
45
-
46
-
47
-
48
-
49
-
50
-
51
-
52
-
53
-
54
-
55
-
56
-
57
-
58
-
59
-
60
-
61
-
62
-
63
-
64
-
65
-
66
-
67
-
68
-
69
-
70
-
71
-
72
-
73
-
74
-
75
-
76
-
77
-
78
-
79
-
80
-
81
-
82
-
83
-
84
-
85
-
86
-
87
-
88
-
89
-
90
-
91
-
92
-
93
-
94
-
95
-
96
-
97
-
98
-
99
-
100
-
101
-
102
-
103
-
104
-
105
-
106
-
107
-
108
-
109
-
110
-
111
-
112
-
113
-
114
-
115
-
116
-
117
-
118
-
119
-
120
-
121
-
122
-
123
-
124
-
125
-
126
-
127
-
128
-
129
-
130
-
131
-
132
-
133
-
134
-
135
-
136
-
137
-
138
-
139
-
140
-
141
-
142
-
143
-
144
-
145
-
146
-
147
-
148
-
149
-
150
-
151
-
152
-
153
-
154
-
155
-
156
-
157
-
158
-
159
-
160
-
161
-
162
-
163
-
164
 |
 |