HP Dc5750 WebPAM User Manual - Page 61
Media Patrol Schedule, Enable, by Day, by Week, by Month
 |
UPC - 883585056446
View all HP Dc5750 manuals
Add to My Manuals
Save this manual to your list of manuals |
Page 61 highlights
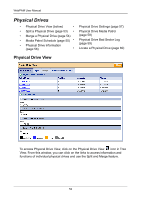
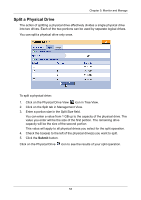
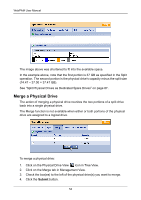
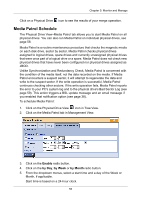
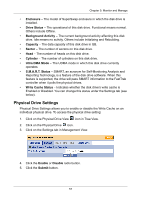
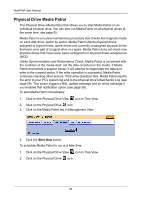
Chapter 5: Monitor and Manage Click on a Physical Drive icon to see the results of your merge operation. Media Patrol Schedule The Physical Drive View-Media Patrol tab allows you to start Media Patrol on all physical drives. You can also run Media Patrol on individual physical drives, see page 58. Media Patrol is a routine maintenance procedure that checks the magnetic media on each disk drive, sector by sector. Media Patrol checks physical drives assigned to logical drives, spare drives and currently unassigned physical drives that were once part of a logical drive or a spare. Media Patrol does not check new physical drives that have never been configured nor physical drives assigned as JBOD. Unlike Synchronization and Redundancy Check, Media Patrol is concerned with the condition of the media itself, not the data recorded on the media. If Media Patrol encounters a suspect sector, it will attempt to regenerate the data and write to the suspect sector. If the write operation is successful, Media Patrol continues checking other sectors. If the write operation fails, Media Patrol reports the error to your PC's system log and to the physical drive's Bad Sector Log (see page 59). This action triggers a BSL update message and an email message if you enabled that notification option (see page 38). To schedule Media Patrol: 1. Click on the Physical Drive View icon in Tree View. 2. Click on the Media Patrol tab in Management View. 3. Click on the Enable radio button. 4. Click on the by Day, by Week or by Month radio button. 5. From the dropdown menus, select a start time and a day of the Week or Month, if applicable. Start time is based on a 24-hour clock. 55
-
 1
1 -
2
-
3
-
4
-
5
-
6
-
7
-
8
-
9
-
10
-
11
-
12
-
13
-
14
-
15
-
16
-
17
-
18
-
19
-
20
-
21
-
22
-
23
-
24
-
25
-
26
-
27
-
28
-
29
-
30
-
31
-
32
-
33
-
34
-
35
-
36
-
37
-
38
-
39
-
40
-
41
-
42
-
43
-
44
-
45
-
46
-
47
-
48
-
49
-
50
-
51
-
52
-
53
-
54
-
55
-
 56
56 -
 57
57 -
 58
58 -
 59
59 -
 60
60 -
 61
61 -
 62
62 -
 63
63 -
 64
64 -
 65
65 -
 66
66 -
67
-
68
-
69
-
70
-
71
-
72
-
73
-
74
-
75
-
76
-
77
-
78
-
79
-
80
-
81
-
82
-
83
-
84
-
85
-
86
-
87
-
88
-
89
-
90
-
91
-
92
-
93
-
94
-
95
-
96
-
97
-
98
-
99
-
100
-
101
-
102
-
103
-
104
-
105
-
106
-
107
-
108
-
109
-
110
-
111
-
112
-
113
-
114
 |
 |