HP K850 User's Guide - Page 72
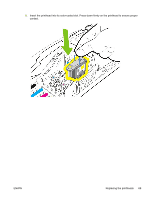
Insert the printhead into its color-coded slot. Press down firmly on the printhead to ensure proper - continuous ink
 |
UPC - 882780027831
View all HP K850 manuals
Add to My Manuals
Save this manual to your list of manuals |
Page 72 highlights
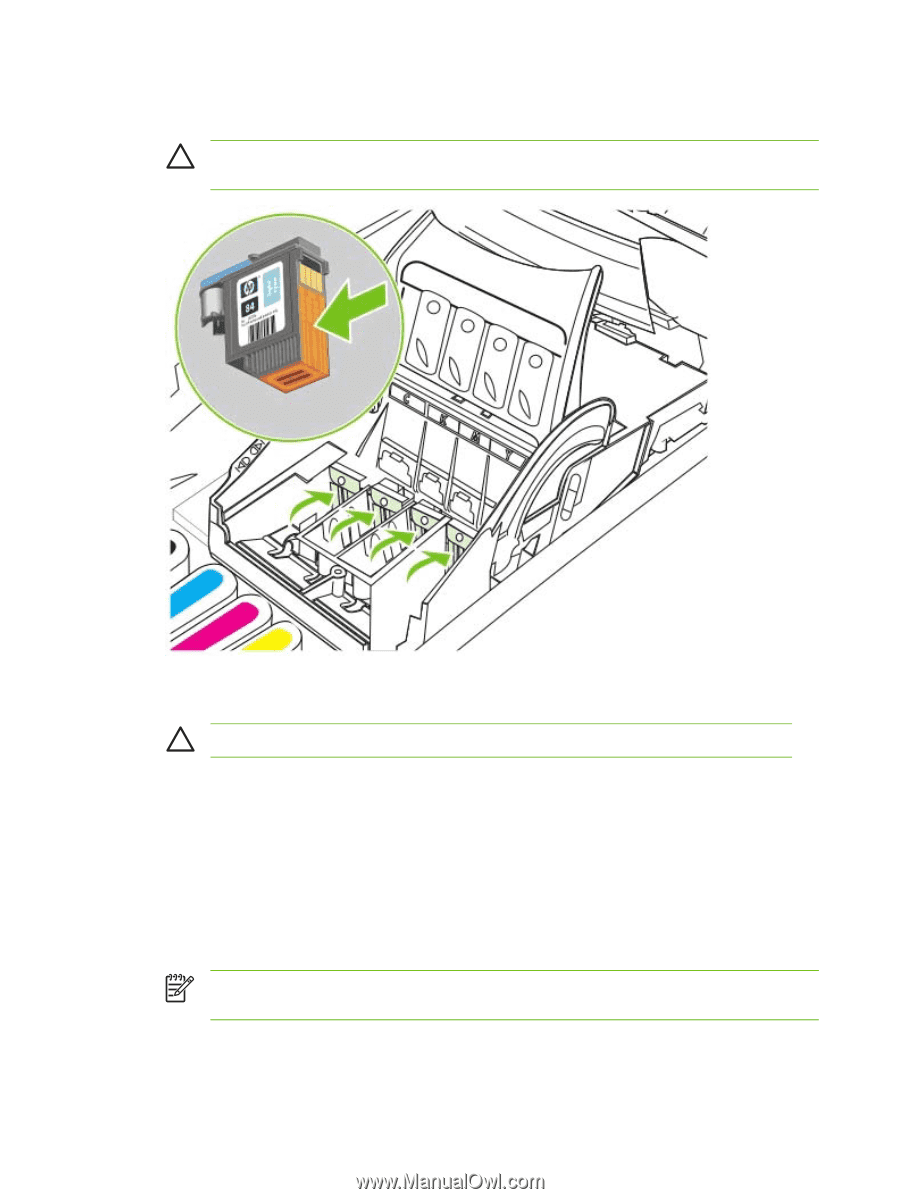
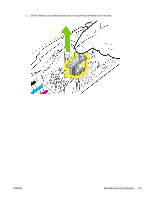
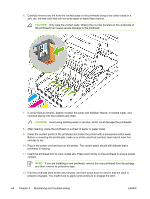
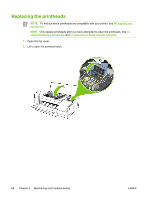
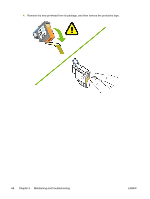
6. Carefully remove any ink from the contact pads on the printhead using a dry cotton swab or a soft, dry, lint-free cloth that will not come apart or leave fibers behind. CAUTION Only wipe the contact pads. Wiping the nozzles (located on the underside of the printhead) can cause severe damage to the printhead. 7. If some residue remains, slightly moisten the swab with distilled, filtered, or bottled water, and continue wiping until the contacts are clean. CAUTION Avoid using drinking water or alcohol, which could damage the printheads. 8. After cleaning, place the printhead on a sheet of paper or paper towel. 9. Clean the contact points in the printhead slot inside the printer with a dampened cotton swab. Before re-inserting the printheads, make sure all the electrical contacts have had at least five minutes to dry. 10 Plug in the power cord and turn on the printer. The control panel should still indicate that a . printhead is missing. 11 Insert the printhead into its color-coded slot. Press down firmly on the printhead to ensure proper . contact. NOTE If you are installing a new printhead, remove the new printhead from its package, and then remove its protective tape. 12 Pull the printhead latch all the way forward, and then press down to ensure that the latch is . properly engaged. You might have to apply some pressure to engage the latch. 64 Chapter 5 Maintaining and troubleshooting ENWW
-
 1
1 -
2
-
3
-
4
-
5
-
6
-
7
-
8
-
9
-
10
-
11
-
12
-
13
-
14
-
15
-
16
-
17
-
18
-
19
-
20
-
21
-
22
-
23
-
24
-
25
-
26
-
27
-
28
-
29
-
30
-
31
-
32
-
33
-
34
-
35
-
36
-
37
-
38
-
39
-
40
-
41
-
42
-
43
-
44
-
45
-
46
-
47
-
48
-
49
-
50
-
51
-
52
-
53
-
54
-
55
-
56
-
57
-
58
-
59
-
60
-
61
-
62
-
63
-
64
-
65
-
66
-
 67
67 -
 68
68 -
 69
69 -
 70
70 -
 71
71 -
 72
72 -
 73
73 -
 74
74 -
 75
75 -
 76
76 -
 77
77 -
78
-
79
-
80
-
81
-
82
-
83
-
84
-
85
-
86
-
87
-
88
-
89
-
90
-
91
-
92
-
93
-
94
-
95
-
96
-
97
-
98
-
99
-
100
-
101
-
102
-
103
-
104
-
105
-
106
-
107
-
108
-
109
-
110
-
111
-
112
-
113
-
114
-
115
-
116
-
117
-
118
-
119
-
120
-
121
-
122
-
123
-
124
-
125
-
126
-
127
-
128
-
129
-
130
-
131
-
132
-
133
-
134
-
135
-
136
-
137
-
138
-
139
-
140
-
141
-
142
-
143
-
144
-
145
-
146
-
147
-
148
-
149
-
150
 |
 |