HP LaserJet MFP M139-M142 User Guide - Page 18
Restore network settings to default settings, Change the connection type
 |
View all HP LaserJet MFP M139-M142 manuals
Add to My Manuals
Save this manual to your list of manuals |
Page 18 highlights
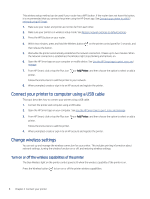
Restore network settings to default settings When there is a wireless connectivity issue, you can restore wireless settings to default, and then reset up the wireless connection between the printer and your device. 1. If the printer is in Sleep mode (the Ready light is on but dim), press the Cancel button printer. to wake up the 2. Press and hold the Wireless button seconds. and the Cancel button on the printer control panel for 5 3. The printer restarts automatically. When the Wireless light starts blinking, the printer is in wireless setup mode. You can now reset up a wireless connection between the printer and your device. NOTE: Use the HP Smart app to connect the printer wirelessly. Change the connection type This topic describes how to change the way to connect your printer. USB to a wireless connection (Windows 10/macOS) If you want to change the way the printer is connected from USB to a wireless connection, use the HP Smart app to change the connection. 1. Unplug the USB cable from the printer. 2. Make sure your computer or mobile device is connected to your Wi-Fi network. On your mobile device, turn on Bluetooth and location services. 3. If your printer Wi-Fi was previously turned off, make sure to turn it on. For more information about wireless status, see Turn on or off the wireless capabilities of the printer. 4. If the printer is no longer in wireless setup mode, restore the printer network settings. See Restore network settings to default settings. 5. Open the HP Smart app on your computer or mobile device. See Use the HP Smart app to print, scan, and manage. 6. When prompted, create or sign in to an HP account and register the printer. 7. Follow the on-screen instructions to connect the printer to your Wi-Fi network. USB to a wireless connection (Windows 7) Use Device Setup & Software from the printer software to change from a USB to a wireless connection. 1. Open the HP printer software. If you have not installed the HP printer software on your computer, visit 123.hp.com to download and install the printer software. 2. In the printer software, click Tools, and then click Device Setup & Software. 3. Select Convert a USB connected device to wireless. Follow the on-screen instructions. Restore network settings to default settings 9
-
 1
1 -
2
-
3
-
4
-
5
-
6
-
7
-
8
-
9
-
10
-
11
-
12
-
 13
13 -
 14
14 -
 15
15 -
 16
16 -
 17
17 -
 18
18 -
 19
19 -
 20
20 -
 21
21 -
 22
22 -
 23
23 -
24
-
25
-
26
-
27
-
28
-
29
-
30
-
31
-
32
-
33
-
34
-
35
-
36
-
37
-
38
-
39
-
40
-
41
-
42
-
43
-
44
-
45
-
46
-
47
-
48
-
49
-
50
-
51
-
52
-
53
-
54
-
55
-
56
-
57
-
58
-
59
-
60
-
61
-
62
-
63
-
64
-
65
-
66
-
67
-
68
-
69
-
70
-
71
-
72
-
73
-
74
-
75
-
76
-
77
-
78
-
79
-
80
-
81
-
82
-
83
-
84
-
85
-
86
-
87
-
88
-
89
-
90
-
91
-
92
-
93
-
94
-
95
-
96
-
97
-
98
-
99
-
100
-
101
-
102
-
103
-
104
-
105
-
106
-
107
-
108
-
109
-
110
-
111
-
112
-
113
-
114
 |
 |
