HP LaserJet MFP M139-M142 User Guide - Page 25
Print, Print from a Windows computer, Print documents, Manually print on both sides
 |
View all HP LaserJet MFP M139-M142 manuals
Add to My Manuals
Save this manual to your list of manuals |
Page 25 highlights
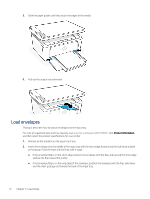
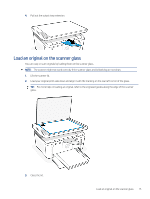
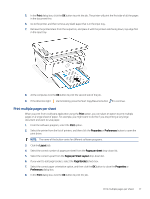
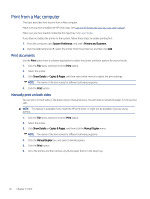
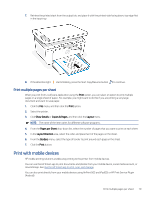
4 Print This section describes how to print from different devices. NOTE: When the Attention and Ready lights are blinking, the printer is initializing, cleaning, or cooling down. When the printer is cooling down print jobs might pause. Print jobs will continue when the engine is ready. This might take several minutes. To provide productive printing, this printer may automatically enter cool down mode under certain environmental conditions when required. Print from a Windows computer This topic describes how to print from a Windows computer. Make sure you have installed the HP Smart app. See Use the HP Smart app to print, scan, and manage. Make sure you have loaded media into the input tray. See Load media. Print documents Use the Print option from a software application to select the printer and basic options for your print job. 1. From the software program, select the Print option. 2. Select the printer from the list of printers. To change settings, click the Properties or Preferences button to open the print driver. NOTE: The name of the button varies for different software programs. 3. Click the tabs in the print driver to configure the available options. 4. Click the OK button to return to the Print dialog box. Select the number of copies to print from this screen. 5. Click the OK button to print the job. Manually print on both sides You can print on both sides of the paper using a manual process. You will need to reload the pages for the second side. 1. From the software program, select the Print option. 2. Select the printer from the list of printers, and then click the Properties or Preferences button to open the print driver. NOTE: The name of the button varies for different software programs. 3. Click the Layout tab. 4. Select the Print on Both Sides Manually check box, and then click the OK button. 16 Chapter 4 Print
-
 1
1 -
2
-
3
-
4
-
5
-
6
-
7
-
8
-
9
-
10
-
11
-
12
-
13
-
14
-
15
-
16
-
17
-
18
-
19
-
 20
20 -
 21
21 -
 22
22 -
 23
23 -
 24
24 -
 25
25 -
 26
26 -
 27
27 -
 28
28 -
 29
29 -
 30
30 -
31
-
32
-
33
-
34
-
35
-
36
-
37
-
38
-
39
-
40
-
41
-
42
-
43
-
44
-
45
-
46
-
47
-
48
-
49
-
50
-
51
-
52
-
53
-
54
-
55
-
56
-
57
-
58
-
59
-
60
-
61
-
62
-
63
-
64
-
65
-
66
-
67
-
68
-
69
-
70
-
71
-
72
-
73
-
74
-
75
-
76
-
77
-
78
-
79
-
80
-
81
-
82
-
83
-
84
-
85
-
86
-
87
-
88
-
89
-
90
-
91
-
92
-
93
-
94
-
95
-
96
-
97
-
98
-
99
-
100
-
101
-
102
-
103
-
104
-
105
-
106
-
107
-
108
-
109
-
110
-
111
-
112
-
113
-
114
 |
 |
